
Hello Everyone!
I found this method a few days ago - How to convert color images to sepia *without* loosing depth, as most sepia conversions cause.
While other methods may give a more "aged" effect, I am including the steps I took to give it a "New but old" look, no fading or loss of contrast from the original.
Enjoy.
1. Open up this stock image, or some of your own.

2. Duplicate this layer. All work will be done on the copy (top layer). Ctrl + Shift + U to desaturate.
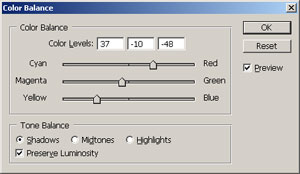
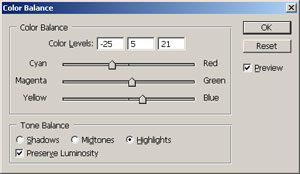
3. Images > Adjustments > Color Balance, here are the settings I used. They will need varied if you are using another image, but these worked well on mine.

4. Most Sepia conversion techniques stop at this point - But the image can look washed out. To add the depth back into the image, set the top layer's blend mode to Color and reduce opacity to 80%, again this will depend on your image.
5. Much better, isn't it? Here are the results, Top is the basic process, bottom includes the depth step.
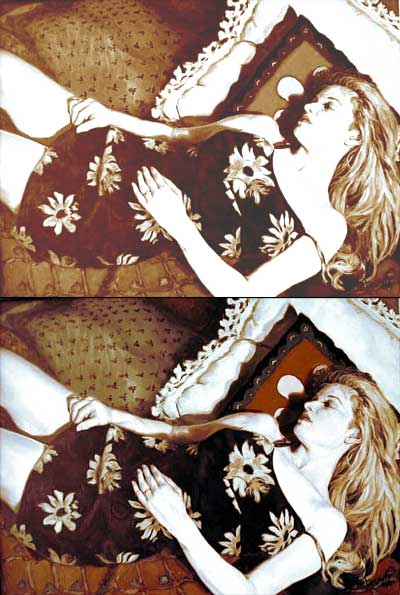
See the difference yourself!