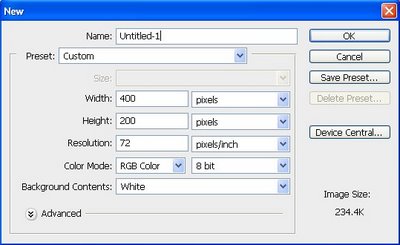
Step 1: To begin, create a new image with the following attributes.
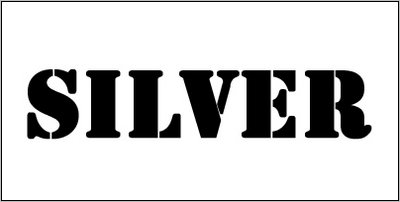
Step 2: Create a new layer and then select the Type Mask tool. I Chose Stencil Std font with 90 pts in size.
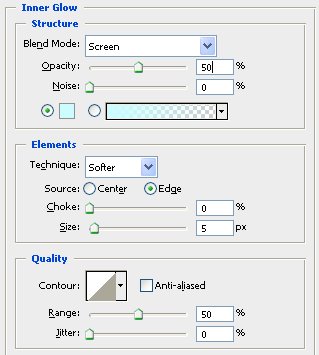
Step 3: Open the Layer Styles for the filled type layer. First, select Inner Glow and apply the following settings:
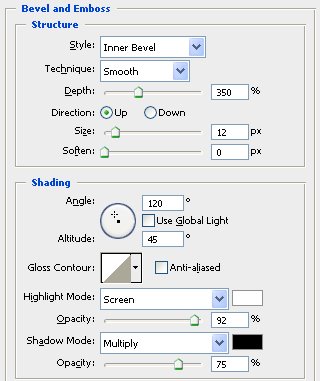
Step 4: Now select Bevel and Emboss with the following settings:
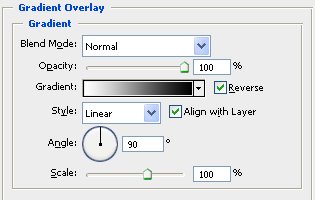
Step 5: Set Gradient Overlay:
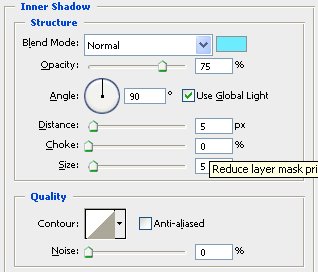
Step 6: Inner Shadow:
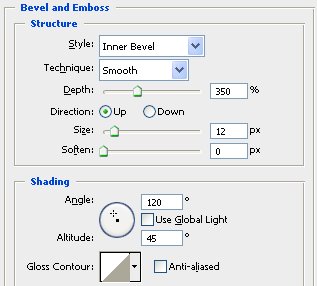
Step 6: Go back to Bevel and Emboss. Click on the Contour window and create a contour like the one seen below.
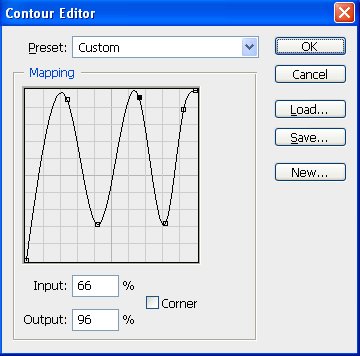
Click Ok.

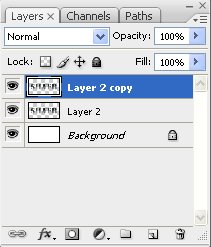
Step 7: Create a new layer beneath the type layer. Select the Type layer and hit Ctrl+E to merge it with the new layer.
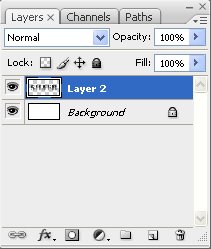
Step 8: Now duplicate the merged layer.
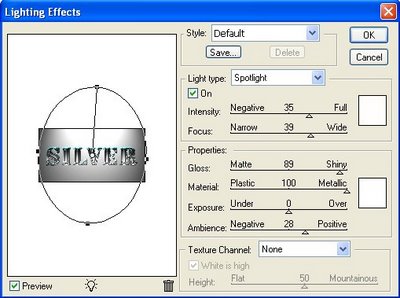
Step 9: Go to Filter => Render => Lighting Effects. Apply the following settings and click OK.
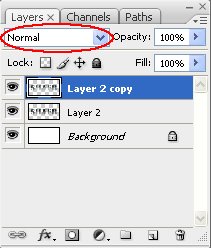
Step 10: Set the duplicate text layer to Normal.

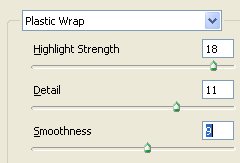
Step 11: Select Filter => Artistic => Plastic Wrap. Enter the following settings in the Plastic Wrap dialog box and click OK.
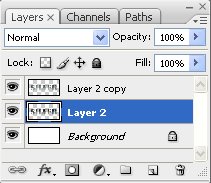
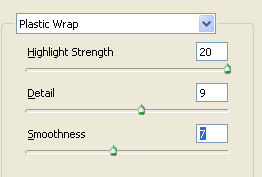
Step 12: Select the original text layer. Apply the plastic wrap to this layer with the following settings and click OK.
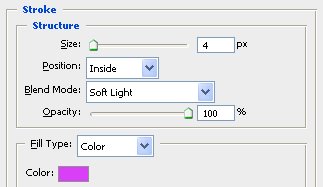
Step 13: Select the duplicate text layer. Open the layer styles for this layer. Select Stroke. Enter the following settings:
Step 14: Select the duplicate layer, hit Ctrl+E and merge it with original text layer.

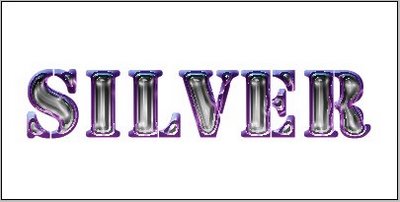
Here is Final Result!