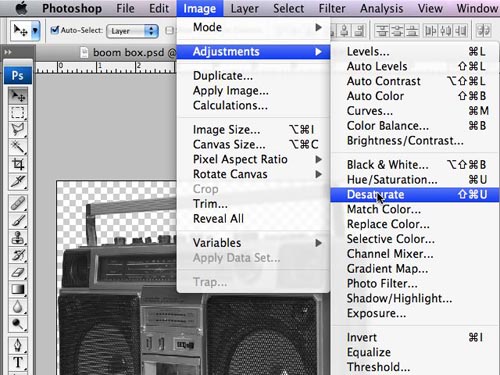
Step 1
Choose an image you want to sprinkle with golden Photoshop magic. In this case I chose a full color image of a boombox and I'm going to make it look like it is solid gold. Make the image into a grayscale image by "Desaturating" the layer in the Image/Adjustments/Desaturate menu.
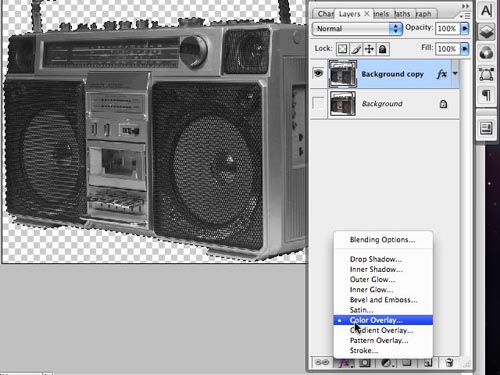
Step 2
Apply a color overlay Layer Style by clicking the FX button at the bottom of your Layers Palette.
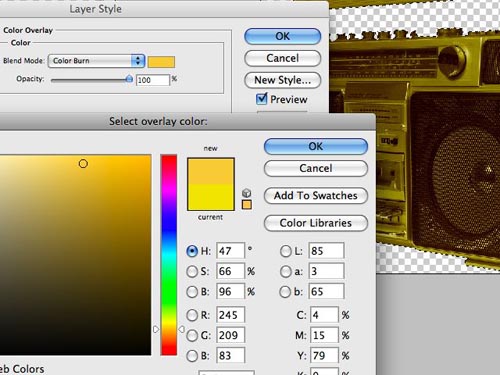
Step 3
Set the color overlay to a rich golden color and make sure the Blend Mode is set to Color Burn
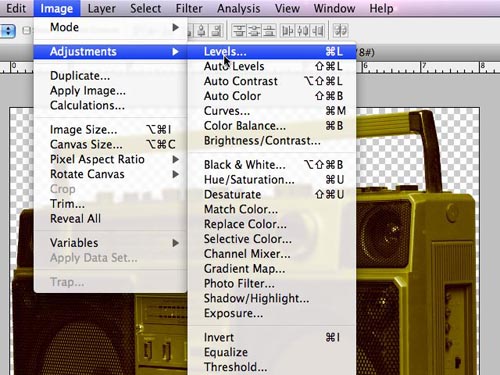
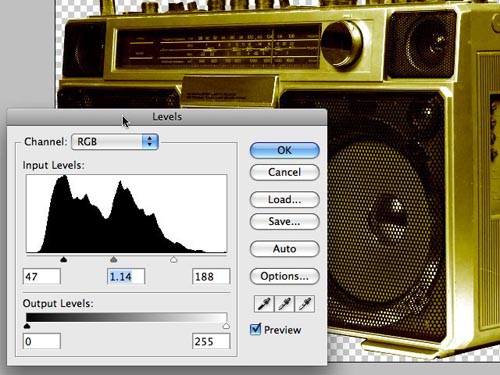
Step 4
Adjust your levels like so and…
Brace yourselves… We've got a solid gold boombox in less than 2 minutes! Super Rad!
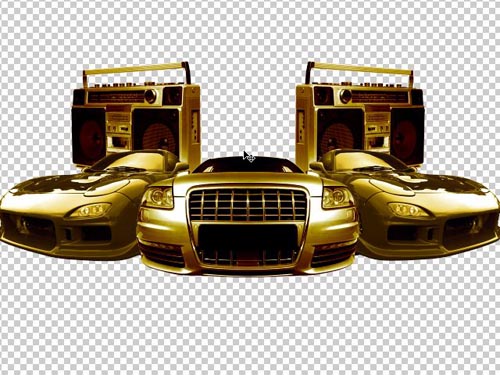
Step 5
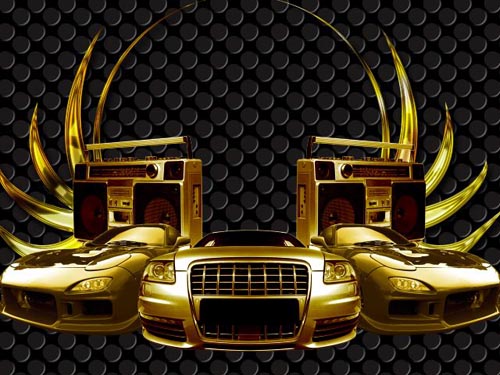
Repeat the exact same steps for 2 different cars. I copied and flipped horizontally the radios and 90s sports car to get a symmetrical composition started.
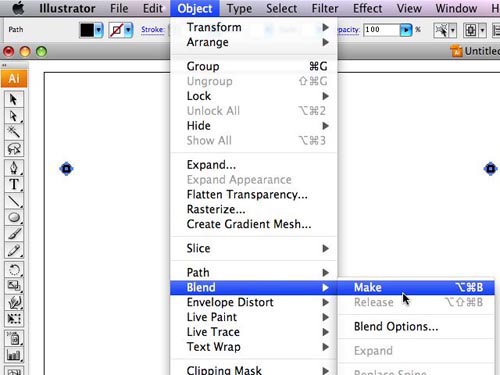
Step 6
We are creating a background for our composition that will look like a close of the boom box speaker shield. In Adobe Illustrator, draw 2 circles and separate them a descent width. Keep them aligned horizontally. Then choose Object/Blend/Make. You can also choose the blend tool from your tools palette.
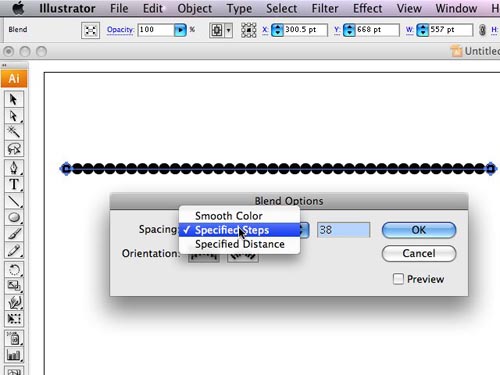
Once you have a blend, you'll want to open the blending options by going to Object/Blend/Blend Options or double clicking the Blend tool in the tools palette will bring up the same dialog box. Choose a # of blends that will leave some space between your circles.
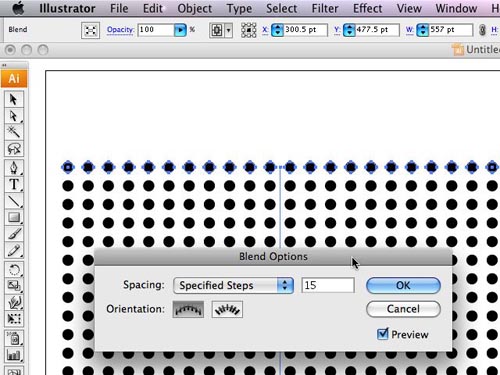
Step 7
Expand your blend by choosing Object/Blend/Expand. Now Each circle is treated individually and can be edited. Select your entire row of circles. Hold down option and drag it down a good distance. Hold down shift at the same time to keep the layer aligned vertically. Then repeat the steps to make a blend. I chose 15 steps. You can see that I have now blended my 2 rows of circles to make a grid of evenly spaced circles.
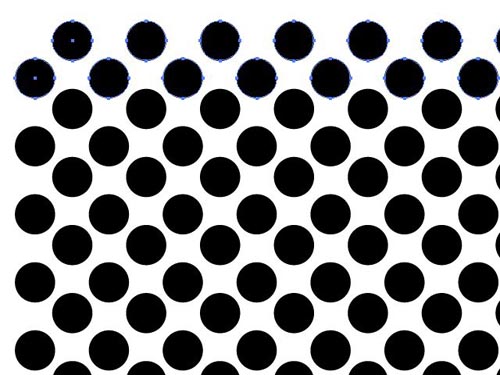
Select the entire grid and hold down option & shift while dragging on a 45 degree angle. You now have a circle pattern that should look like the pic below
Copy and paste it into your Photoshop document
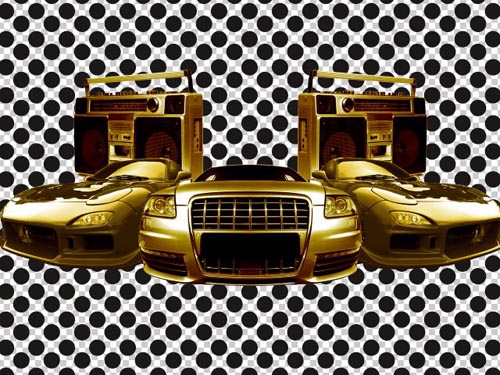
Step 8
Apply Bevel & Emboss layer style to your grid of circles. Choose Outer Bevel.
Add a black background… and get crunk!

Step 9
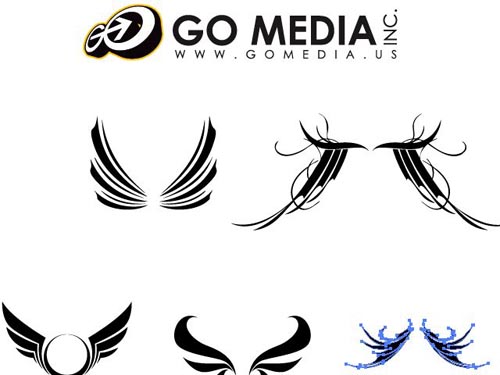
This is the hardest part of the tutorial… and it's all trial and error… at least for me it was. We're going to create our own layer style that take a solid 2d object and make it look all bling'd out. I chose this amazing vector artwork from Go Media's Arsenal Set 1 Crests.
First use a Gradient Overlay from the FX Layer Style tab in your layers palette. I created this gradient of different hues and values of Gold. Make sure you have contrast in your gradient.
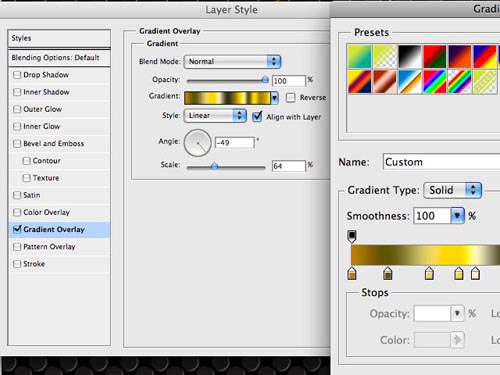
This is what the Go Media vector crest will look like after the gradient has been applied:

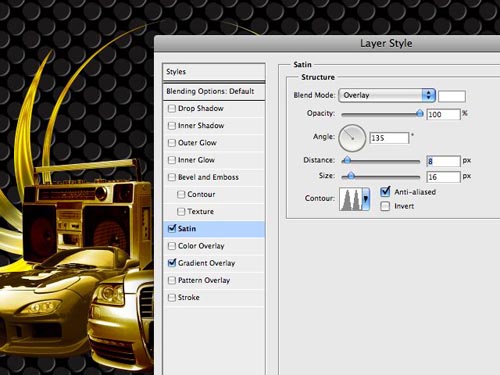
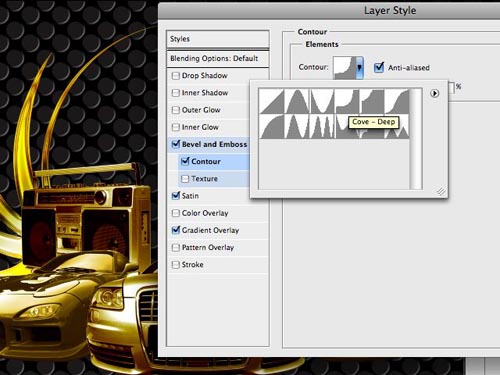
Apply a Satin layer style within the same dialog box. You will want to experiment with your settings. Each object you bling out could require tweaking the settings. You will see some depth start to take place and that is important. Choose a different Contour as well. I chose this double peaked one.
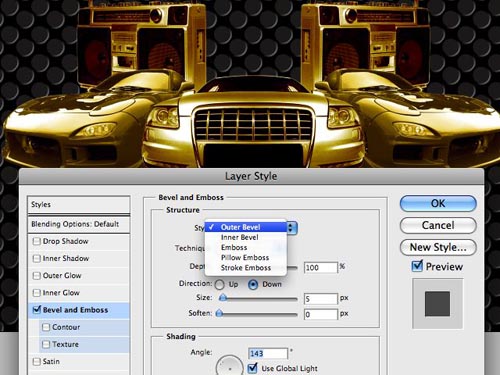
Choose a Bevel and Emboss from the Layer Style window. Select Inner Bevel. Adjust the size and softness. I chose 10 and 1. Set the Shadow Mode to Color Burn and you may want to decrease the opacity.
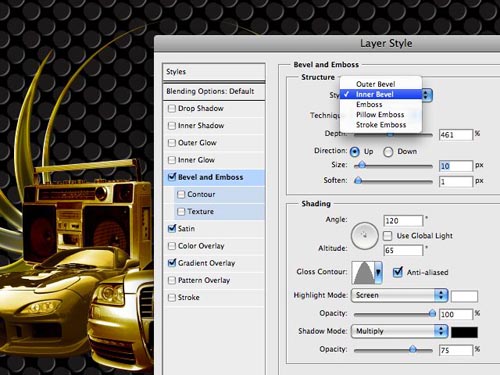
Check the Contour Box under Bevel and Emboss. Choose a Contour. Each one will give a different look.
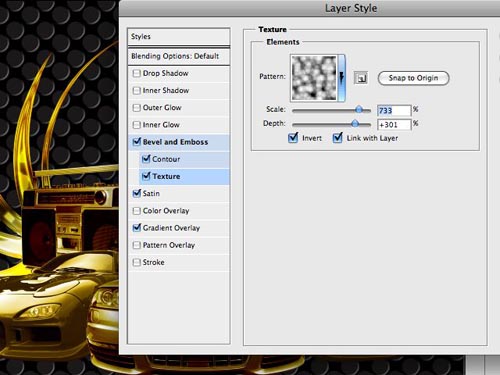
Choose the Texture box under Bevel and Emboss as well. Select a pattern from one of the Photoshop presets. Adjust the scale and depth and watch how it effects the Go Media Crest. Again, experiment with these settings to get something that is really starting to look like gold reflections.
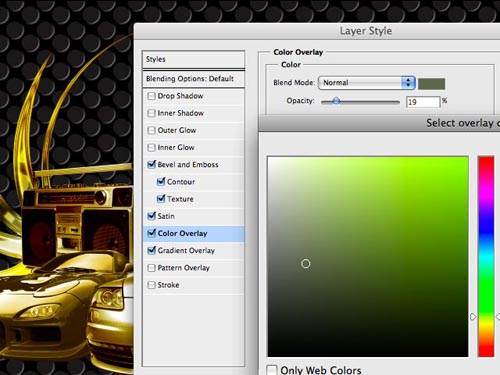
At this point I feel as though the crest is a little too orange. I could go back in and adjust my gradient overlay… but then I 'd have to adjust each point in the gradient where there is a color change. Instead, add a color overlay. I chose a darker desaturated green to help tone down the red in my gold layer style. I adjusted the opacity until I felt it was beginning to match the golden cars a little better.
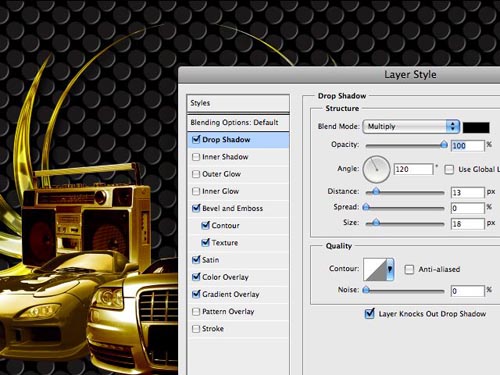
And the last layer style for our gold effect will be to add a drop shadow to help with some depth.
Now, before you close the Layer Style box. You are going to save this style so you can reuse it on anything! Click the New Style button just below "Ok" and give your style a name. Check both boxes - Include Layer Effects & Include Layer Blending Options.
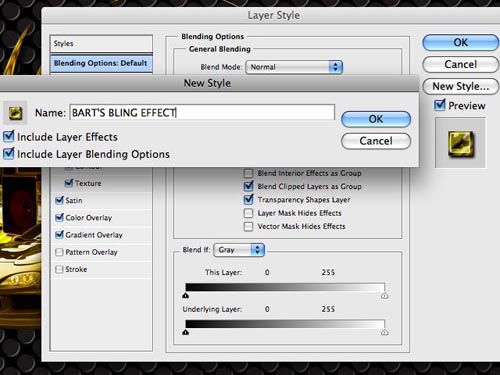
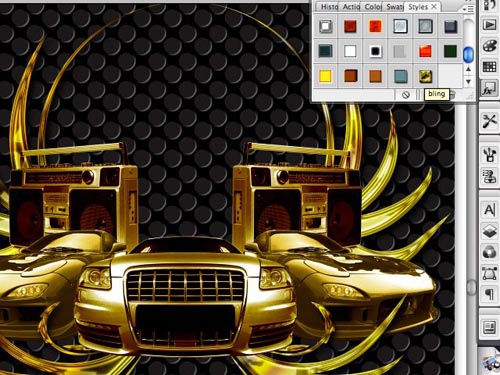
Notice now that your style appears in the Styles palette!

And your new golden style shines so bright!
Step 10
Add more bling to your design. I chose another Go Media Vector from Set 1 Wings.
Copy and paste into Photoshop and this time… apply your new style you just finished creating.
Repeat the same step for any additional elements you want to turn into gold.

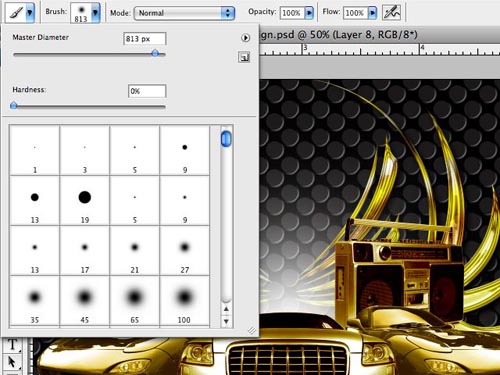
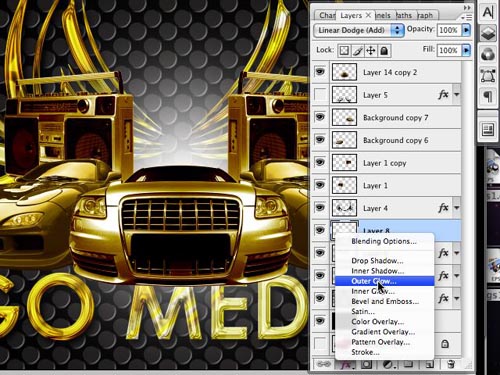
Step 11
We're going to add some light effects using the airbrush and a layer style. Choose a standard airbrush and set it really large. I clicked one time at 100%.
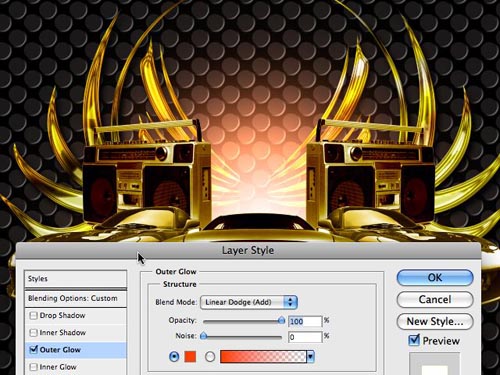
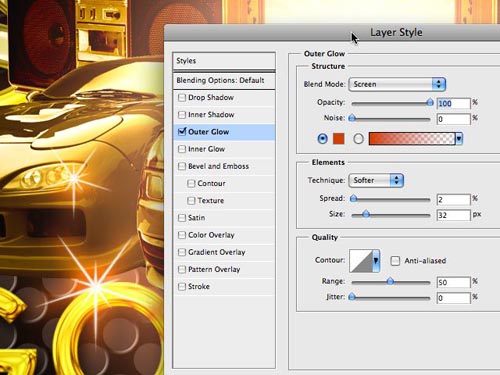
Apply a Layer Style of Outer Glow from the FX tab in the layers palette.
Choose a color for the Outer Glow. Set the Blend mode to Add. Opacity 100%
Copy that layer and then place it in front of everything. Adjust the opacity to be quite a bit lower. Then use the eraser with an air brush setting that will allow you to erase over the middle of the car and near the edges. The result gives you the look of over spill from the light source.

Step 12
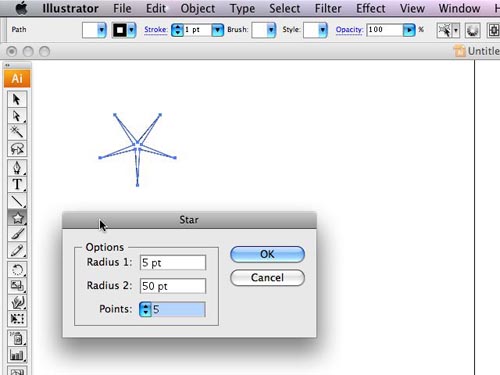
We're going to add some sparkle to our bling using Illustrator and more layer styles. We'll then make a custom brush from our sparkle shape and bling this piece out with tons of rad sparkly things. Create a star shape in illustrator. I chose a 5 point star and dupicated/rotated slightly to get my final sparkle shape.
Copy and Paste it into Photoshop. Apply a Layer Style of Outer Glow. Only this time change the Blend Mode to normal and adjust the spread/size to give a faint blur around your sparkle shape.
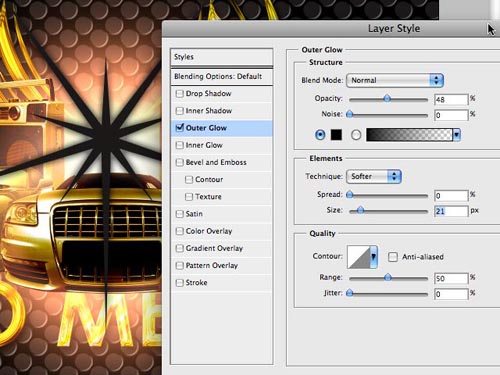
Now option click directly on the Effect of the layer. It will bring up these options. Choose Create Layer. This will make the outer glow an actual image on the layer below your sparkly image.
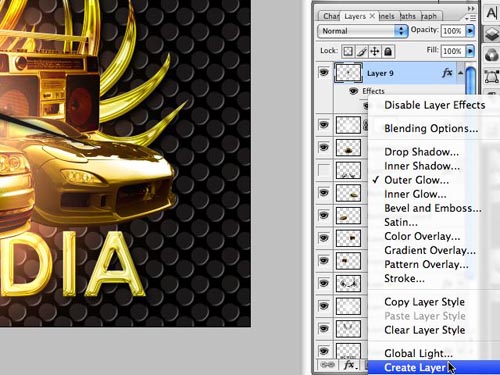
Choose the layer above blurry sparkle shape. This should be the crisp sparkle. Choose Merge Down from the Layer Palette tab in the right hand corner.
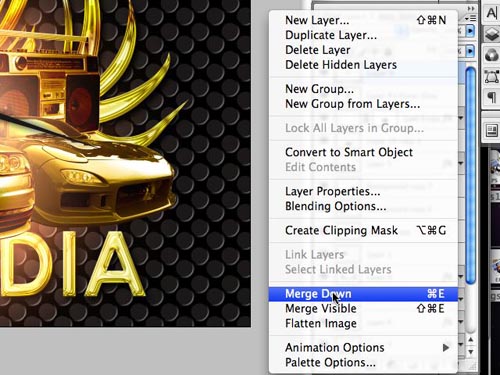
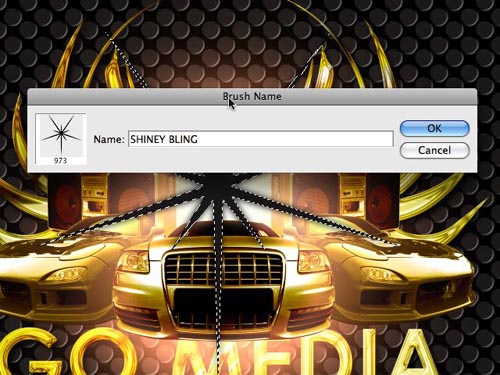
Now go to Edit/Define Brush Preset.
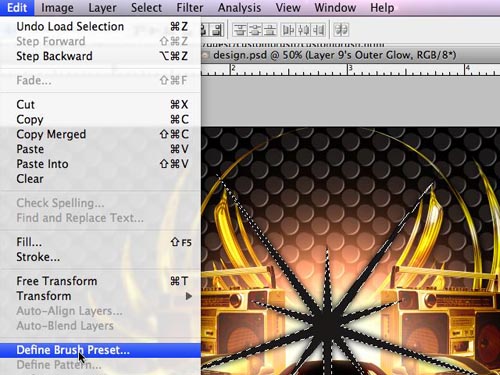
Name your new brush.
And now you will see your new brush in the brush palette. (and you can see that I've created some of these before)
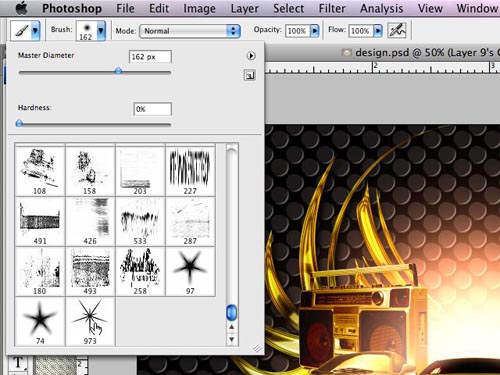
Click once in your desired spot to add sparkle to your bling! However… these sparkles could look even better with… another layer style applied to it! Why not? right!

Apply an outer glow with some color. Set the Blending Mode to Screen. Adjust the size/spread. Ba da boom. Ba da BLING!
To tighten this design up a little more, I've added the Go Media Logo complimented by an icy hot diamond because that's how Chris Wilson likes to roll at Go Media.
I simply applied my own style that I created earlier in the tutorial. Unfortunately, not everything is quite as successful when the style is applied to it. I actually had to tweak my style settings quite a bit to get it to match the other Go Media vectors that turned gold fairly easy.
So there you have it. Some badass blingin sparklies. Feel free to post a link to anything you blingify in your comments.
Download the Photoshop Layer Style here.