Step 1:
Let's start out by creating a new file. I used a 400x300 pixels canvas set at 72dpi, and I filled my background with white color. Now make a new layer set and name whatever you want.
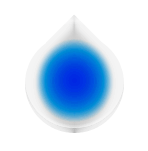
Create a new layer then draw a light gray circle with #CF4F4F4 color shade and 99 x 99 px dimensions. Now select the Horizontal Type Tool then set the font family to Webdings, 90 pt, strong and #F4F4F4 color shade. In a new text layer type '5′ which should be an arrow pointing up, position this arrow on top of your circle.
Step 2:
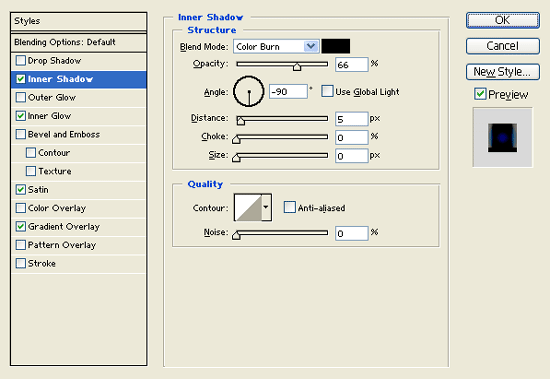
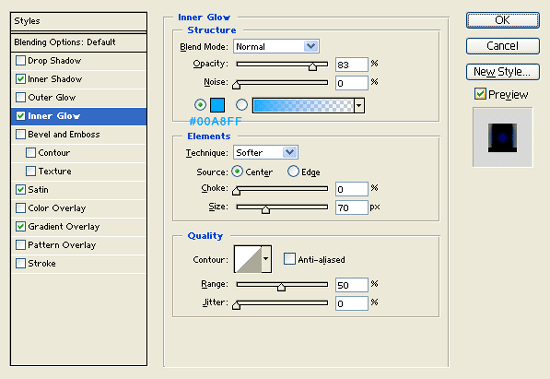
Under Layer Style(Layer > Layer Style) add an Inner Shadow, Inner Glow, Satin and Gradient Overlay blending options to your light gray shape layer.
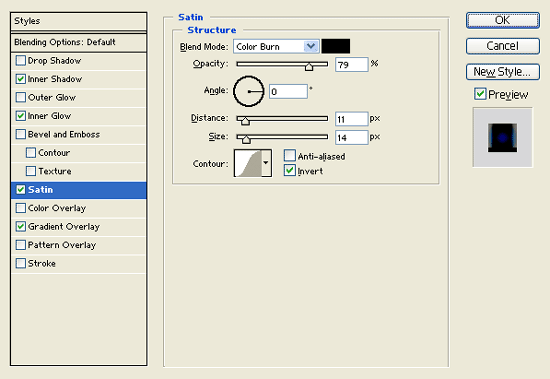
Result:
Step 3:
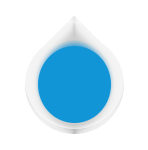
Make a new layer set and name it 'Futuristic Logo' then place your gray shape circle layer inside this layer set. Now make a new layer then draw a circle with #1295D7 color shade and 73 x 77 px dimensions.
Step 4:
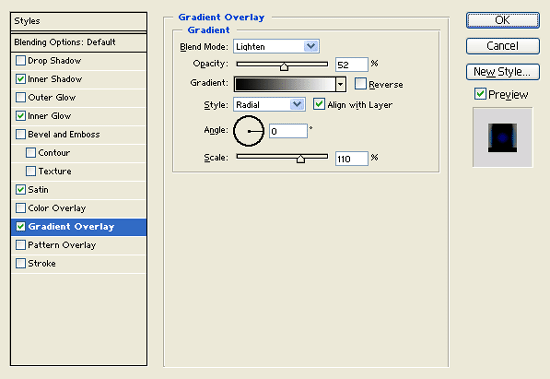
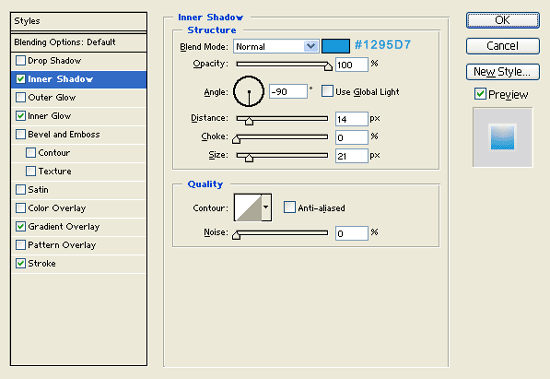
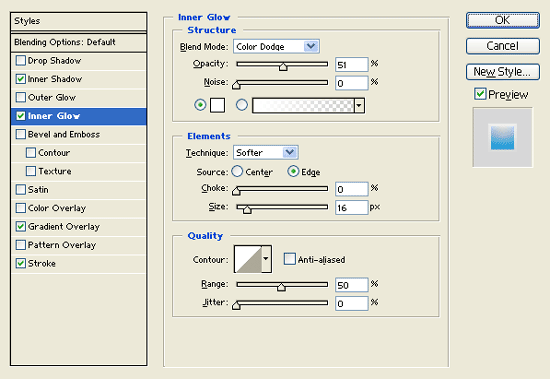
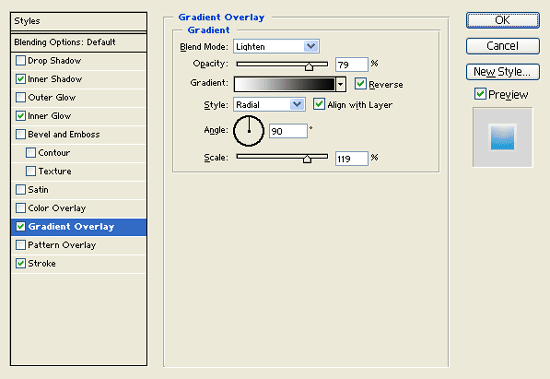
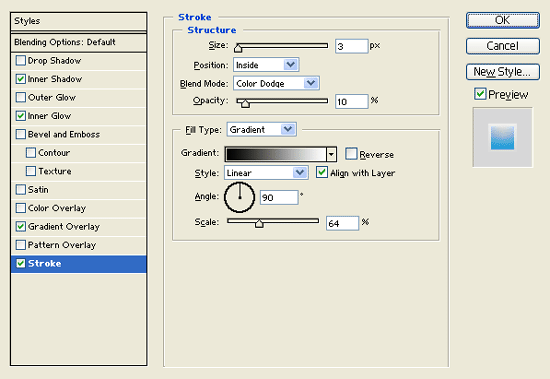
Under Layer Style(Layer > Layer Style) add an Inner Shadow, Inner Glow, Gradient Overlay and Stroke blending options to your blue shade circle.
Result:

Step 5:
Under Layer Style(Layer > Layer Style) add an Inner Shadow and Stroke blending options to your small white circle layer.
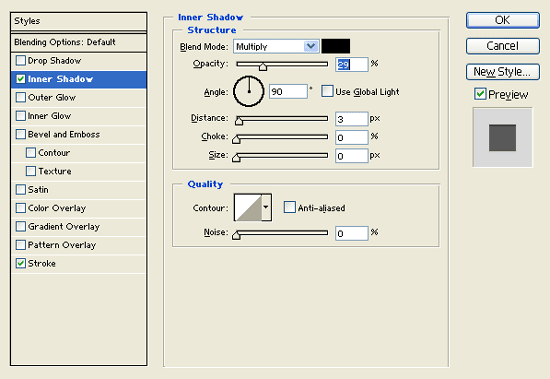
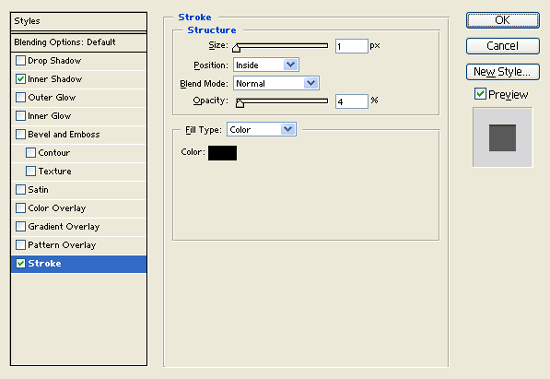
Result:
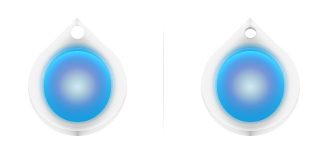
Step 6:
Make a new layer then draw a black circle with 82 x 82 px dimensions on the center of your futuristic logo design.
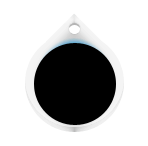
Step 7:
Under Layer Style(Layer > Layer Style) add an Inner Shadow and Gradient Overlay blending options to black circle layer. Then set the layer's blending mode to Soft Light.
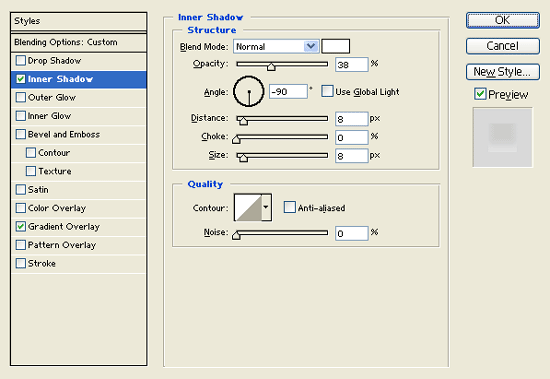
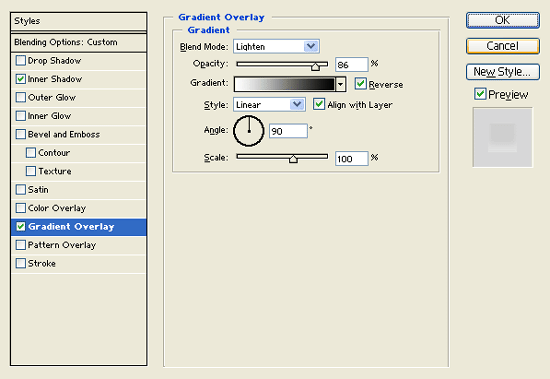
Result:
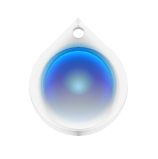
Step 8:
Duplicate the 'Futuristic Logo' layer set and merge it so it turns into a regular layer. Then rotate the duplicate layer by 90 degrees CW through Edit > Transform. Now move the layer behind the original 'Futuristic Logo' layer set on the Layers window.
Step 9:
Do the same for the right and bottom side of your logo to complete the design.
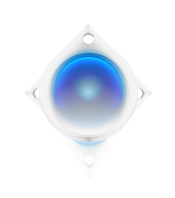
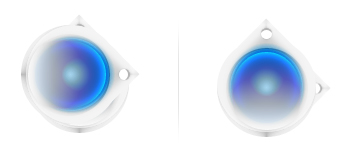
Results:
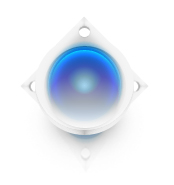
And here is the final output of Futuristic Web Logo Design.