

Step 1: Open that photograph which you want as the Background Blending option.

Step 2: Open another photograph in Photoshop this image will be used as the Blending Layer.

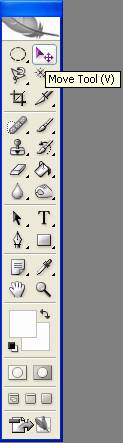
Step 3: Now Move one photograph over the other, this can be done by dragging the photograph which you have chosen as the Blending Layer above the background. This can be done only if move tool has been selected by default, if not then select the Move Tool by shortcut key V or by selecting its option as shown below.
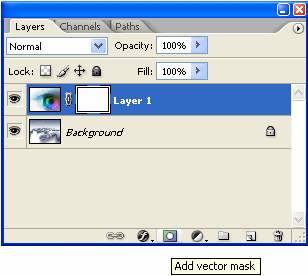
Step 4: Go to the Layer Palette and add a Vector Mask to the Blending Layer as shown below.
Step 5: Now we will put the Blending effect using the Gradient tool.
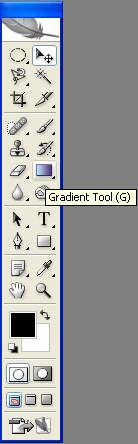
Select the type of Gradient you want, i have chosen the Radial Gradient

Now Using the Gradient Tool Draw the Gradient Arrow at any angle you want, i have done it from lower left corner to upper right corner.
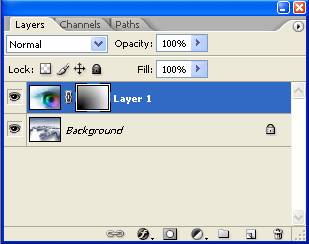
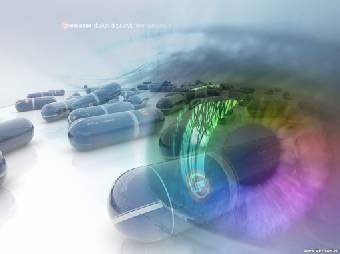
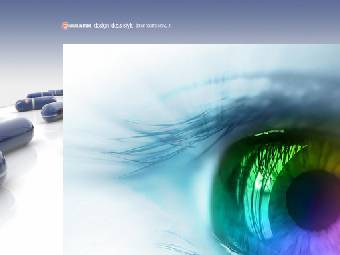
Here is the final Image. As you can see that the blending layer is only visible on the right, this is because of the gradient tool. If you look at the Layer Palette in the above figure you will notice that the lower left corner is black while the rest is white. The region in white in the Mask Layer is Visible while the region which is black is not visible and the region which is neither white nor black is i.e. a little grey is partially visible.
Note: You can now experiment with the Different Angles of the Gradient tool to get different effects.