


Step 1: Let's start out by creating a new file. I used a 1000x126 pixels canvas set at 72dpi, and I filled my background with white color. Now make a new layer then draw a light blue rectangle with #C2EBFF color shade and 1000 x 121 px dimensions.

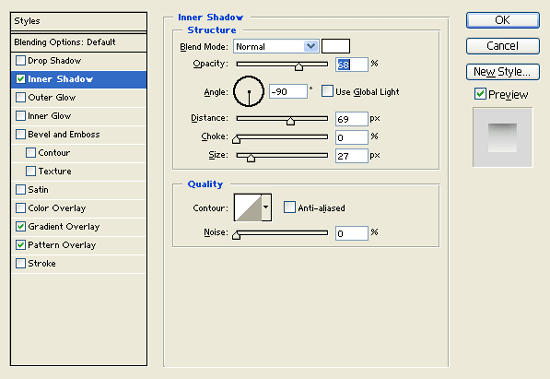
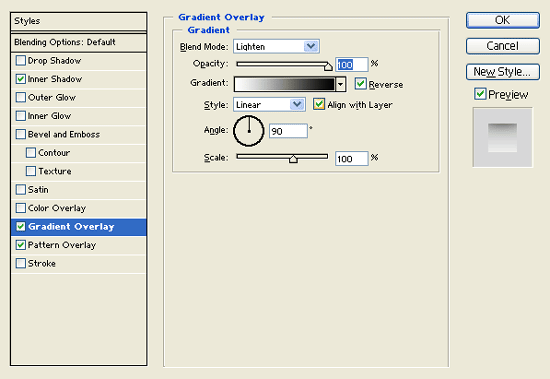
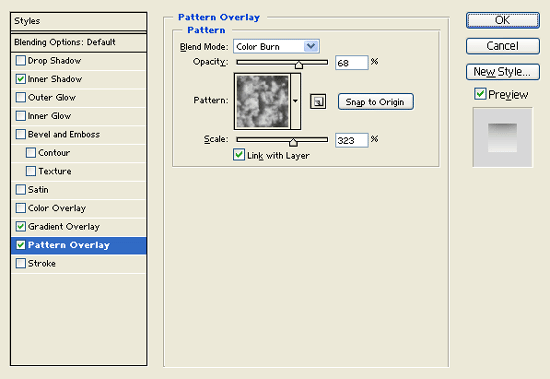
Step 2: Under Layer Style(Layer > Layer Style) add an Inner Shadow, Gradient Overlay and Pattern Overlay blending options to your light blue rectangle layer.

Step 3: Now select the Horizontal Type Tool then set the font family to Arial, bold, 28 pt, strong and white color shade. In a new text layer type your website name on the left side of the header design.

Step 4: Under Layer Style(Layer > Layer Style) add a Stroke blending option to your website name text layer.

Step 5: Now set the font family to Font Wingdings, 48 pt, crisp and #3EC1FF color shade. In a new text layer type 'S' on your header which should be a water drop shape.

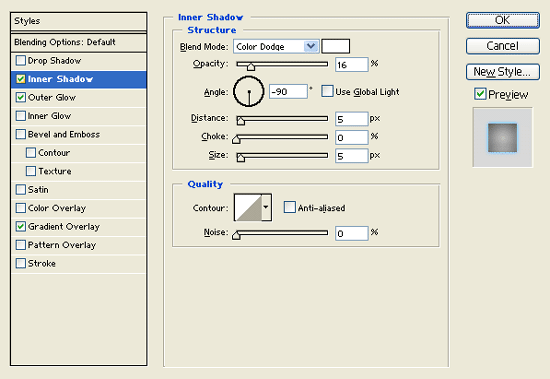
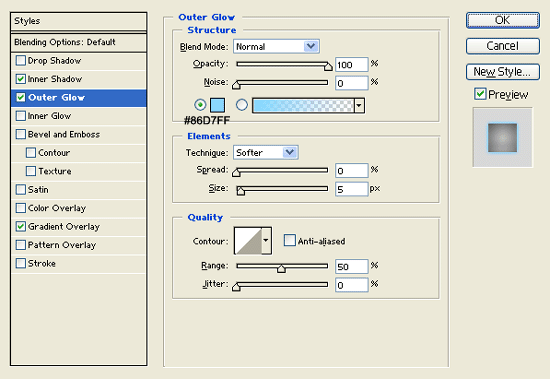
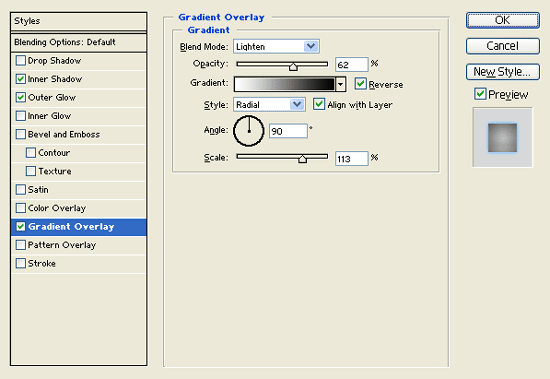
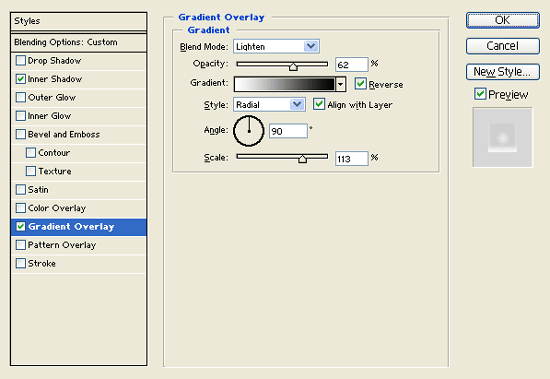
Step 6: Under Layer Style(Layer > Layer Style) add an Inner Shadow, Inner Glow and Gradient Overlay blending options to your water drop shape text layer.

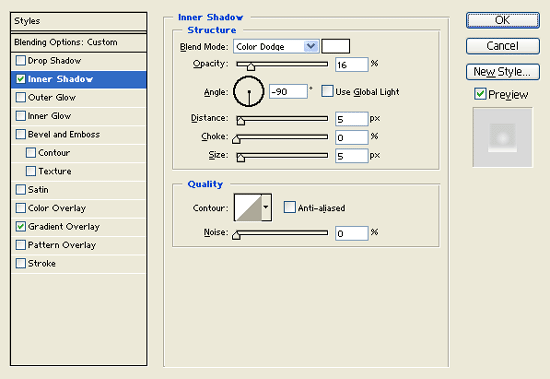
Step 7: In a new text layer add a smaller water drop shape by the first. Then under Layer Style(Layer > Layer Style) add an Inner Shadow and Gradient Overlay blending options to the smaller water drop text layer. Now set the text layer's blending mode to Soft Light.

Step 8: Here we added more water drops on the name for eye candy.

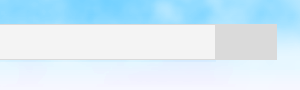
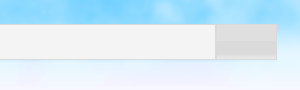
Step 9: Now add the navigation interface on the right side of the header close to the name. In a new layer draw a long rectangle with #F4F4F4 color shade and 463 x 36 px dimensions.

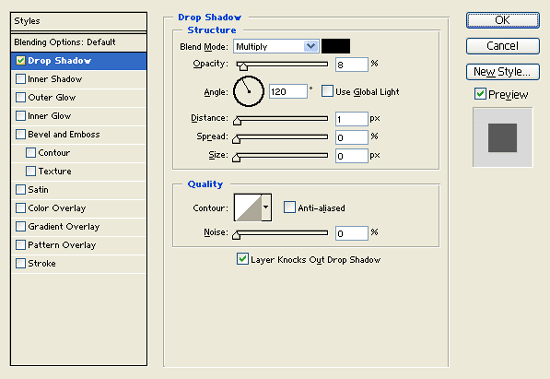
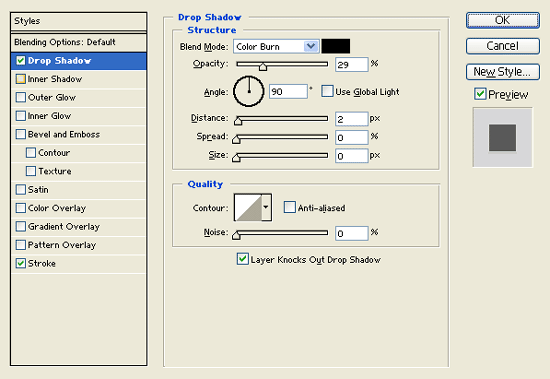
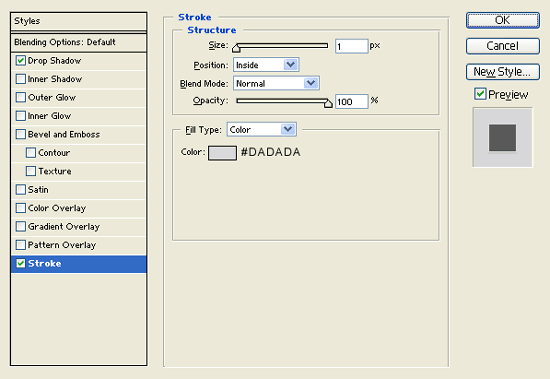
Step 10: Under Layer Style(Layer > Layer Style) add a Drop Shadow and Stroke blending options to your gray rectangle layer.

Step 11: In a new layer draw a gray rectangle with #DADADA color shade and 61 x 36 px dimensions.
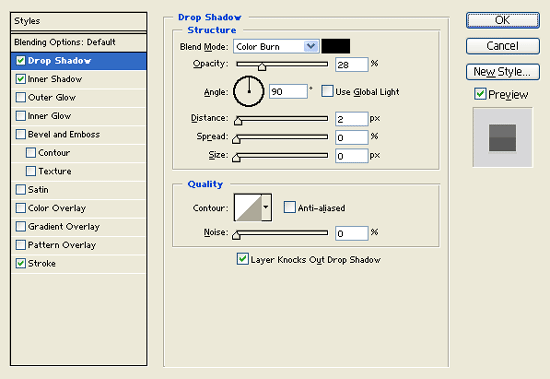
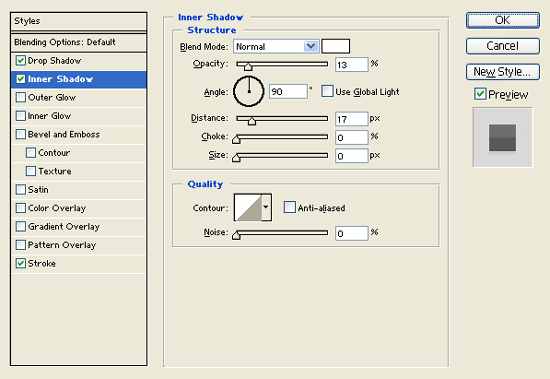
Step 12: Under Layer Style(Layer > Layer Style) add a Drop Shadow, Inner Shadow and Stroke blending options to your gray rectangle layer.

Step 13:
Select the Horizontal Type Tool then set the font family to Arial, regular, 13 pt, none and #00ACFF color shade. In a new text layer type out your navigation links

Result:
