

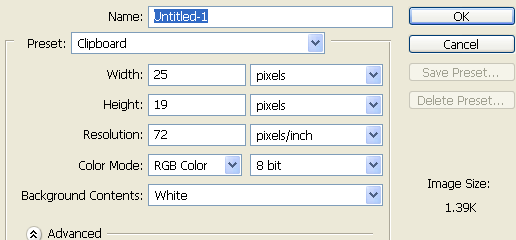
Create a new Photoshop document 25x19 pixels in size, fill the background with #0D8DEA
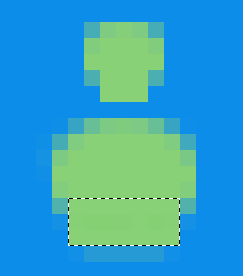
Create a new layer and set your foreground color to #89D177, Zoom in all the way (1600%) and use the circular marquee tool to make a selection like below And use the paintbucket tool to fill it with your foreground color, you might have to click twice to make the color more 'solid'

Now your going to do about the same thing again, make a selection like below and fill it with the color #89D177.

Now pull out the rectangular marquee tool, make a selection like below and fill it with the same green color
Next select your 'head' layer and apply the following to layer styles to it.
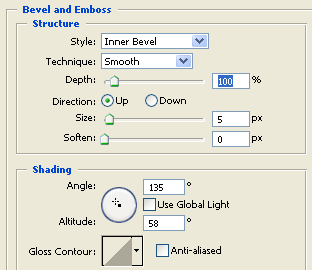
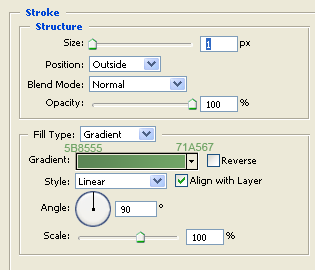
Right click on the head layer, select 'Copy layer style' then right click on the body layer and select 'paste layer style'.
That should produce:
![]()
Now for the arms, create a new layer that is above both your head and your body layer, Zoom back in and set your foreground color to #397829 pull out the pencil tool with the width set to 1 pixel and draw three pixels like below on the bottom left hand side of the icon.
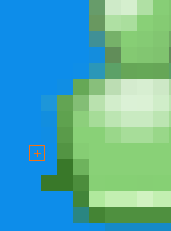
Now draw two vertical lines like below, the colors are also specified in the image
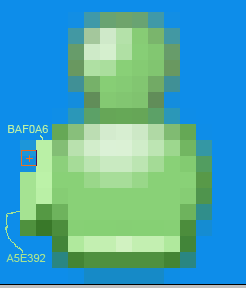
Press ctrl+j to duplicate the arm layer, then go to Edit > Transfrom > Flip horizantal, then use the move tool to move the icon to the right hand side of the icon.
![]()
That's it for this tutorial I hope you liked it.