


Preparation:
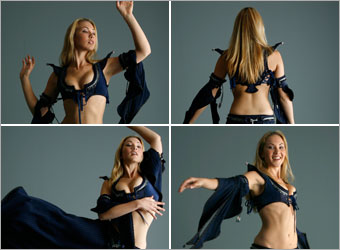
We will need a series of images of a woman dancing. There is a good set of them found at Mjranum Stock.
Visit gallery of Mjranum Stock.
All rights of these resources belong to their respective owners.
Step 1 - Setting Up Background:
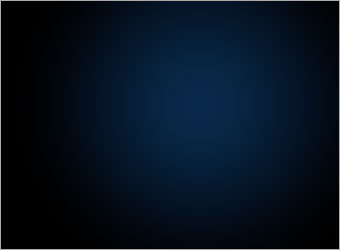
Create a document of size 900x660 pixels..
Set the foreground color to #09294B and background to #000000.
Using the Radial Gradient tool, create a gradient like the one shown in the diagram.
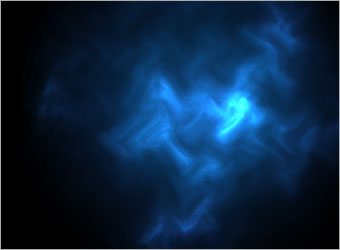
Step 2 - Creating Blue Mist:
Create a new layer and name it as Blue Mist.
Set the foreground color to #FFFFFF and background to #000000.
Go to Filter > Render > Clouds. Then follow by Filter > Distort > Wave. Leave the settings as default and hit OK.
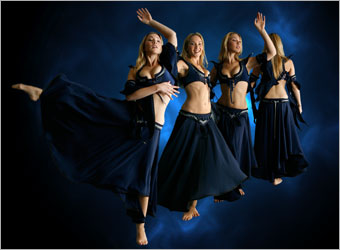
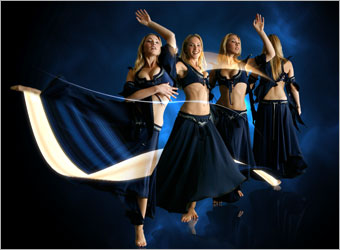
Step 3a - Cropping the Dancer:
Open up one of the dancer images.
Crop her out of the background.
Resize the dancer and position her the way shown on the left.
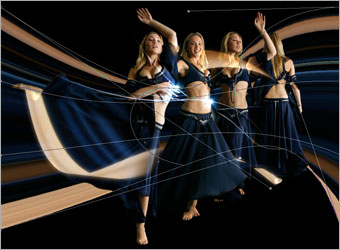
Step 3b - Cropping the Dancer:
Repeat Step 3a for 3 more of the dancer images.
Resize and position them in such a way that they look like a chain of movements.
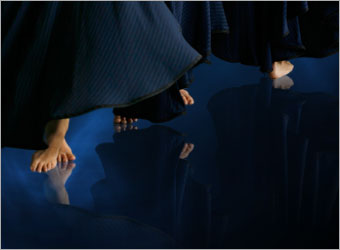
Step 4 - Adding Reflections:
Duplicate each of the four dancer images.
Flip them vertically by going to Edit > Transform > Flip Vertical. Position the mirrored images directly below the original ones.
Using the Airbrush Eraser tool with size 300, fade the mirrored images downwards.
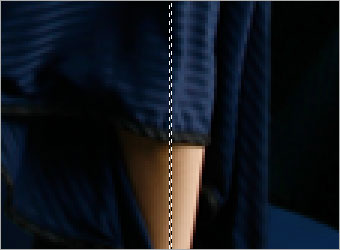
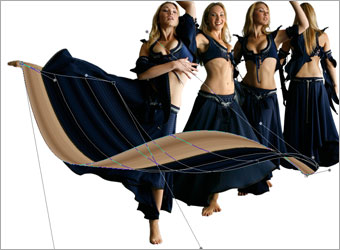
Step 5a - Creating Wavy Lines:
Select the layer of the first dancer image. Using the Rectangular Marquee tool, make a rectangle selection of 1 pixel width. Make sure the selection covers from the dress to the skin of the dancer.
Press CTRL+C then follow by CTRL+V. This will create a new layer with the selected area. Rename this layer to Wavy Lines.
Step 5b - Creating Wavy Lines:.
With the Wavy Lines layer selected, go to Edit > Free Transform.
Scale the width of the pixels horizontally as shown in the diagram.
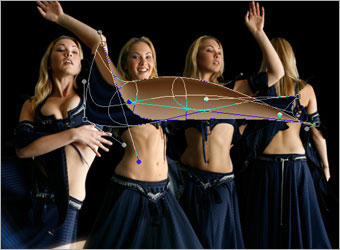
Step 5c - Creating Wavy Lines:
Go to Edit > Transform > Warp.
Distort the color lines such that they form several waves.
You may hide the background to have a clearer view during the distortion.
Step 5d - Creating Wavy Lines:
Using the Eraser tool, remove some parts of the wavy lines so that it seems moving between the dancers. Duplicate the Wavy Lines layer. Select the upper Wavy Lines layer, go to Filter > Blur > Gaussian Blur. Set the radius to 3 pixels and hit OK.
Set the Blend Mode of this layer to Screen. Set the Blend Mode of the lower Wavy Lines layer to Linear Dodge (Add).
Step 5e - Creating Wavy Lines:
Repeat Step 5a, 5b and 5c for the arm area.
Step 5f - Creating Wavy Lines:
Repeat Step 5d for the arm area.

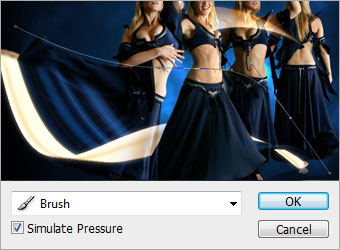
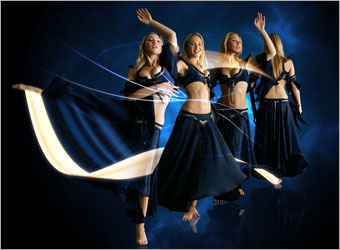
Step 6a - Create Glowing Lines:
Create a new layer above the rest and name it as White Stroke. Using the Pen tool, draw a path like the one shown in the diagram.
Set the Brush tool to Airbrush 3 pixels. Select the Pen tool again, right-click on the path you have just drawn and choose Stroke Path. Check on Simulate Pressure and hit OK.
Step 6b - Create Glowing Lines:
Right-click on the White Stroke layer and choose Blending Option.
Choose Outer Glow. Set the Blend Mode to Color Dodge, Opacity to 100%, color to #0072FF, Size to 5 and leave the rest as default.
Step 6c - Create Glowing Lines:
Repeat Step 6a and 6b for more glowing lines around the dancers.
Step 7a - Create Glowing Dots:
Create a new layer and name it as Glowing Dot. Using the Brush tool, set it to Airbrush 17 pixels and color #FFFFFF, paint a dot near the glowing lines you have drawn earlier.
Right-click on the layer and choose Blending Options. Go to Outer Glow and change the Blend Mode to Linear Dodge (Add), Opacity to 100%, color to #008AFF, Size to 24 and leave the rest as default.
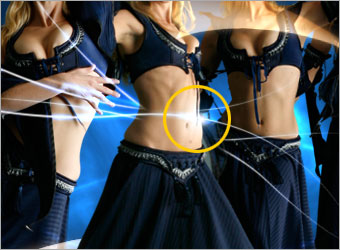
Step 7b - Create Glowing Dots:
Repeat Step 7a for more dots around the glowing lines.
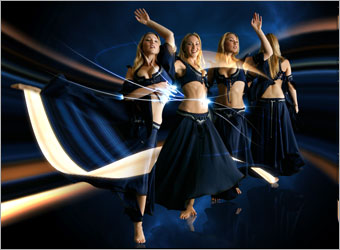
Step 8a - Create Wavy Background:
Repeat Step 5a and 5b.
Go to Edit > Transform > Warp. Distort the color lines differently this time. Make sure it stretches to all four corners of the document.
Rearrange this layer to be just above the Blue Mist layer.
Step 8b - Create Wavy Background:
Duplicate the background wave layer.
Select the duplicated layer and go to Filter > Blur > Gaussian Blur. Set the radius to 10 pixels.
Change the Blend Mode of this layer to Color Dodge.
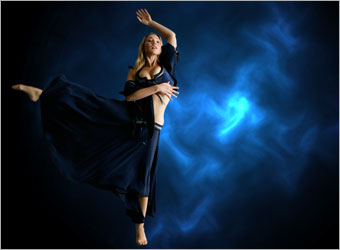
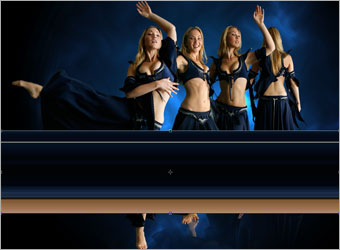
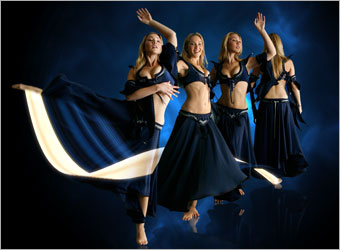
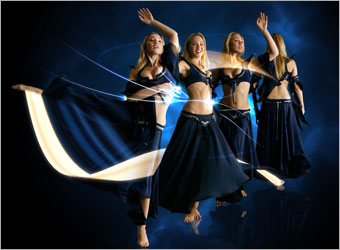
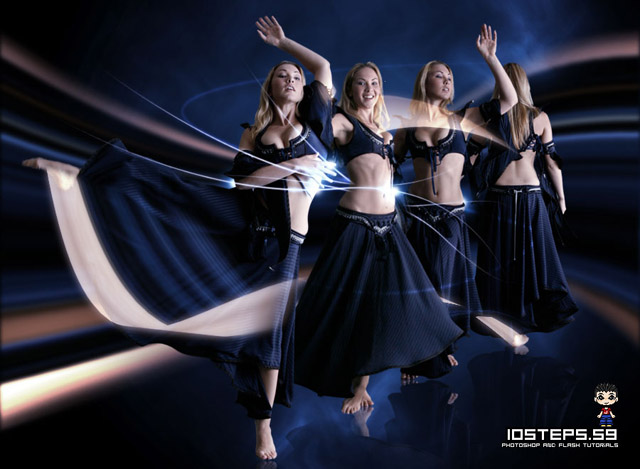
Optional:
And we are done! I adjusted the colors a little further using the Hue/Saturation and Curves Adjustment Layers.
Hope you have enjoy the session. Thanks!
 10Steps is a huge resource of Photoshop tutorials, freebies and inspiration for designers.