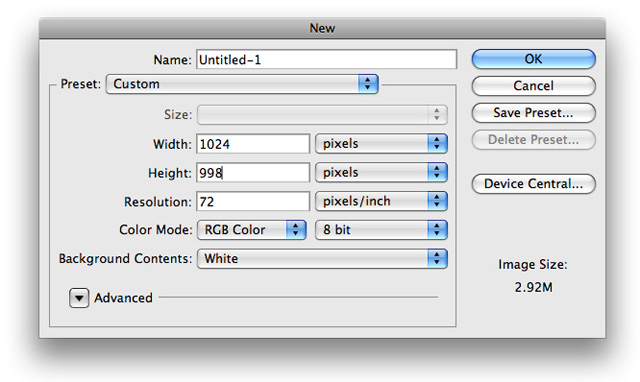
1. Create a new document with the dimensions of 1024x998. Of course this may vary depending on big you would like it.
2. Next we want to go ahead and change our background color. So using your Paint Bucket Tool for your tools pallet fill your background layer with #0E1926
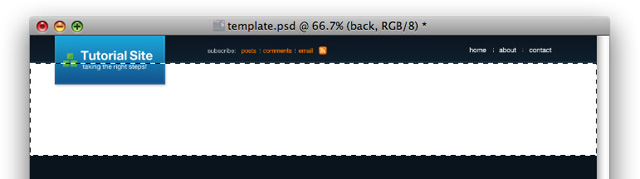
3. The first thing we will do is go ahead and work on our top navigation bar. Go ahead and use your Rectangle Marquee Tool and make a selection similar to the following and fill it with #FFFFFF

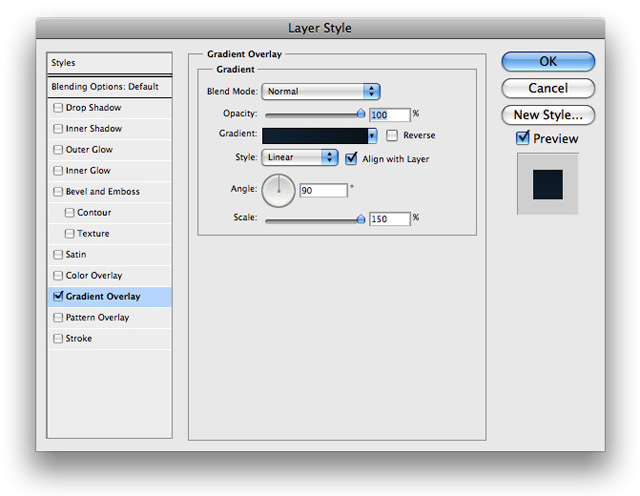
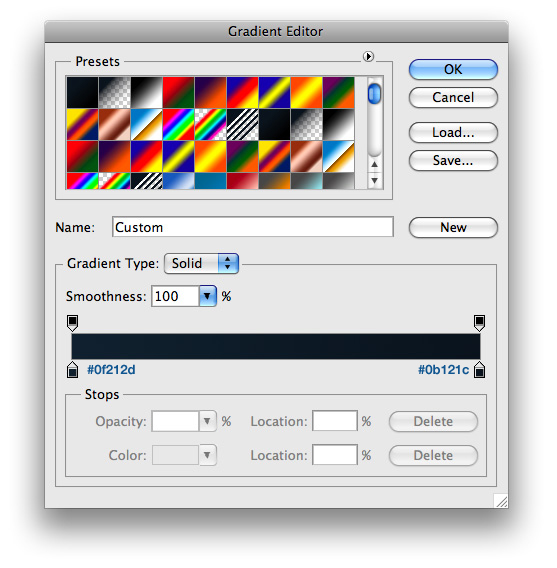
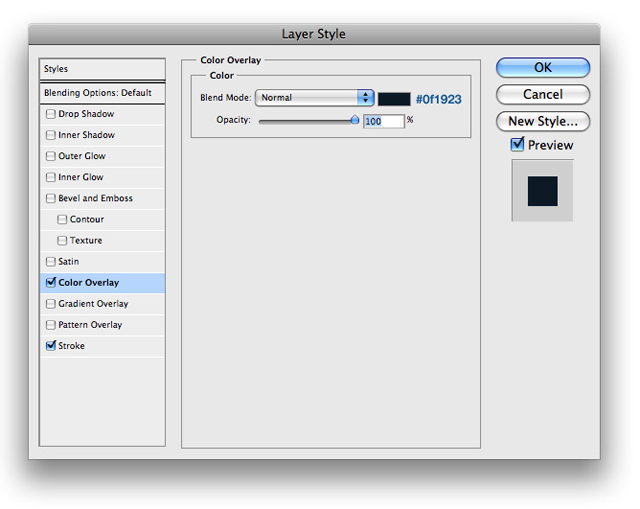
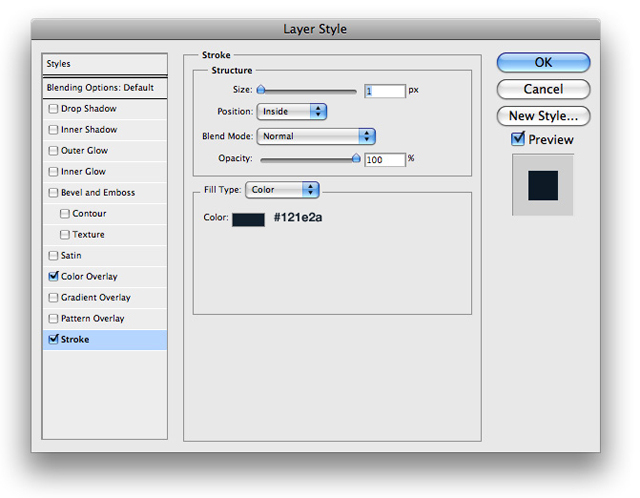
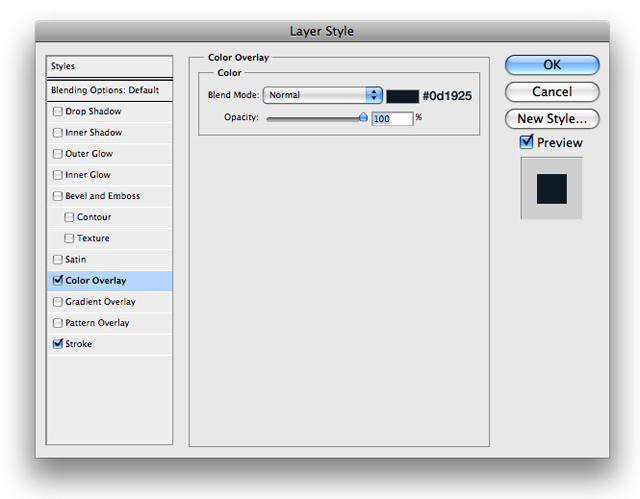
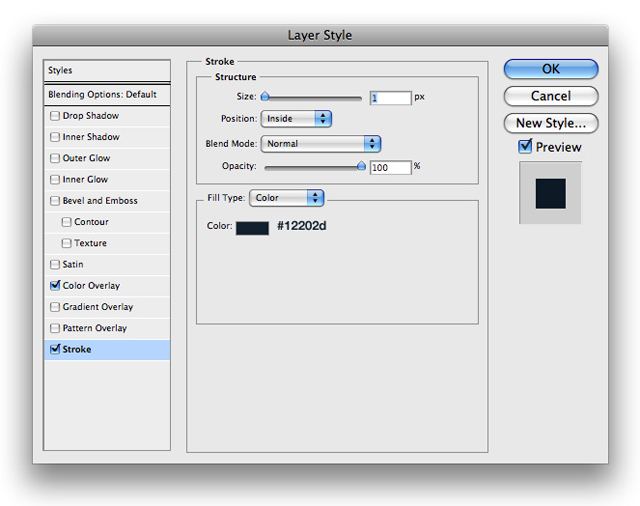
4. Now right click your newly created layer and insert the following blending options by choosing blending options from the drop down menu
5. Next go ahead and use your text tool to add some links to your navigation menu. For the links I choose to use #FFFFFF and for the RSS I used #F08A13
![]()
6. Next, in between our links we want little 'dividers'. Make a selection similar to the following with your Rectangle Marquee Tool and fill it with #FFFFFF

7. Then copy your divider and place it between each link. It should look something like this

8. Next make a 1px high selection at the base of your navigation that goes from one side of the document to the other. Fill it with #FFFFFF. It should look like this

9. Now change the blending mode to Soft Light

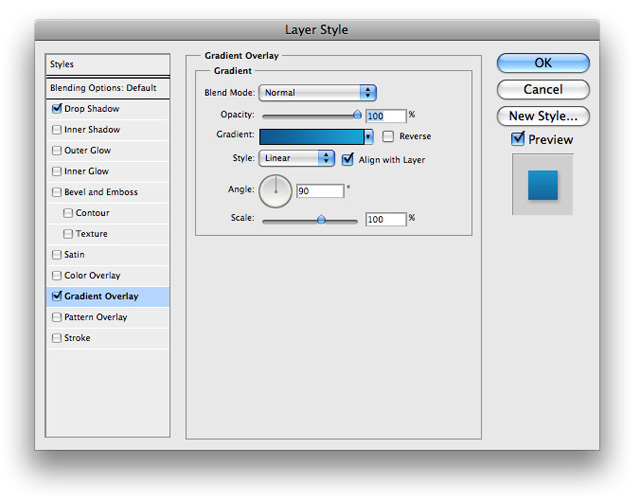
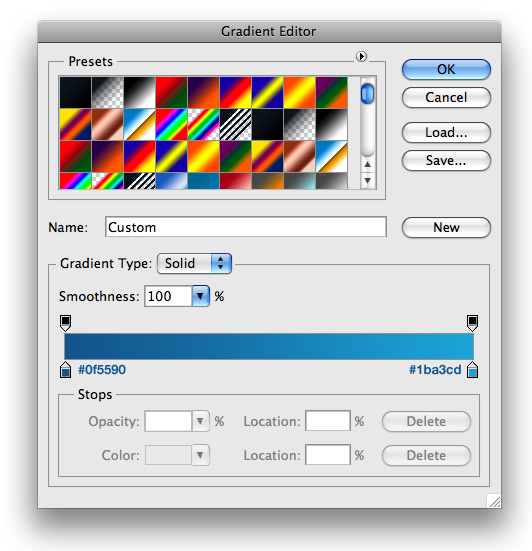
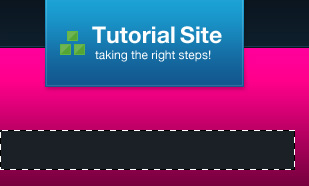
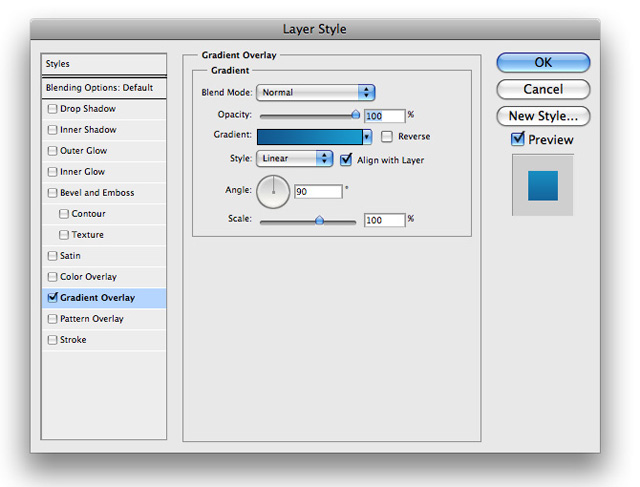
10. The next thing we want to do is create our logo. Using your Rectangle Marquee Tool create a rectangle similar to the following and fill it with #FFFFFF

11. On this newly created layer insert the following blending options

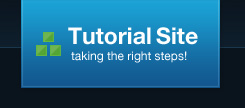
12. Next lets go ahead and add some simple text to our box. I used helvetica for my font, and made a couple little squares for a logo, and this is what I came up with
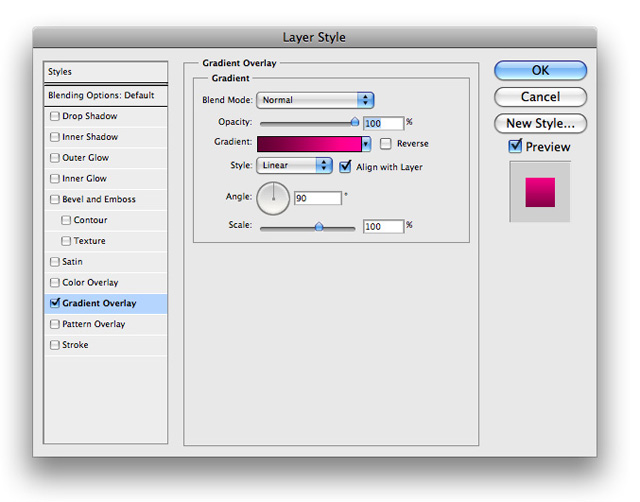
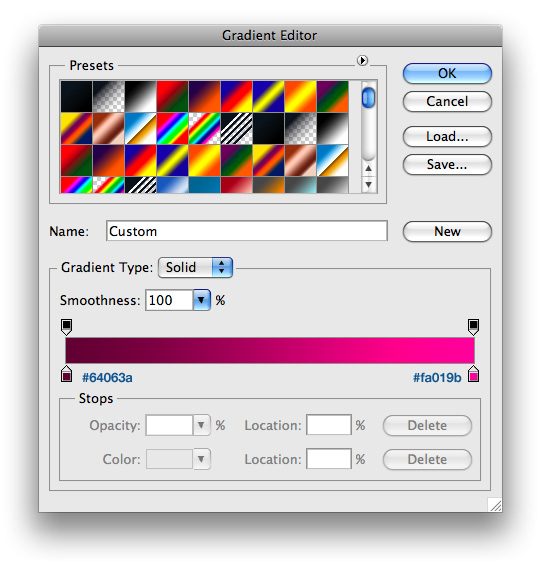
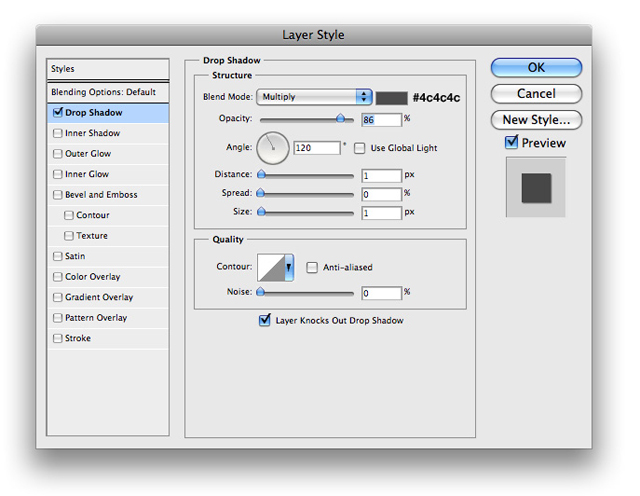
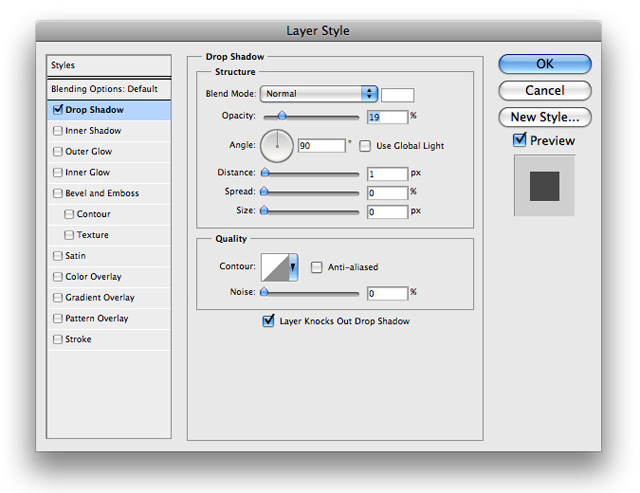
13. Now we want to go ahead and use our Rectangle Marquee Tool to make a selection similar to the following and fill it with #FFFFFF
14. Now insert the following blending options onto its layer
15. Next we want to go ahead and add a little white line at the bottom of our pink box. Make a 1 pixel high selection and fill it with #FFFFFF
16. Then lower the opactiy to about 57%, and then change the blending mode to Soft Light
17. Now we want to add a little 'shadow' line at the bottom of the pink box. Make a selection similar to the following across the bottom of your box and fill it with #000000
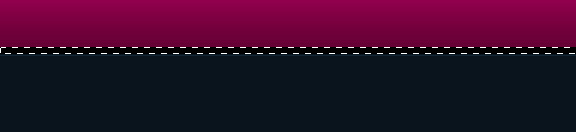
18. Go ahead and lower the opacity to 20%, and then change its blending mode to Soft Light
19. Now lets go ahead and make our search box. Using your rectangle marquee tool, make a selection similar to the following and fill it with #252B32
20. Now go ahead and use your Polygonal Lasso Tool to make a selection similar to the following to give it a ripped effect
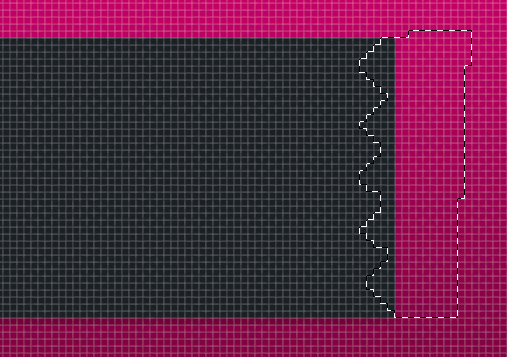
21. After its selected choose Edit>Clear. Then go ahead and put the following blending options onto its layer
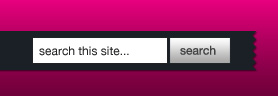
22. Now just use your rectangle marquee tool to make a simple input box and a simple search button and you will have something that looks like this
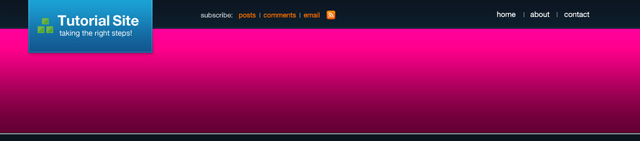
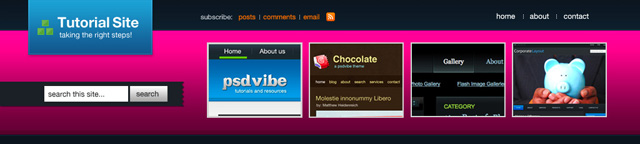
23. For the other space in my header, I chose to have it so there was space for random tutorials to be displayed. Your document will look something like the following
24. Next lets move onto our sidebar. Using your Rectangle Marquee Tool make a selection similar to the following and fill it with #FFFFFF
25. Now insert the following blending options onto its layer
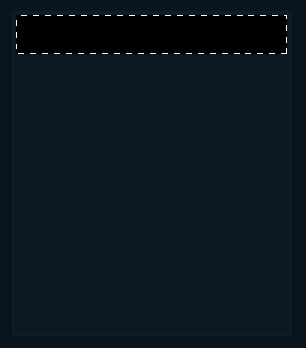
26. Now lets use our Rectangle Marquee Tool yet again to make a selection similar to the following to house our contents header. Fill it with #000000
27. Now insert the following blending options onto its layer

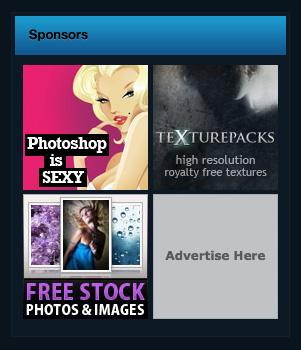
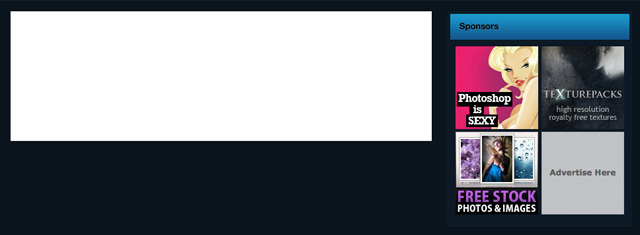
28. Now lets go ahead and use some black text and name our box. For this tutorial, I chose to make a Sponsors box

29. We want to give our text some depth, so add the following blending options to your text layer
30. Go ahead and add some content and it will look something like this
31. Following those same steps I made a Recent Comments box. Your document should look something like this at this point.
32. Now we want to go ahead and show what our posts will look like. Using your Rectangle Marquee tool yet again, make a selection similar to the following and fill it with #FFFFFF.
33. Now insert the following blending options
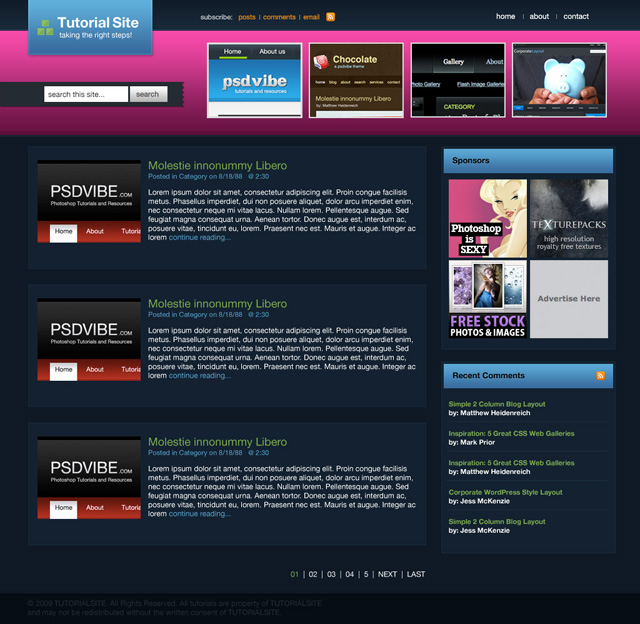
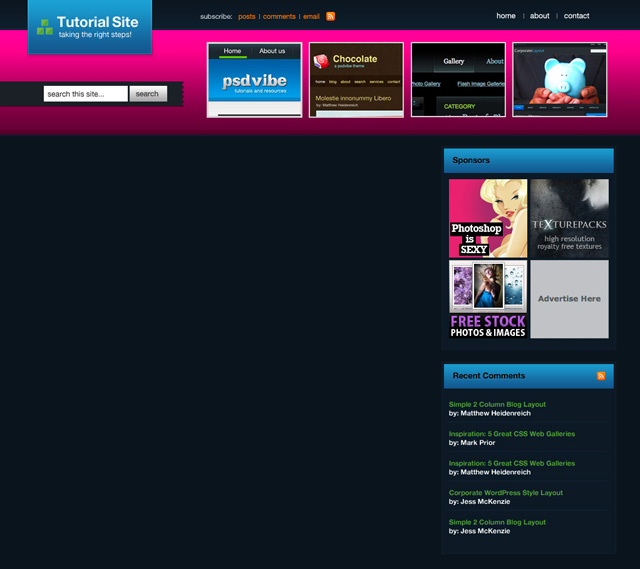
34. Now just insert some text and a thumbnail preview for your post and thats it! For my footer I just made a simple box filled with #050D15. Your final results should look something like this