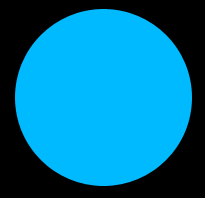
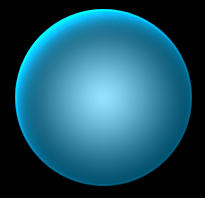
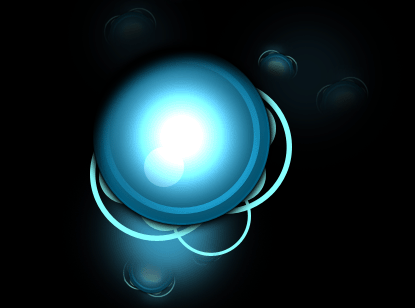
1. Let's start out by creating a new file. I used a 900x300 pixels canvas set at 72dpi, and I filled my background with black color shade. Now in a new layer set and name it 'Circle Design'. Then in a new layer draw a blue circle with #00BAFF color shade and 177 x 177 px dimensions.
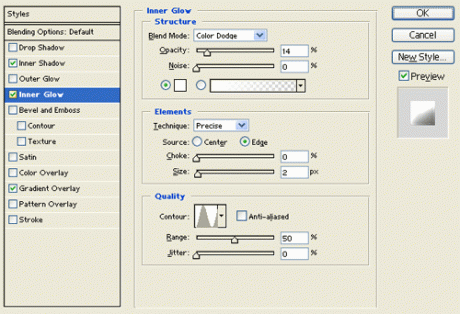
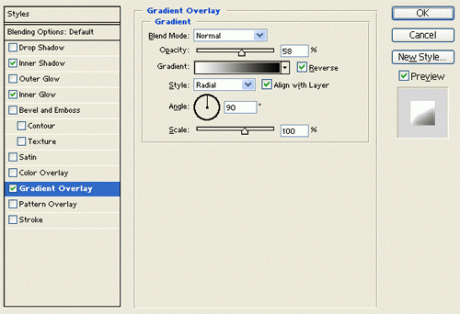
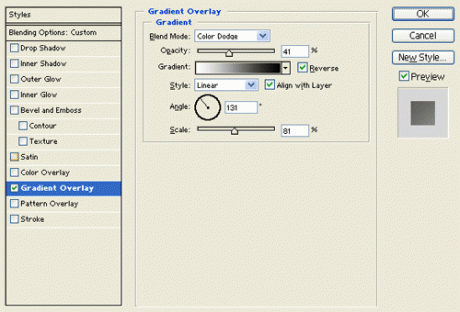
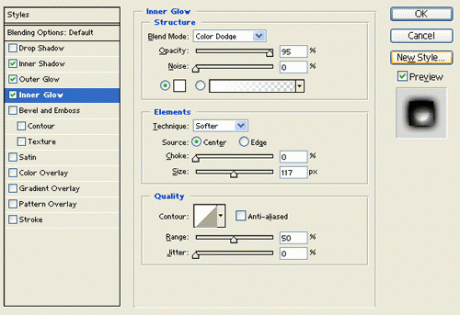
2. Under layer style (layer - layer style) add an inner shadow, inner glow and gradient Overlay blending options to your blue circle layer.
3. Create a new layer, using your custom shape tool choose the circle thin frame shape and draw a white circle thin frame with 157 x 157 px dimensions.
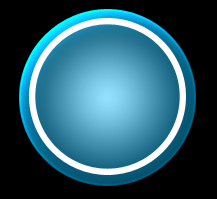
4. Under layer style (layer - layer style) add a gradient overlay blending option to your white ring layer. Then set the layer's blending mode to darken.
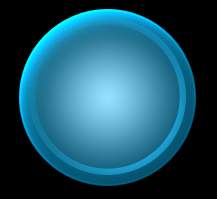
5. In a new layer draw a white circle with 40 x 40 px dimensions on the bottom side of your circle design. Then set the layer's opacity level to 16%.

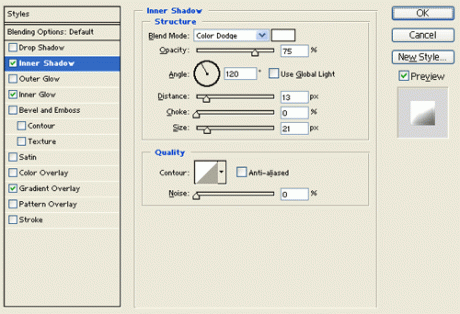
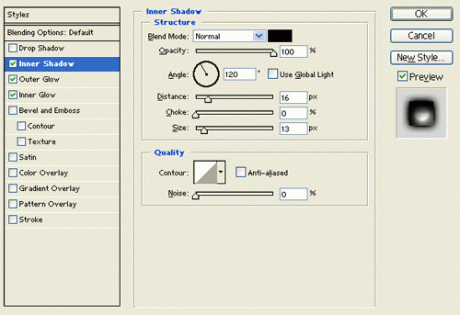
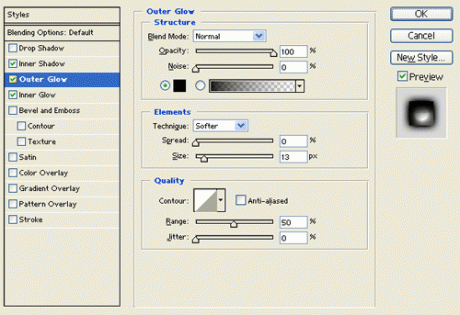
6. Merge down your 'circle design' layer set through (layer - merge layer set). Then under layer style (layer - layer style) add an inner shadow, outer glow and inner glow blending options.
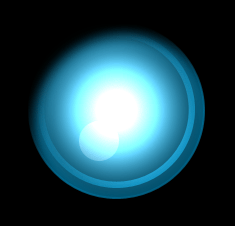
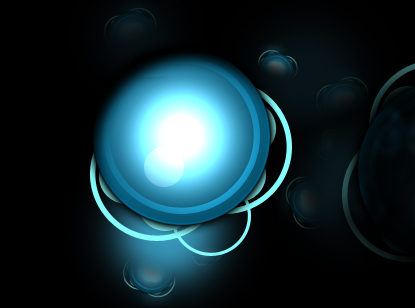
7. Create a new layer set and name it 'futuristic circle design', place your circle design layer inside the layer set. Then create a new layer behind your circle design layer and draw a couple of circle thin frames with #87FFFF color shade. Finish it off with a couple of circles with the same color shade as shown below.
8. Again create a new layer behind your circle design layer and use your brush tool with a soft large brush to paint #3693B5 color shade spots around your circle design. Then lower the opacity level to 10 - 15%.
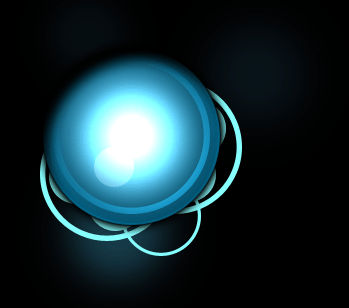
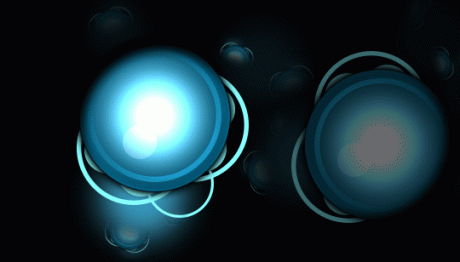
9. Duplicate your 'futuristic circle design' layer set and merge it through (layer - merge layer set). Now resize the copy really small and set the opacity level to 20-30%. Then add a couple more small futuristic circle designs all around your bigger circle design.
10. Now fill up your canvas with more futuristic circle designs, just add a marquee selection around your original futuristic circle design and copy merged it through Edit. Then paste the copy into your canvas and rotate it through (edit - transform). Set the layer's opacity level down to 10 - 20%.
11. Add more futuristic circle designs on corners with dark shades to make it unique from the rest of the designs.
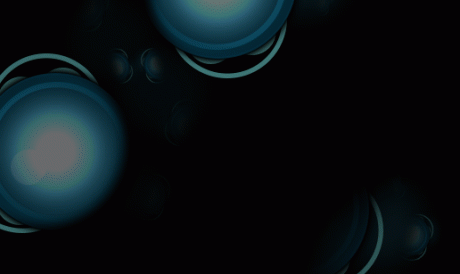
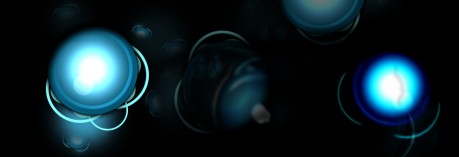
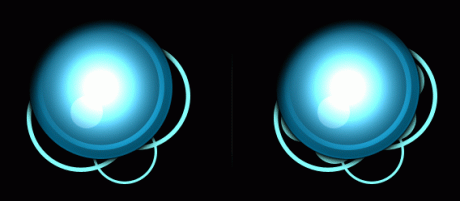
12. And there you go, we've just created a fantastic futuristic poster! Use it on your website, flyer or on a business card and have fun with it! You can see 2 examples made using this tutorial.