Step 1:
Let's start out by creating a new file. I used a 1000x300 pixels canvas set at 72dpi, and I filled my background with #FFF2B4 color shade. Now create a new layer then draw a large rectangle with #71B4FF color shade and 1000 x 160 px dimensions.

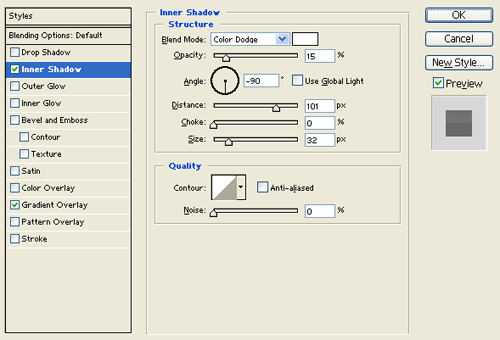
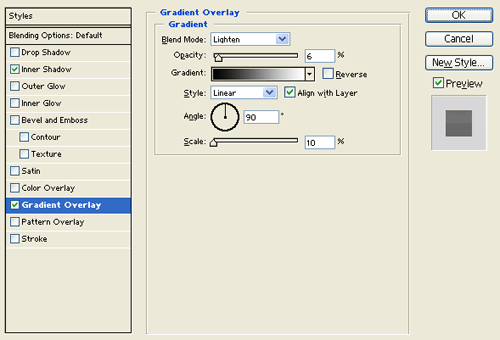
Step 2:
Under Layer Style(Layer > Layer Style) add an Inner Shadow and Gradient Overlay blending options to your large rectangle layer.

Step 3:
In a new layer draw a black rectangle across your canvas between the large blue rectangle design and the background.

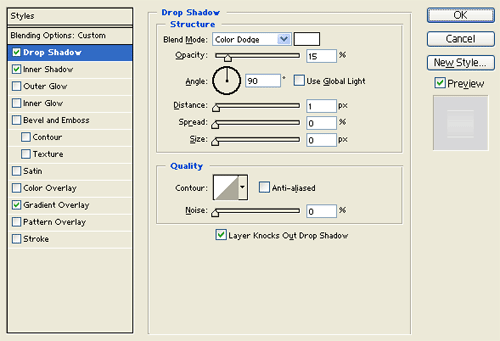
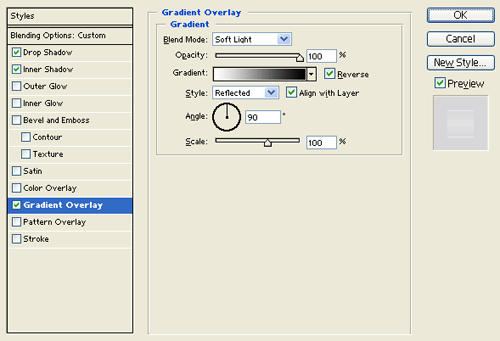
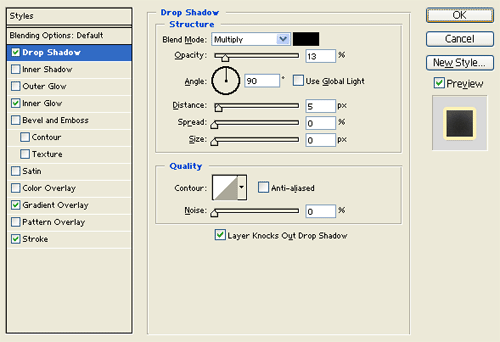
Step 4:
Under Layer Style(Layer > Layer Style) add a Drop Shadow, Inner Shadow and Gradient Overlay blending options to the black rectangle layer. Then set the layer's blending mode to Lighten.


Step 5:
Duplicate the black rectangle design layer twice and move them on the sand colored background, modify the layer's opacity level to 12-20%.

Step 6:
Create a new layer, using your Ellipse Tool draw a bunch of random white clouds on the blue header.
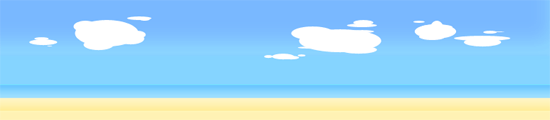
Step 7:
Now add small blurred clouds on the header design. Do this by making white clouds and apply Gaussian blur through Filter > Blur.

Step 8:
In a new layer draw a brown rounded rectangle with #563B1A color shade and 473 x 23 px dimensions.

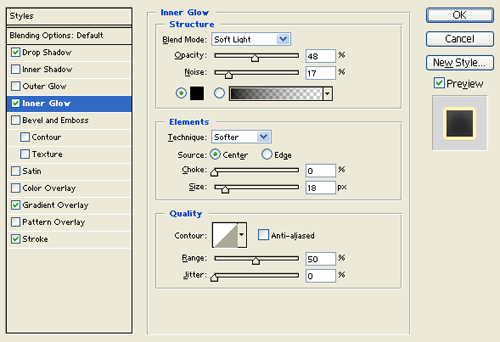
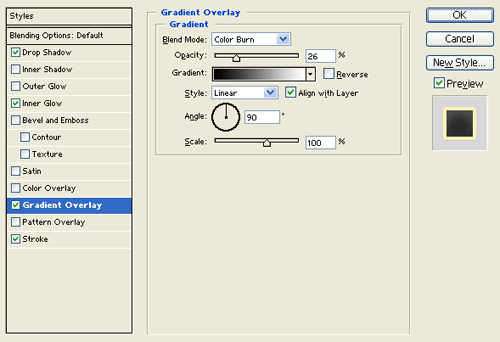
Step 9:
Under Layer Style(Layer > Layer Style) add a Drop Shadow, Inner Glow,Gradient Overlay and Stroke blending options to the brown rounded rectangle layer.

Step 10:
Select the Horizontal Type Tool then set the font family to Arial, regular, 13 pt, none and #FFAD37 color shade. In a new text layer type out your navigation links with spaces on the rounded rectangle design. Use #84D3FF color shade for alternate link color.

Step 11:
Now add a search box on the right side of the header.

Step 12:
Add a Plant design on the center of the beach header, grab the file here.
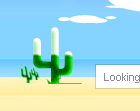
Step 13:
Select the Horizontal Type Tool then set the font family to Arial, bold, 40 pt, smooth and white color shade. In a new text layer type your website name on the header design. Then rotate the name by a little through Edit > Transform > Rotate.

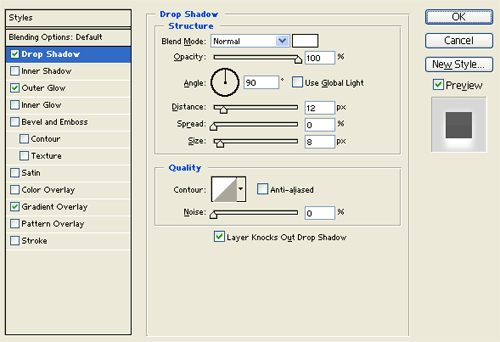
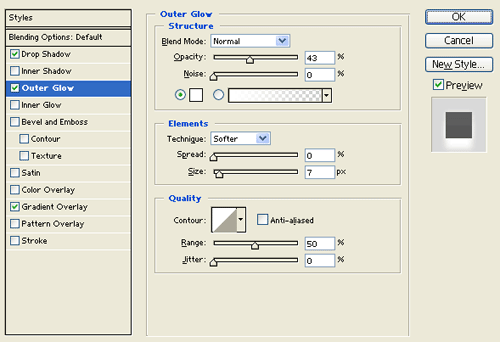
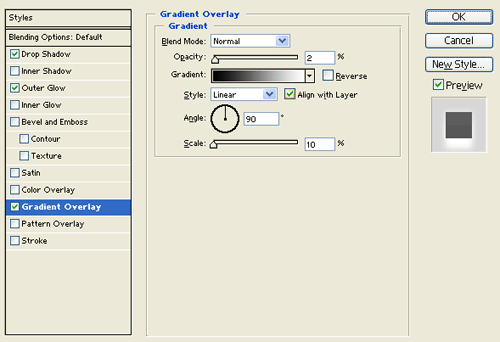
Step 14:
Under Layer Style(Layer > Layer Style) add a Drop Shadow, Outer Glow and Gradient Overlay blending options to your website name text layer.

Result:
