Here you will be taught how to make ice.
1. Open a new file, around 400 x 300 pixels. with a white background.
2. Use the lasso tool and make the shape you want your ice to look like. Make it black.

3. Go to Filter > Noise > Add noise
Use these setting:
4. Go to Filter > Pixelate > Crystalize
Use between 2-4.
5. Go to Filter > Stylize > Find edges
6. Go to Filter > Blur > Gaussian blur
Set it to about 1.
7. Go to Image > Adjust > Invert
8. Go to Edit > Transform > Rotate 90 CW
9. Go to Filter > Stylize > Wind
For the setting use WIND and make it either left or right, depending on what side you want the icicles hanging off.
10. Rotate it back the the way you had it before. Go to Image > Adjust > Color Balance
Use these settings
11. Go to Image> Adjust> Hue/Saturation
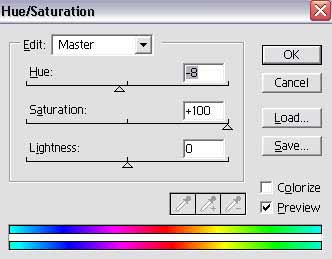
12. You can use different setting on the last 2 steps to make it any color your want. Thats it. Here my final result.