1) Make a 400x400 document. Now press "D" on your keyboard to reset the foreground and background colors to black and white. Fill the background with Black.
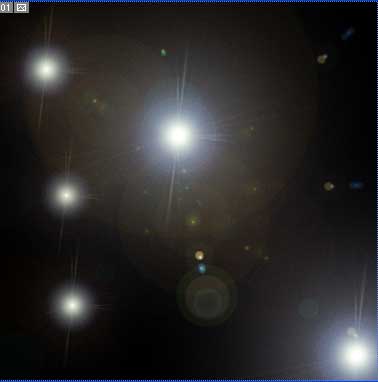
2) Now we add a 5 or more Lens Flares. Filter>Render>Lens Flare. Choose the 105 Prime Lens at the bottom. Add 5 lens flares to the background, use different sizes, just dont go over 100%. Once your done your background should look like:
3) Now duplicate the Background Layer and set Screen as the blending mode for the new duplicated layer.
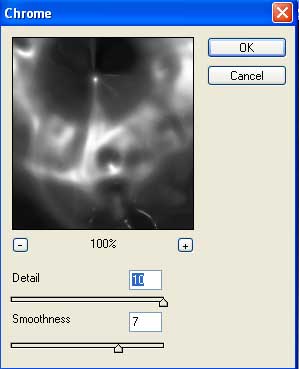
4) Now apply Chrome to the background layer (do not apply to duplicated layer). Filter>Sketch>Chrome. Use these settings:
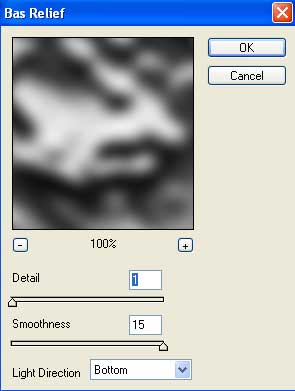
5) Now we add Filter>Sketch>Bass Relief to the Duplicated Background Layer. Use these settings:
6) Now apply Filter>Artistic>Plastic Wrap to the duplicated layer aswell, use these settings:

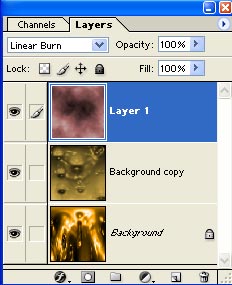
7) Now make a new layer and press "D" to reset to black and white. Go to Filter>Render>Clouds and set Linear Burn for the layers blending options.
8) Now apply Filter>Distort>Polar Coordinates to the Background layer. Select Polar to Rectangle.
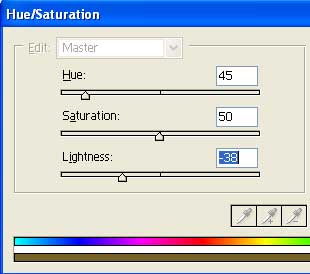
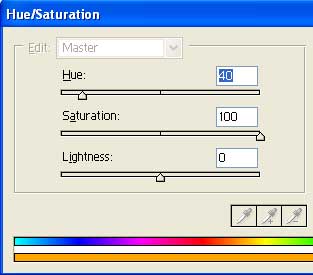
9) Now apply these color settings to each layer by pressing CNTRL+U with the layer selected.
Layer 1 Settings:

Background Copy Settings:
Background Settings:
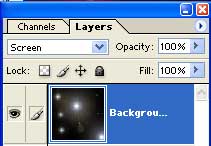
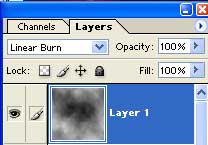
Your Layers window should now look exactly like mine:
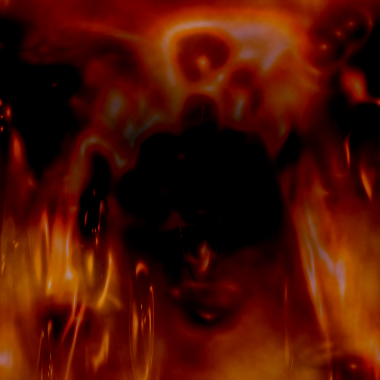
Voila you are done, your work should look similar to mine below: