


Here you will be taught how to create the flame effect I used on my banner and slash page. Although its not 100% the same method because I forgot what setting I used. Also there was alot of tweaking that im not going to get into for this tutorial.
1) Open a new window, make the size 800x600, with a white background.
2) Make your foreground color white and your background color black.
3) Go to FILTER > RENDER > CLOUDS
4) Go to FILTER > RENDER > DIFFERENCE CLOUDS.
5) Go to IMAGE > ADJUST > INVERT
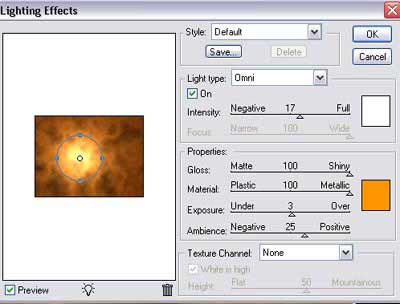
6) Go to FILTER > RENDER > LIGHTING EFFECTS and use these settings
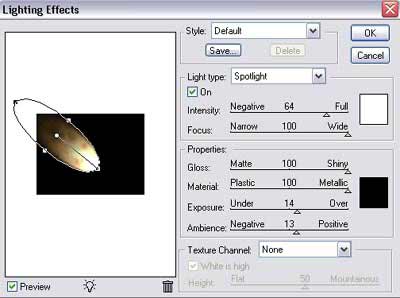
7) Go back to Lighting Effects and use this setting. Make sure you put the tip of the spotlight at the brightest part of your pic.
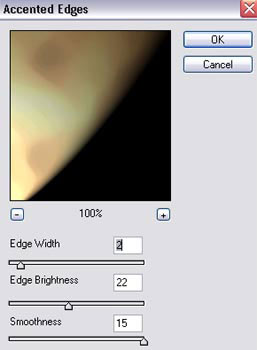
8) Now go to FILTER > BRUSH STROKES > ACCENTED EDGES and use these settings.
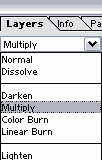
9) Now make a copy of this layer. And set it to multiply.
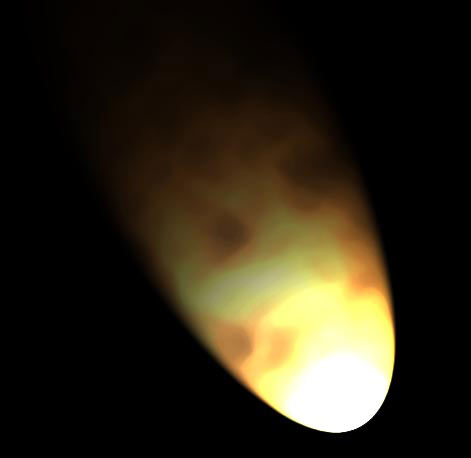
It should look something like this now.
9) I think this could use a little more red. Go to IMAGE > ADJUST > HUE SATURATE and just slide the bar around until you get to red and click ok.
10) I also don't like hard edges so im going to use FILTER > BLUR > GUASSIAN BLUR to make it a bit softer. Not too much blur, just enough to get those edges soft.
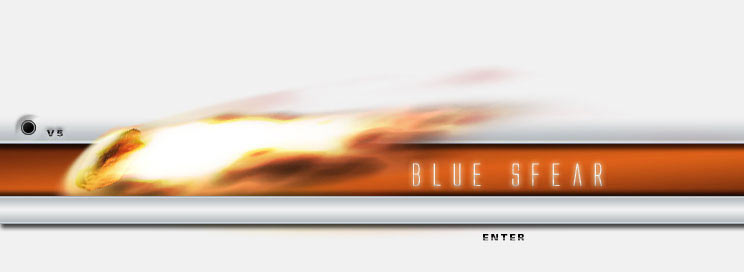
11) Now you add anything you want to the bottom of this, like a meteor, and with good blending and a little more work you can get something like this.
 Click to enlarge |