First open up a new document
with a transparent background.
I used 300x300. Create a new
layer.
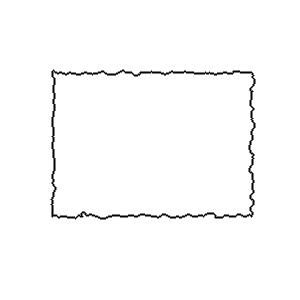
Create a new layer and fill it white. Next take
the pencil tool with a 1px size brush and draw the shape of a rectangle
with rough edges (your paper) in the middle of your rectangle.
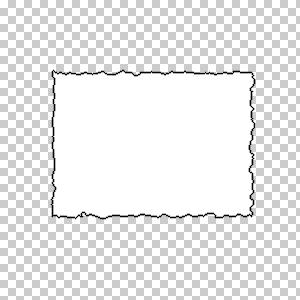
Now use get the magic wand
and select the white out side the shape you have just drawn(make sure you
are still on the layer with your new draw shape.
Now delete the selection and you should be left with an image like below.
Now comes the hardest part
of the tutorial. Adding the burn effect.
There are not many pictures
to help with the next bit as it will take a lot of practice. and trial and
error.
To achieve the burn effect
it takes some skill with the air brush and eraser tool.
Before you start air brushing
you want to create a new layer.
Select a small soft brush for
you air brushing.
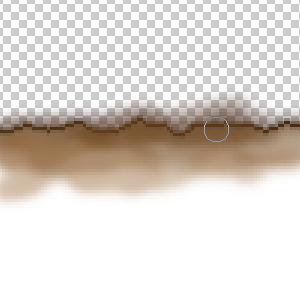
![]()
Then starting at the edges with a dark brown, air brush
to wards the center getting lighter.
Then you will want to remove
some of the air brushing by using the eraser so that some of the "paper
is left unchanged" it doesnt matter about going over the edges of the paper as we explain in the nexts step.
When you are finished air brushing,
press ctrl+g so that it sets the layer to a clipping mask, and this causes
any parts where you may of air brushed over the edge of the shape to be hidden.
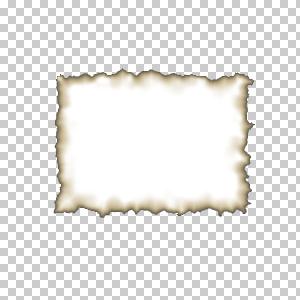
With some practice using the
air brush you can get results like this.