


Increase the size of a fire.
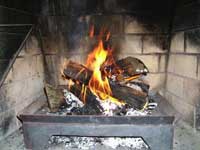 |
1. Open the image for editing. |
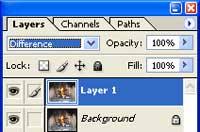 |
2. Duplicate the current layer (Ctrl+J) and change the blending mode of the new layer to Difference. |
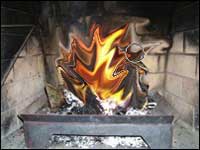 |
3. Using the Liquify tool (Filter> Liquify), select an appropriate brush size, click and hold from the center of the fire and drag outwards. Do this several times, dragging towards a different direction every time until you've enlarged the flames enough. |
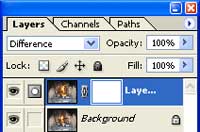 |
4. Add a layer mask to the current layer (Layer> Add Layer Mask> Reveal All). |
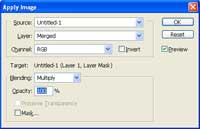 |
5. With the layer mask selected, use the Apply Image tool (Image> Apply Image) to apply the following properties:
Layer: Merged
|
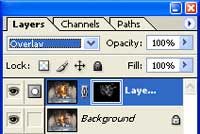 |
6. Change the blending mode of the current layer to Overlay. |
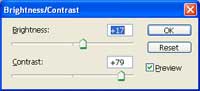 |
7. With the layer mask selected, use the Brightness/Contrast tool to tweak the visibility of the current layer. |
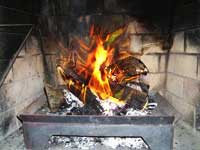 |
8. Rollover the image in this step to see the original image before this Photoshop technique was applied. |