This background can be prepared from scratch in few simple steps using just the filters in Photoshop.
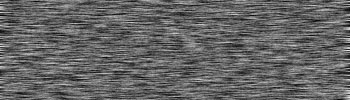
Open a file 350X100 in dimension. Fill it with black. (To fill press D, then Alt+ Del )

Go to Filter/noise/addNoise and use the following settings:
Amount: 175%
Distribution: Gaussian
Monochromatic

Go to Filter/blur/motionBlur and use the following settings:
Distance: 11 pixels
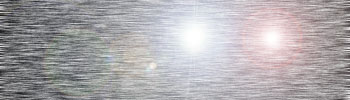
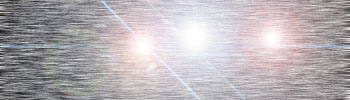
Now Filter/render/lensFlare and place the following flares on the image:
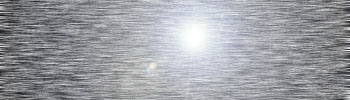
You have to repeat this step 3 times and use a different lensflare scheme each time.
1. 105mm Prime. 125%
2. 35mm Prime 125%
3. Movie Prime. 125%
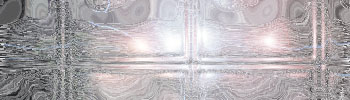
Next.. Filter/distort/glass and following settings:
Distortion: 9
Smoothness: 3
Texture: Blocks
Scaling: 100%
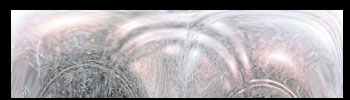
Final step… Filter/distort/PolarCoordinates and choose the following:
Polar to rectangular
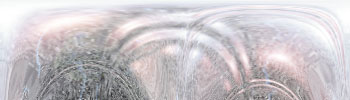
That's it, done.
Now you can experiment with different settings and filters to come up with a unique background for your signature.