Her
Home
Photoshop Tutorials
Web Layout
Trendy Content Box Design
Trendy Content Box Design
Added:Mar 17, 2005 Rating:
Less than 3 votes yet
Level: Beginner Software:
Photoshop
Introduction
Making a nice trendy content box. Make your content boxes look
like a proffetionals box. |
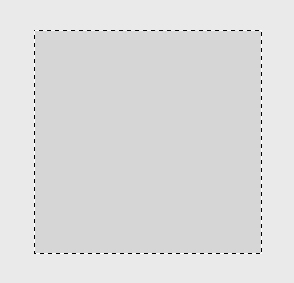
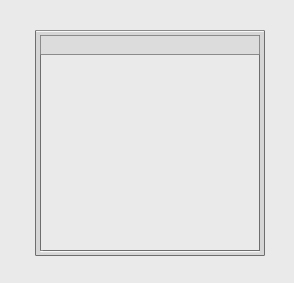
Step 1
First of all you will need to start of with a new blank document,
about 500 by 500 pixels, and fill the background with #EAEAEA. Now select
the Rectangle Marquee tool and make a selection as show below. Make a new
layer, Layers >> New Layer and then fill the selected oval in this
colour #D6D6D6. |
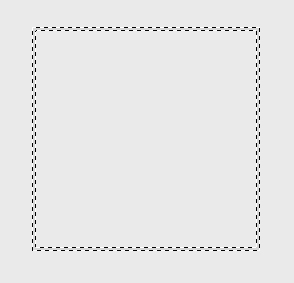
Step 2
Now go to [Select > Modify > Contract, and enter the number
4] You will notice that it has selected 4 pixels inside of the box. Delete
the selected area (4 pixels inside the box). And on your Layer Palette.
While holding CTRL click on the layer again. This will then select the border. |
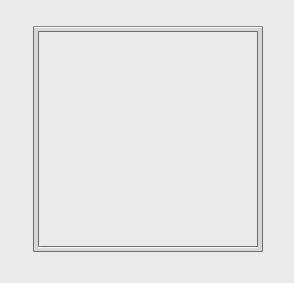
Step 3
Now go to [Layer > Layer Style > Blending options > Stroke]
once your there use these
settings: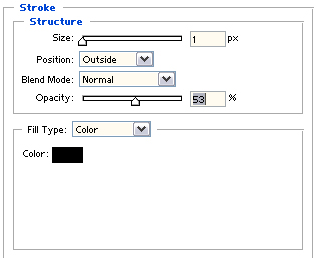
You will now have an outline to you box.
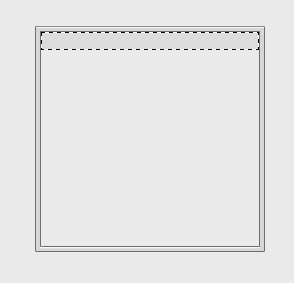
Now to add a little tiny effect to it. Simply create a new layer, select
the line tool. The line tool should have THESE settings. Once you've done
that make your foreground white #FFFFFF and the while holding SHIFT, start
from the far left to the far end, just below the top content box. Looks
something like the picture below..? Good, lets carry on... |
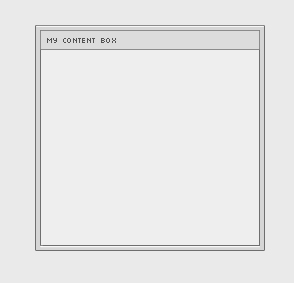
Step 4
Now make a new layer and a selection like mine on the picture below
and add the same colour as the border which is, #D6D6D6. You should have
something roughly the same as mine. If you have carry on. |
| Now go to [Layer > Layer Style > Blending Options >
Stroke] and use these
settings:
You now should have, roughly, something the same as mine: |
| Now to add in a small little pixel text. Then call
it whatever you want. |