

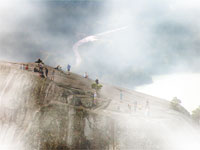
Add realistic clouds that blends into your photographs.
 |
1. Open the image for editing. |
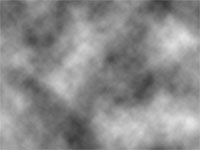 |
2. Create a new layer and apply a "Clouds" filter (Filter> Render> Clouds). If you're working on a high-resolution file, enlarge this layer until the clouds are bigger using the transform tool (Ctrl+T). |
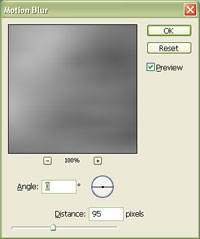 |
3. Apply a "Motion Blur" (Filter> Blur> Motion Blur) with the "Angle" at "0º" and the "Distance" at a value of around "100" pixels. Click OK. |
 |
4. Set the current layer's blending mode to "Screen". |
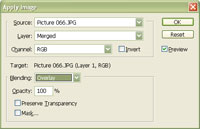 |
5. Use the "Apply Image" tool (Image> Apply Image) with the following properties:
Source: filename
Click OK. |
 |
6. Create a new layer and apply a "Clouds" filter (Filter> Render> Clouds). If you're working on a high-resolution file, enlarge this layer until the clouds are bigger using the transform tool (Ctrl+T). |
|
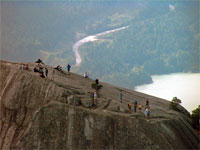
7. Set the current layer's blending mode to "Screen" and decrease the opacity of the top two layers to decrease the visiblity of the clouds. Rollover the image on the left of this step to see the original image before this technique was applied. |