


Simulate the effects of the automatic white balance feature found in digital cameras.
 |
1. Open the image for editing. |
 |
2. Duplicate the current layer (Ctrl+J) and apply an "Average" filter (Filter> Blur> Average). |
 |
3. Invert the layer (Ctrl+I). |
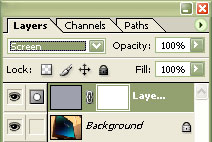 |
4. Add a layer mask to the current layer (Layer> Add Layer Mask> Reveal All) and set the blending mode to "Screen". |
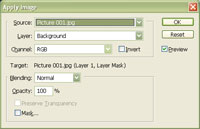 |
5. With the layer mask selected, use the "Apply Image" tool (Image> Apply Image) to apply the following properties:
Source: filename
Click OK. |
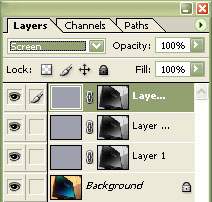 |
6. Duplicate the current layer (Ctrl+J) twice. |
|
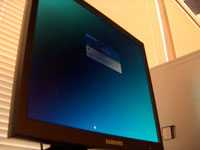
7. Rollover the image on the left of this step to see the original image before this technique was applied. |