

Sharpening shadows reveal details without sharpening highlights. Clouds and light coloured skins remain soft while dark areas are sharper and more visible.
 |
1. Open the image for editing. |
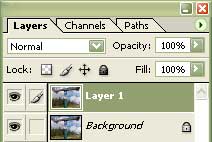 |
2. Duplicate the current layer (Ctrl+J). |
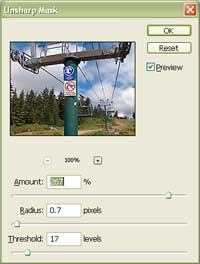 |
3. Apply an "Unsharp Mask" filter (Filter> Sharpen> Unsharp Mask) and sharpen the image accordingly. You do not worry about over-sharpening light areas in this step. |
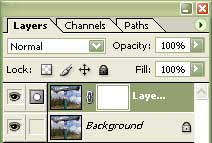 |
4. Add a layer mask (Layer> Add Layer Mask> Reveal All) to the current layer. |
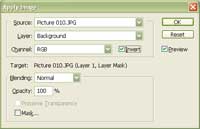 |
5. With the layer mask selected, use the "Apply Image" tool (Image> Apply Image) to apply the following properties:
Source: filename
Click OK. |
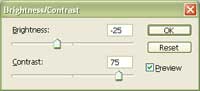 |
6. With the layer mask still selected, use the "Brightness/Contrast" tool to apply the following properties:
Brightness: -25
Click OK. |
|
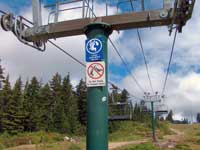
7. Adjust the opacity to adjust the sharpness. Rollover the image on the left of this step to see the original image before this technique was applied. |