1. Make a new picture (CTRL+N) i used the format 477x250 pixels.
2. Press 'D' to reset the colors
3. Press ALT+BACKSPACE to set the background black
4. Press 'X' to switch place between the black and the white color.
5. Click on the 'Horizontal Type Tool' and type a text in the middle of the image. (look at the image below)

6. Click on Filter > Stylize > Wind, a window will pop up and ask you if you would like to razterize your text-layer, press OK, then OK again in the wind window.
7. Click on Edit > Transform > Rotate 90 CW.
8. Now do number 6 and number 7, 7 times. Do number 7 one more time and your image should look something like this.
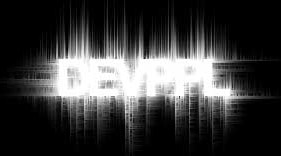
9. Hold down CTRL+SHIFT and drag the text to the right so you will center it.
10. Click on Filter > Distort > Ripple, set Amount to 100 and Size to Small, OK.
11. Duplicate the layer. Click on Filter > Distort > Ripple, set Size to Medium, OK, set this layers' 'Blend Mode' to 'Overlay'. (look at the image below)
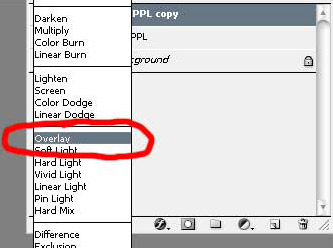
12. Duplicate the layer. Click on Filter > Distort > Ripple, set Size to Large, OK, set this layers' blending option to 'Exclusion'.
13. Make a new layer, set the blending options to 'Overlay'.
14. Choose a color and paint the whole layer. (I choosed green in my example)
15. Press 'D' to reset the colors, now type the same text you typed in the beginning of this tutorial, make sure its black, and place it in the middle of the image.
16. Double click on the layer and click on 'Outer Glow', click in the colorbox and choose white then OK. Set Opacity to 66 and Size to 10, OK.
17. Set the Opacity of the textlayer to 25%, and move the textlayer down below the green Overlay-layer. This is how the layer-order should look like:
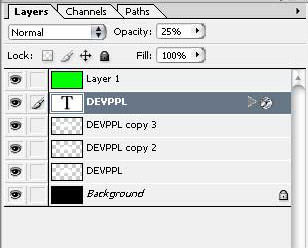
Here is my final result: