1. Begin with a new file in greyscale. Then take the Text Tool and type in your text.
2. Go to Filter>Noise>Add Noise and set the Amount to 140 and Distribution Gaussian. Then press Ctrl+E to Merge Down the layer.
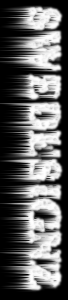
Now should it look like the image below shows.

3. Go to Filter>Pixelate>Crystalize with the Cell Size 3.
4. Then go to Filter>Stylize>Find Edges.

5. Go to Filter>Blur>Gaussian Blur with 0,8 Pixels.
6. Rotate the image, Image>Rotate Canvas> 90 CW and then press Ctrl+I, then go to Filter>Stylize>Wind with Method Wind and Direction from the Right.
7. Then rotate back the image, Image>Rotate Canvas>90 CCW.
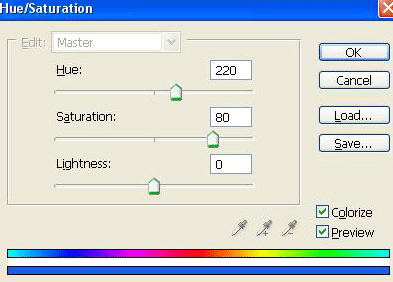
8. Then change the mode to RGB Color, Image>Mode>RGB Color, press Ctrl+U and begin to click Colorize and set the Hue to 220, Saturation to 80 and Lightness 0.
And you are done!
This is what i came up with.