 |
1. Create a new document and fill the background layer with black. For this step, I've created an 800x600 pixels document. Press the D key on your keyboard to ensure that the default foreground (black) and background (white) colours are being used. |
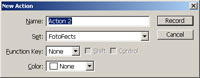 |
2. In the Actions pallet (Alt+F9), create a new action. |
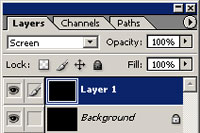 |
3. With the action recording, duplicate the current layer and change the blending mode of the new layer to screen. |
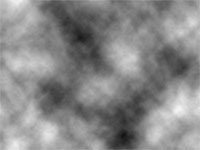 |
4. Add a Clouds filter (Filter> Render> Clouds). |
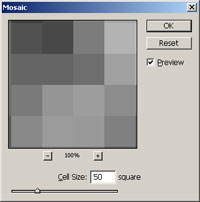 |
5. Add a Mosaic filter (Filter> Pixelate> Mosaic) with a cell size of 50 square. |
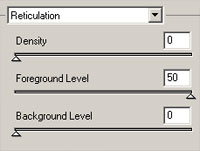 |
6. Apply a Reticulation filter (Filter> Sketch> Reticulation) with the following properties:
Density: 0 Foreground Level: 50 Background Level: 0 |
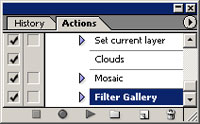 |
7. In the Actions pallet (Alt+F9), stop recording the action. |
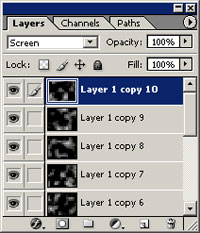 |
8. Play the previously created action about 7-10 times until your screen has been filled with tiles. |
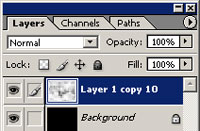 |
9. Link all of the layers except for the background and merge (Ctrl+E). Photoshop CS2 users may simply select multiple layers and Merge (Ctrl+E). |
 |
10. Apply a Photocopy filter (Filter> Sketch> Photocopy) with the following properties:
Detail: 24 Darkness: 1 |
Her
High Tech 3D Tiles
Added:Jul 12, 2005 Rating:


 Level: Experienced Software:
Photoshop
Level: Experienced Software:
Photoshop
Level: Experienced Software:
Photoshop