


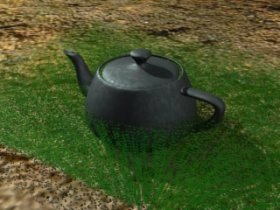
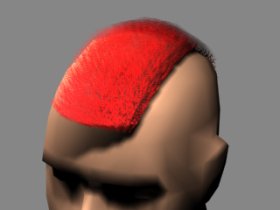
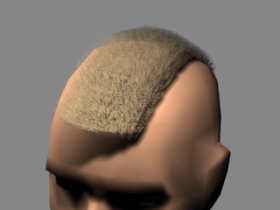
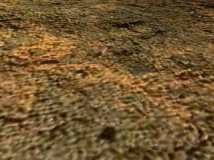
To get started: the grass in figure 1 contains ten, the hair in figure 2 and 3 960 faces.
So how do we achieve this? The answer is short and simple: alpha maps.
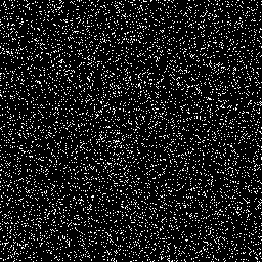
All images where created by using an alpha map like the one shown in figure 4. (And the right geometry setup. ;) That's why the tutorial does not end at this point.)
We now will examine step-by-step how to create low-poly grass as seen in figure 1. The same technique has been used to create the hair in figure 2 and 3.
We assume you have a basic knowledge of the rendering package you're working with. Everything you'll need are geometry primitives and alpha maps.
Now on to the grass.
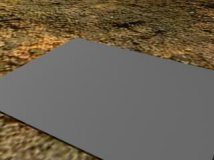
We'll first create some kind of ground plane to put our grass on. In this case this' a simple plain with some mud-texture in the diffuse channel.
Next we create a second plane (the basis for the grass) somewhere in the center of our ground plane (and a little above, we won't see grass below the surface, will we?).
Now open the material editor.
To get a better look, create a noise map with differing greens in the diffuse slot (alternatively, use some grass texture, this will give you an even better look). Put the black-and-white noise map from figure 4 in the opacity channel and apply the material to your grass plane.
You won't see much, if you hit the render button but let's take a step back and think a little about grass and hair.
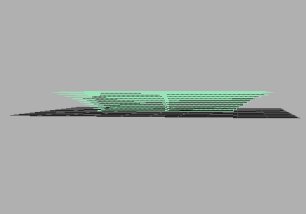
The first thing that comes in mind if you think about how grass or hair is "constructed" (we're talking about the "real world" here ;) ) are single blades or strands from the basis to the end. You definitely will run into problems if you try to model this. But if you don't think about grass constructed out of blades but as a massive block as a whole (and now we talk about CG-world) you can break up your grass into single layers or slices parallel to the ground plane. The human eye and brain is foolish enough, to automatically connect these single layers into our mentioned "massive block".
So the next step is obvious: we copy our grass basis (in the example case 10 times) with a small offset in our "grow"-direction:
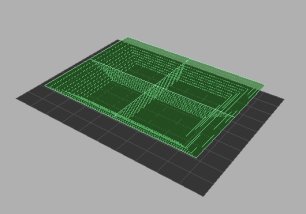
(The planes are set to two steps in x/y direction to give a better impression on what's going on here. You don't need these divisions, except you are going to use your grass in some gouraud-shader environment like VRML.)
Another thing done here is the scaling of the upper planes so our grass-"blades" won't look like vertical lines put one to another.
And: that's it.
You now should have something like figure 1 except the teapot.
Some notes: While experimenting with this technique, I found out that the "configuration" of the alpha map is a little critical. If it don't has the right mixture of black and white pixels, you'll end up with either some dots in the air or a massive green block. But try this out yourself (or just use the map from figure 4).
The same technique was used to create the hair in figures 2 and 3. The planes where constructed parallel to the top of the head, offset and scaled a little and little and voilá ;).
So that's it for now, have fun and hair.
If you have any questions or comments about this tutorial, don't hesitate to contact me: [email protected]
[Grab the zipped tutorial here (69KB).]