1. First start with a 500x500 window and make the background black.
2. Next add four Lens Flares (Filter-->Render-->Lens Flare) to the top, bottom, left and right of the window. (Just like a compass, North,West,South,East.) (The Lens Flares are 50-300mm Zoom with 100% brightness.)
3. Then Twirl (Filter-->Distort-->Twirl) it 690 degrees.
4. After that use Polar Coordinates (Filter-->Distort-->Polar Coordinates). Make it Rectangular to Polar.
5. After that, Press Ctrl+U and click the colorize box and choose whatever color you decide.
6. Next right click that layer and select "Duplicate Layer".
7. Next use Filter>Distort>Polar Coordinates and set to Polar to Rectangular.
8. Then Press Ctrl+U and pick a different color of your choice.
9. Set the layer Blending Mode to "Lighten".
10. Merge Down (Ctrl+E)
11. Then Make a new layer, not a Duplicate. (Shift+Ctrl+N)
12. Repeat Steps 2-10. (Remember now that you have to set all the layers' Blending Modes to "Lighten".
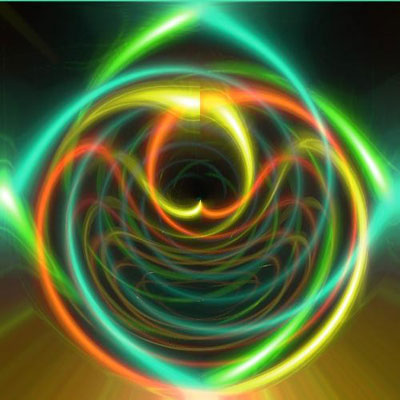
In the End it should look like this of some sort.