One of these days while looking through TemplateMosterâ??s vast collection I came across one or two templates with a very curious effect. The effect I'm talking about is when a single picture is comprised of smaller rectangles. Without hesitation, I decided to copy the effect in Photoshop and relate my steps in this tutorial.
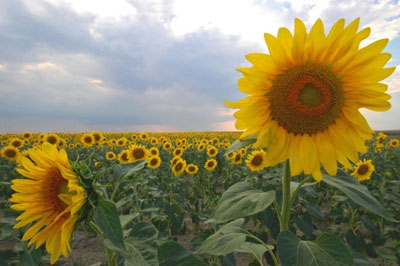
For starters, we'll need a picture, which will serve as a basis for the rectangles. I liked this sunflower one a lot.
Open it in Photoshop, go to Channels Panel and create a new channel. Select Rounded Rectangle tool in the top left hand corner and draw a medium-sized rectangle.

Holding down Ctrl, left click the thumbnail of channel Alpha1. After that select Move tool and holding down Ctrl+Alt+Shift use the left mouse button to move the rectangle to the right. You should get a thin black 4pixel line between the rectangles.

Repeat the procedure until you have the line filled with rectangles.

Holding down Ctrl, left click the thumbnail of channel Alpha1. After that, using the Move tool and holding down Ctrl+Alt+Shift move the rectangles with the left mouse button so that a 4pixel black line remains between the rows. Repeat this action until you fill up the whole space.

Select all the white rectangles. To do this, left-click the thumbnail of Alpha1 channel while holding down Ctrl. Go back to Layers Pallete and click the thumbnail of your picture. Select the Marquee tool and move the selected area the way you want. You can also use the Transform Selection to modify the selection in your own most suited way. I liked my original selection so I decided to keep it.

After that, duplicate the selection and hide the layer containing the full picture. Here's what you should get:

Basically, the tutorial is over. From this point on, you have no restrictions to follow you fancy. You can delete a few cells of substitute some texts/inscriptions for them, or outline them in a certain way creating menu buttons.

