


This tutorial will teach you how to change the color of a car, no adding flames or rims just changing the color for now.
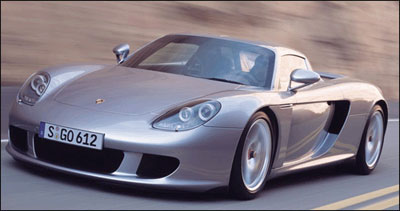
That's the picture I'm using and i will make it pink.
Step 1
Select the pen tool, and at the top select this.
![]()
Step 2
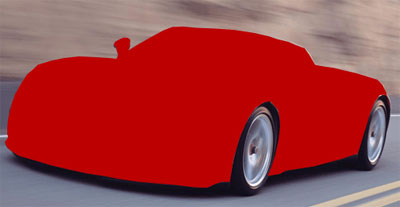
Now start drawing all around your car, Don't worry about going all over the RIMS or windows, we can erase that later with no problem. When you have drawn round the edges the car, create a new layer then right click inside the area you drawn and right click > Create vector mask this will create a new layer of what you just drawn!
Then get your paint bucket tool and paste the color you want, it will look rubbish at the minute, but set the opacity for the vector mask to about 60% so you can see what you have done and carry on.
It should looking something like this.
Step 3
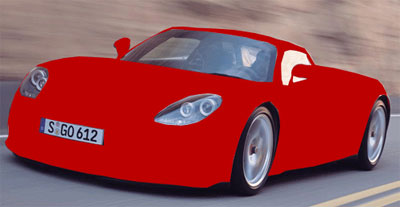
Using the following settings and staying on your vector layer, cut around every window.
![]()
Now with your new settings and if you haven't turned down the opacity for the Vector mask do it now so you can see where your cutting, Start cutting around windows, head lights, License plate and wheels if you went over the wheels.
Your car should now look like this will opacity on the vector mask turn to 100& and with whatever color you filled it with at the start!
Step 4
Now just set the layer blend from "Normal" to "Soft overlay" or try some others but soft overlay works best in my opinion.
How to change blend option:

Here's my final!
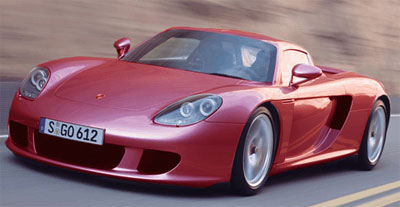
My drivers side window looks messed up, it's just the image with the sun in the back looks really bright, also there's a black thing in front of the searing wheel, it's just the window wipers i think, that was on the first image too.