1. Open your file.
I used - 400x120/RGB/Transparent
2. Get the Bucket or Fill Tool,and fill it with Black.

3. Now, get the Gradient Tool and from the bottom-up make the fill.
Make sure the Gradient Tool has these settings.
Mode: Difference
Opacity: 100
Make sure the Dither box is checked
Make sure the Transparency box is checked

4. Make a new layer and make circles like this. Also cutout smaller circles inside them.

5. On the layer with the circles get the Gradient Tool and go from Halfway-down
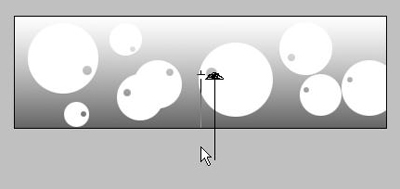
The bubbles should now be black instead of white.
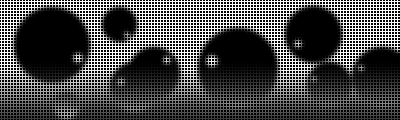
6. This step is optional,
Go to Filter>Blur>Gaussian Blur with these settings Radius: 2.0

7. Make a new layer and fill it with any pattern you want.
Invert this to make it like this

After you fill it,lower the Opacity,I made it 8% you can use whatever you want.
8. Make another layer. Select the Elliptical Marquee Tool and make an oval shape form corner to corner.

Now select the Gradient Tool and from Bottom-Up use it.
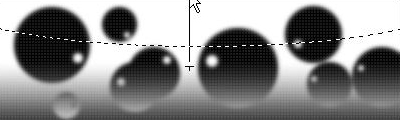
you should get this

Lower the Opacity on that layer to around 10-30%. And you are done!

Here is your final result!