

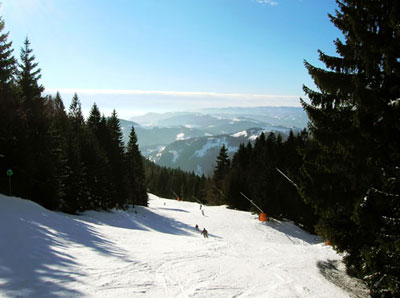
This is the finished product from this tutorial, a picture with snow.

First, open your picture, I used this one:
Now create a new layer, above it, and call it "snow". With black and white as foreground and background color (press D), select the area of your picture and fill it with black (on the snow layer). Now go to Filter > Render > Difference Clouds.
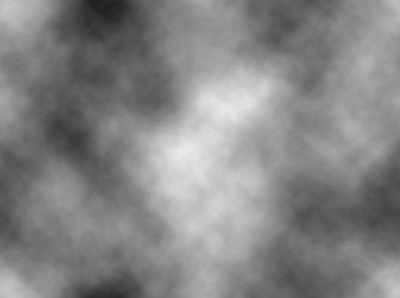
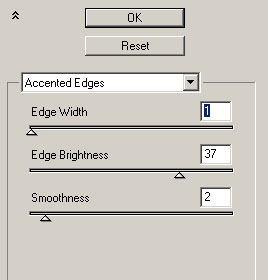
At the snow layer, go to filter > noise > add noise, use about 16%, gaussian and monochromatic. Now go to filter > brush strokes > accent edges, and use the following settings.
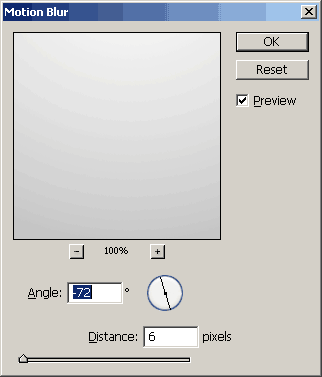
Go to Filter > Blur > Motion blur now, just like the picture.
Change the "snow" layer mode to "Screen". Now you can erase the bottom of the snow layer with a soft and large brush.
Hover over to see "before" image.
It's done! You can also add a little bit of noise now if you want. Realize that changing some parts of the tutorial you can change everything in your snow, the direction for which it falls, for example, you change on the motion blur angle.
I hope you enjoyed the tutorial.