Quick step by step
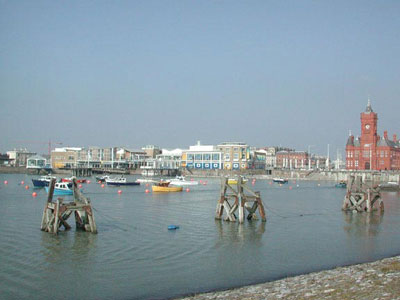
Apply levels and crop the image as necessary.
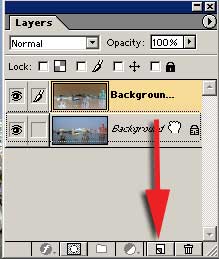
2 new layers above the Background Layer
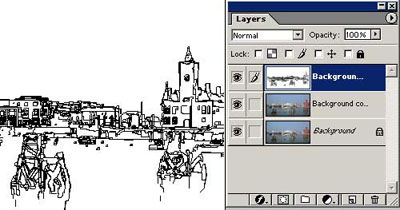
Top layer:- Filter> Blur >Smart Blur radius 20 Threshold 50 > High > Edges only - click OK.
Then invert using Ctrl + I

2nd layer......Filter> Brush strokes > Sumie. Click OK, or try experimenting with the settings.
You can also try some of the other filters from the Brush Strokes menu.
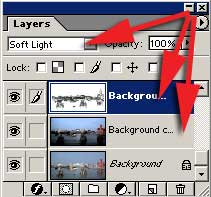
Blend top and second layer using blend mode > soft lights and reduce the Opacity if required.
Create a new empty layer above the top Layer. Click on
Merge Visible and hold down the Alt key so that all the layers merge into one new layer.
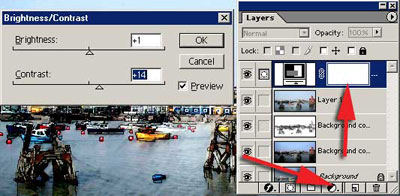
Adjust Brightness, Contrast and Hue/Saturation. Use the Layer Adjustments for this.
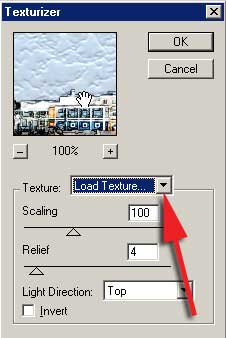
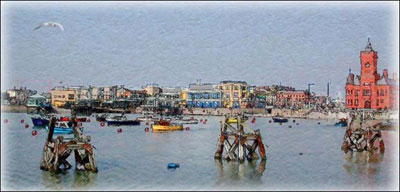
Add texture to taste, a soft vignette and seagull ......finished.