Sometimes, admiring the photos of our favorite celebrities we want to play with them a little in Photoshop: to add some effects and make them look especially beautiful. Or just to change in some other way. In this tutorial I will describe how to create the maze effect.
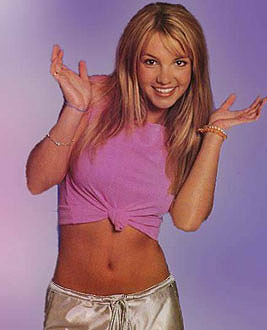
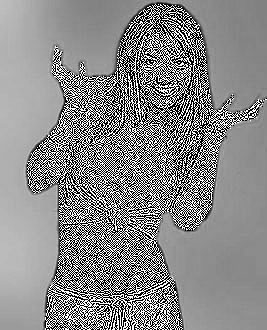
So, open the photo you like. I've chosen the photo of Britney Spears for my experiments.
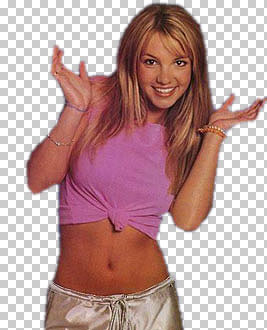
Duplicate the layer (Ctrl+J), hide one of them (click on the eye symbol near the background layer) and then, with a help of Extract tool (Ctrl+Alt+X) cut out the contours of the girl. Read this tutorial if you don't know how to use extract tool. Don't worry - quality of cutting out doesn't play an important role.
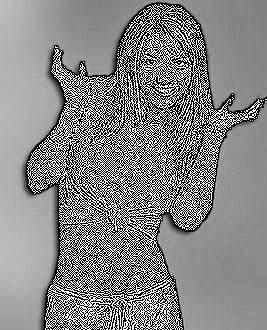
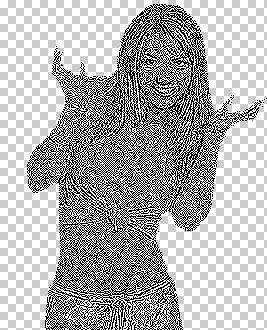
Desaturate (Ctrl+Shift+U) the layer. Now, apply the Sharpen filter (Filter>Sharpen>Sharpen). Press Ctrl+F (applies the last used filter) about 10 times, until the image turns into black and white lines and dots.
Now you can add some background . For simplicity I used the original background of the picture, but made it black-and-white. Unhide the layer with the original picture (click on the place where eye symbol was placed) and desaturate it (Ctrl+Shift+U).
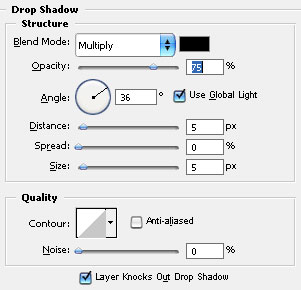
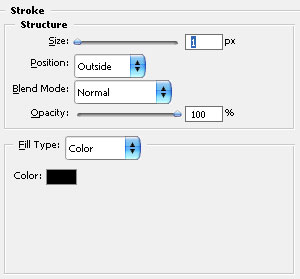
To create more convincing outlines you can apply Stroke with one pixel black border and also add the shadow. Choose the layer with cutout Britney and go to Blending Options (Layer>Layer Style>Blending Options). Set out the next parameters for Stroke and Drop Shadow:
Here is what I've got:
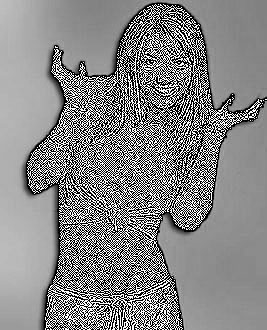
The effect is ready . The only thing I'd like to notice for this picture is not enough clear border between her hand and body. Create the new layer (Ctrl+Shift+N) to correct it. Choose Pencil tool (B) 1 px wide of black color. Draw the line at the end of Britney's hand.