Developing an
understanding of the subject and discovering how to best portray its
character is a crucial step in composing your image. Is the subject
contemporary, modern, classic, historic, minimal, and so on? Depending
on the design of the structure, different sensibilities may apply. And
while we don't have the capability to put down our cameras and walk
around the space, we do have an extraordinary freedom to place any
number of cameras in our virtual space.
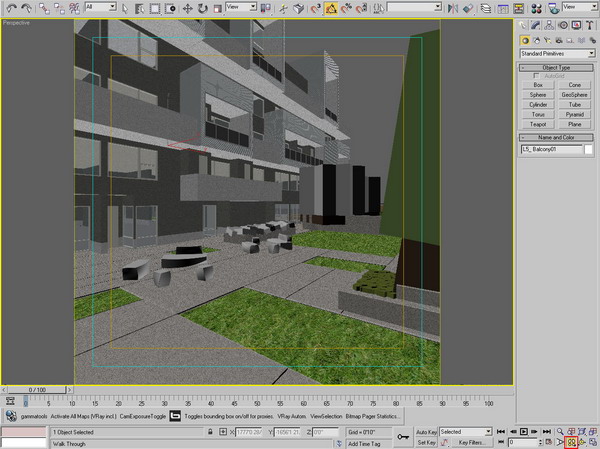
Additionally, the new Walk Through Camera is a useful tool for taking a
quick, informal virtual walk around the model to discover potential views and
photogenic elements.
Using the Walkthrough Camera
is a great way to "discover" the virtual space.
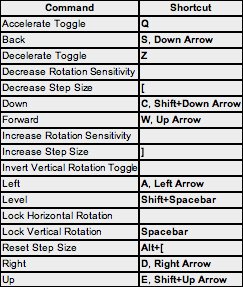
Below are
the shortcuts for using the Walkthrough Camera.
(Note: the
Level Command is very useful, especially for straightening verticals.)
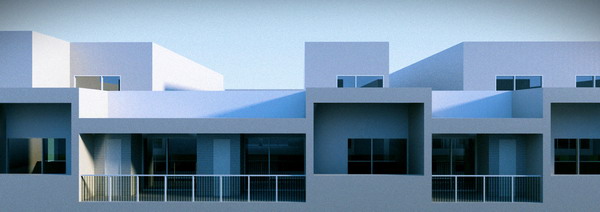
It is also useful to set
up a quick Sunlight System
to light the scene in a quick but realistic way, even if the materials
are simple colors and shades. The interaction of the light with the
scene is an important aspect of the composition. Sometimes the patterns
and dynamic lines created by light and shadow can be more interesting
than the structure itself.
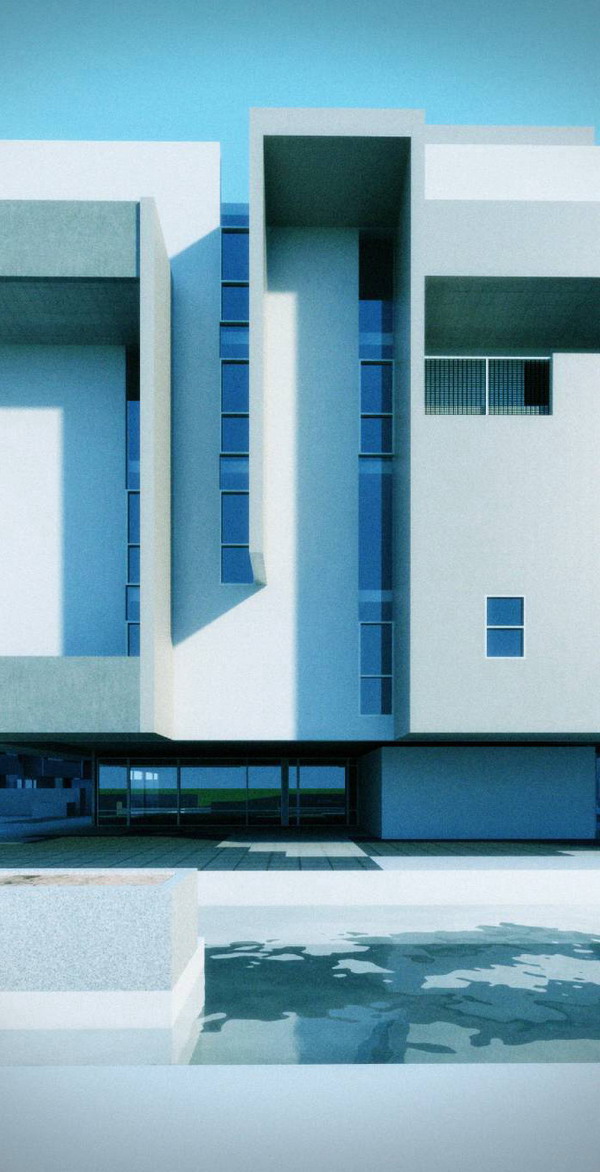
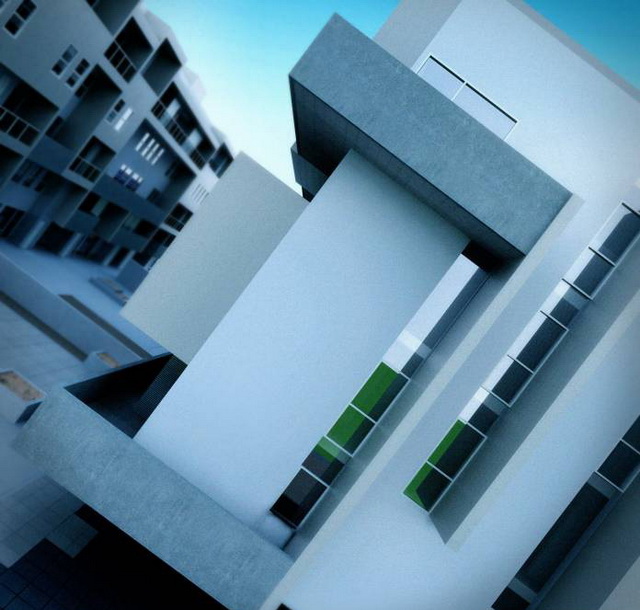
Keeping in mind our Rule
of Thirds and Diagonal Rule from our earlier tutorial, we see that the
same notions apply with exteriors.
Rule of Thirds
Diagonal Rule
Experimenting
with various camera lenses and aspect ratios can also create engaging
compositions.
Exaggerated Aerial
Dutch Angle (Rotated
Horizon)
Modeling (ACAD/Revit/SketchUp Into Max)
1. Introduction
There are many
different ways of importing files to 3DS Max. Many people have their
own methods, but you'll find the best process we've used via AutoCAD, Revit, and SketchUp.
2. ACAD
a. Method A
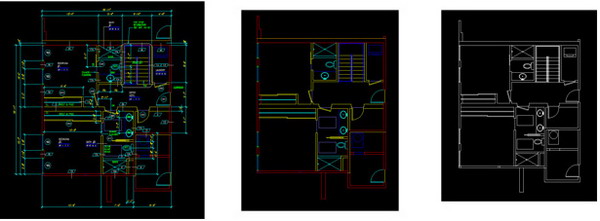
Basically,
this method is about how to clean the CAD files before you import into
3DS Max so that you can use this CAD file as reference and modeling in
3DS Max
- Clean up CAD files that you don't need such as electrical
installations, structural elements, notes, specifications, etc.
- There should be no "XREF" file present.
If so, you need to insert or bind or you can try the "include XREF"
option but we prefer binding XREFs and cleaning this XREF file as well.
-
Sometimes there are blocks in the CAD files. You can either "explode"
them or you can turn on "Convert blocks to groups" option when you
import into Max.
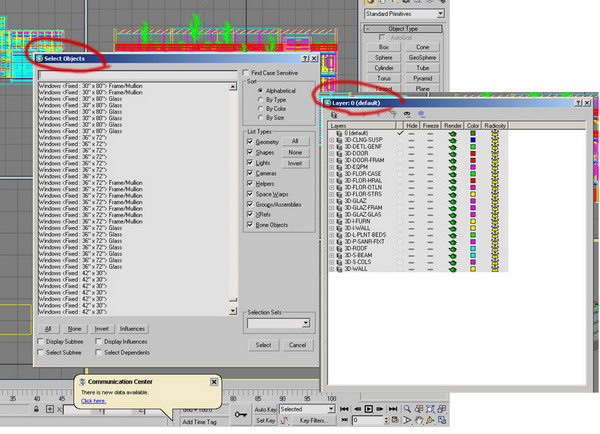
- Make separate lines for each shape. Max will
import your file as separate lines and then organize your layers by the
same components (we normally make layers by materials) such as walls,
floor, ceiling, trim, wood, stone, fabric etc.
- When importing
files into Max, we usually use "Legacy AutoCAD" or "AutoCAD Drawing".
It depends on how you are going to use them.
- Let's do "Legacy
AutoCAD" for this example. There is "Combine Objects by Layer." That is
why you need to use layers in AutoCAD, so that Max imports the object
by layers as well.
- Freeze the imported CAD and trace the line
that you are going to create.
- Now you can apply "Extrude" modifier
into this line to create walls, etc.
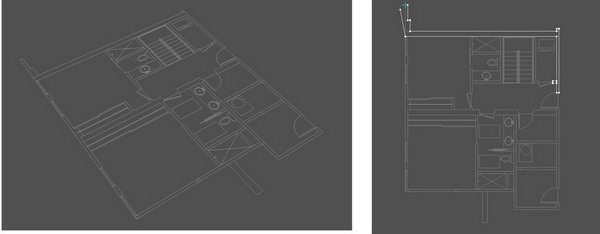
b. Method B
This
method is more about interactivity between CAD files and Max. In other
words, if you change something in the CAD, Max will instantly update
based on the CAD file. In order for this concept to work, there are
certain things that you need to consider and understand about the
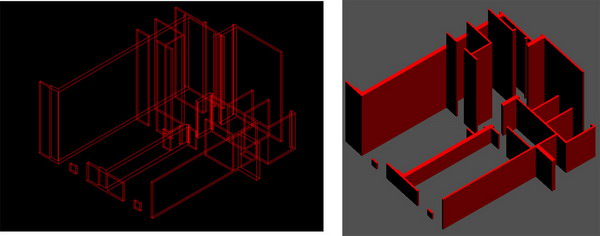
concept. The most important thing would be "polyline."
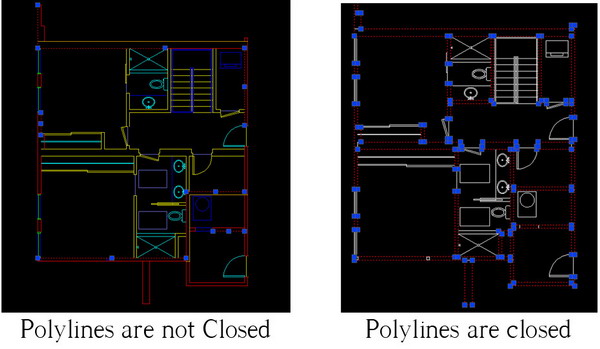
- Polyline
must be closed. In most CAD drawings, polylines are not closed or are
single lines drawn on top of each other. So you need to redraw clean,
closed polylines by layers.
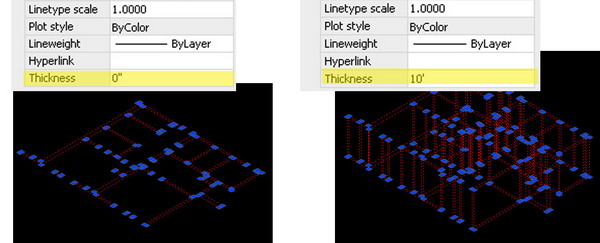
- In Polyline options, there is
"Thickness." Not only will you be able to create a simple 3D geometric
shape, but also it will instantly update in 3DS Max.
- The
"thickness" is basically how much you can extrude so if you type 10'-0"
then it will extrude from polyline and create a 3D form.
- Now organize the layers by components
and you're ready to import it into 3DS Max.
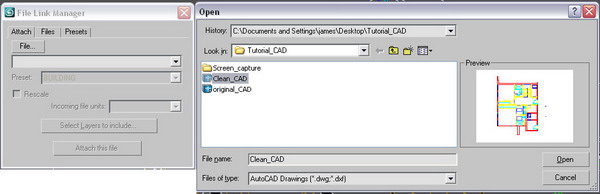
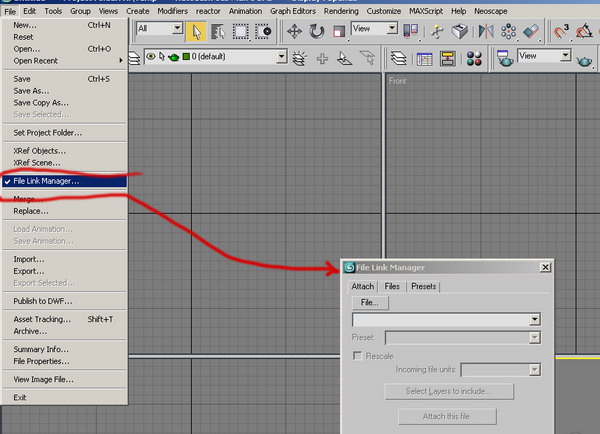
- In Max, go to
"File" and select "File Link Manager."
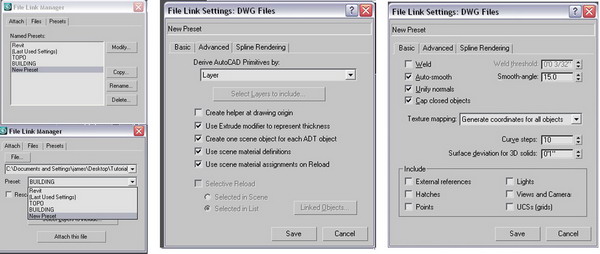
- In "File Link Manager" you will be
able to customize, preset and link the file.
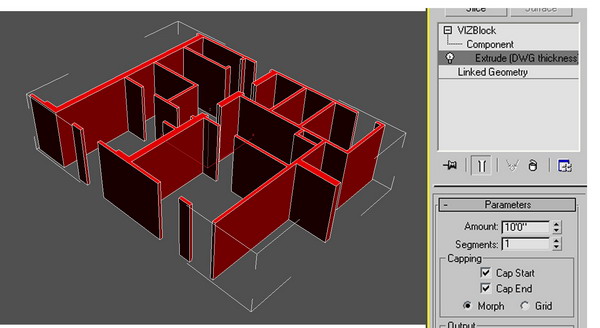
- As you see, you will be able to tell
the polyline that has "thickness" as it will have the extruded
modifier automatically applied.
- Let's give different thicknesses to
certain polylines in CAD, and let's move some of the wall vertexes.
Then reload the CAD file in Max.
- You will notice it instantly update
whenever you save changes in the CAD.
3. Revit
This
part of the tutorial will explain how to import a Revit model in 3DS
Max. It expects little experience with Revit and a solid understanding
of 3DS Max.
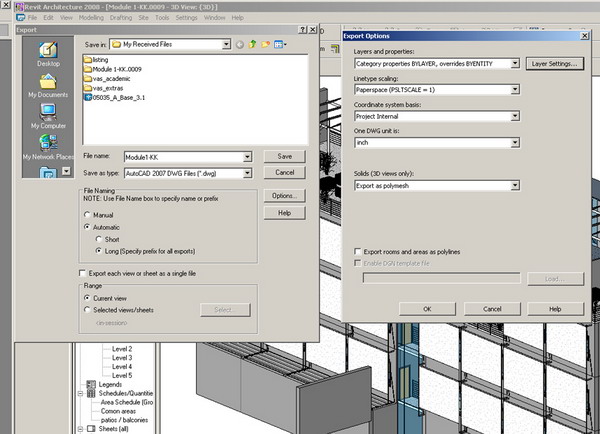
- Need to be in a 3D view in Revit
- Export it
out as AutoCAD DWG format
a. In Revit
FileExportCAD
Format
b. In 3DS Max
File
linking - The best way to bring any AutoCAD DWG is File Linking
Manager.
If the original file in Revit has a
different unit system, you can check "Rescale" and select
inches from the pull-down menu.
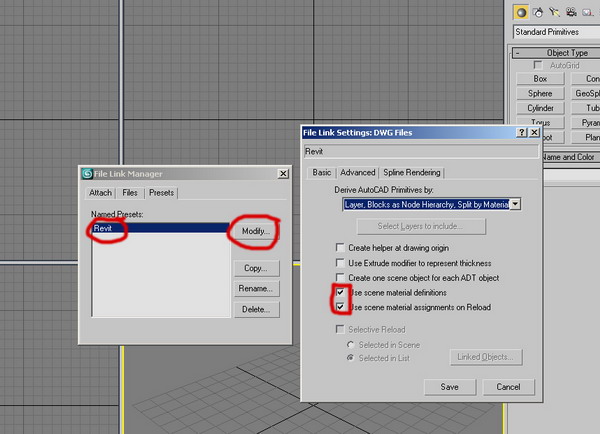
There is a preset that is already
set up for Revit on the dialog box.
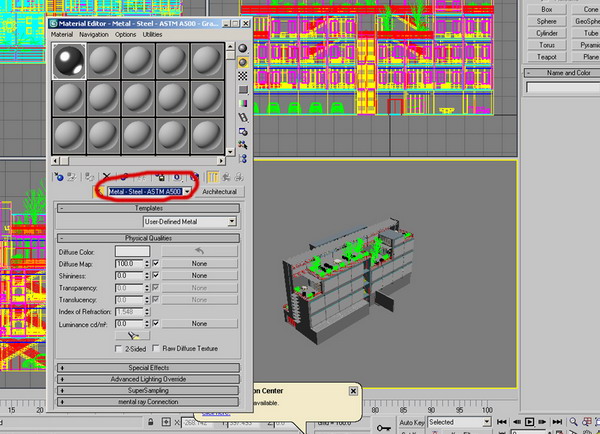
Check "Use scene material
assignment on Reload" if you want to bring materials that were assigned
in Revit to 3DS Max.
If you want to assign new materials in 3DS
Max, you need to keep this box unchecked.
We have linked the model now in 3DS
Max.
The layers and object naming will be saved, so everything is
well organized.
You can go any time to the File Link
Manager to reload the file back in 3DS Max. If you have assigned new
materials in 3DS Max, the 3DS Max materials will be maintained so we do
not lose them.
The materials that were assigned in
Revit will save all their qualities and naming.
All the camera
views will be maintained as well.
The file is ready now for
lighting and rendering.
About the author
I'm a Web-Graphic Designer, Freelance and Webmaster, blogger and more. I like to push the boundaries. I love creating unique, clean, usable design for the web and other digital sources.