Exterior Scenes in 3d Max
4. SketchUp
This final portion of the tutorial will explain how to import a SketchUp model into 3DS Max. It expects little experience with SketchUp and a solid understanding of 3DS Max.These instructions were recoded from practice using SketchUp Pro6 and 3DS Max version 9. However, it is believed that the instructions will be applicable to earlier versions of 3DS Max.
a. In SketchUp Pro
Get the model from Google Earth in SketchUp by using the Get Models button to access the model from the 3D Warehouse.
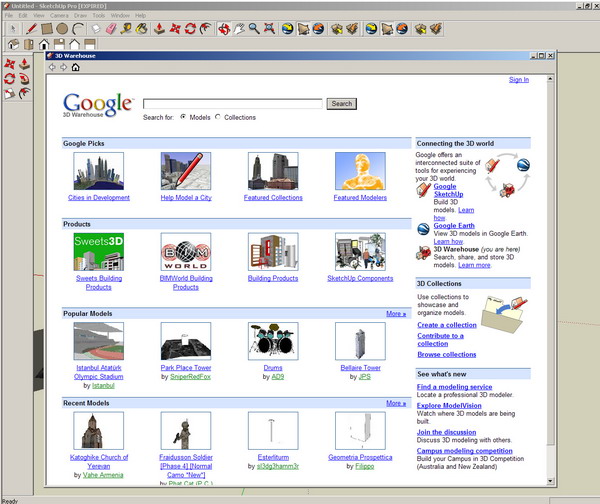
Download the model.
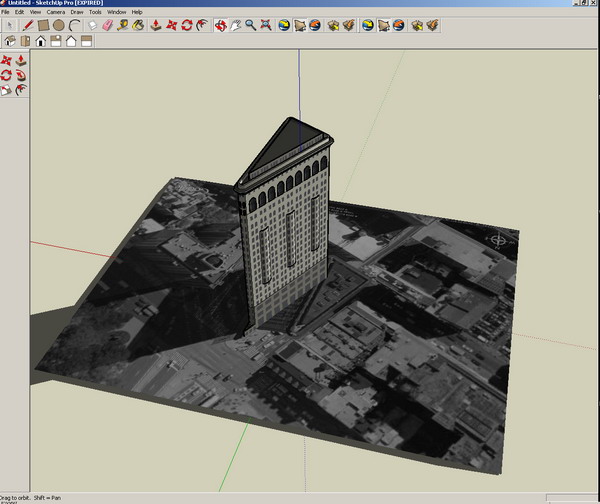
Prepare the model for exporting to 3DS Max.
1) Save your model.
2) Orient all faces correctly. Any face that is blue is facing the wrong direction. You will need to reverse all faces that are oriented incorrectly or they won't display in 3DS Max.
3) Add pages for your desired render views.
SketchUp export options ?? the common export options are DWG and 3DS.
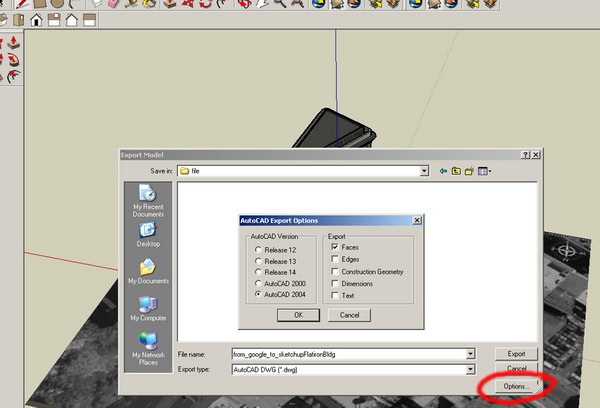
Export as DWG ?? by exporting it as a DWG, everything gets pre-welded. So if the model is not organized in layers or components, the best way is to export that as a DWG.
(SketchUp surfaces are independent from one another, so basically you just have a bunch of surfaces that are adjacent to each other and are not actually connected. By welding the points, you'll be able to smooth it out.)
Select "File," then "Export" and then "3D Model." Click the "Options" button and be sure to select "Faces."
b. In 3DS Max
Now import the model into 3DS Max. Click "File" and select "Import." Then choose .dwg file. Navigate to your model and select it for import. Max will prompt you to merge or completely replace the scene ?? choose "Replace."
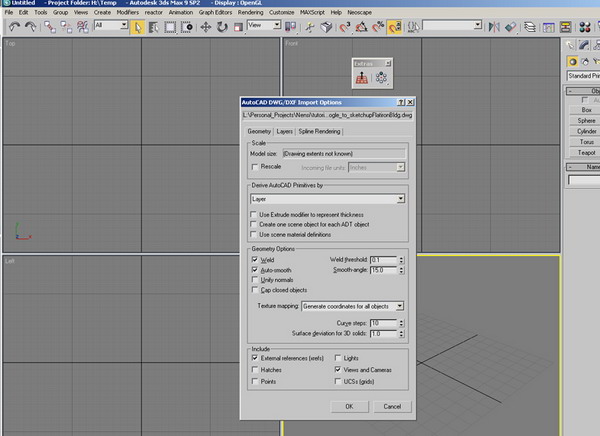
Look at the image above for settings.
The model is now imported into 3DS Max
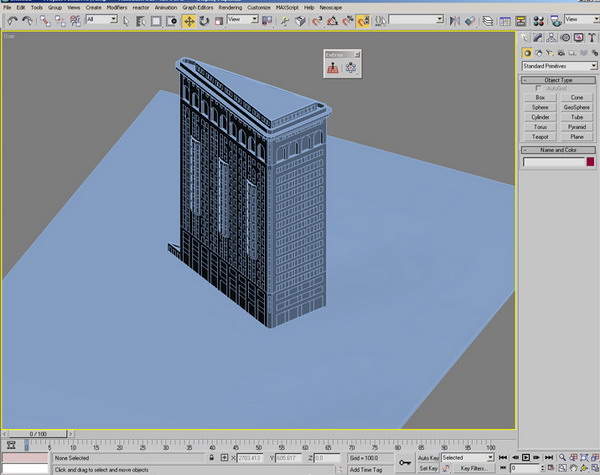
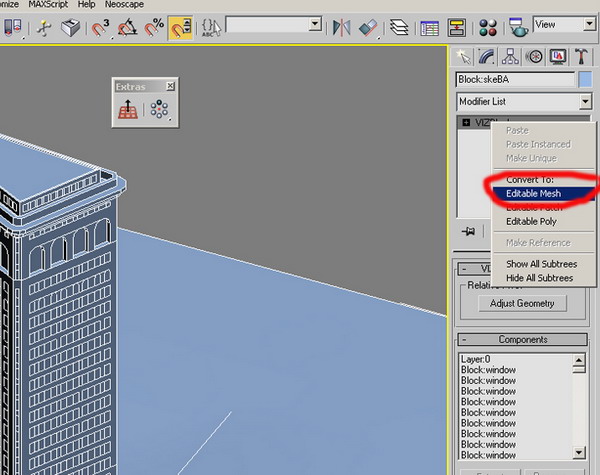
Collapse the model in Editable Mesh, because the model is a Viz Block.
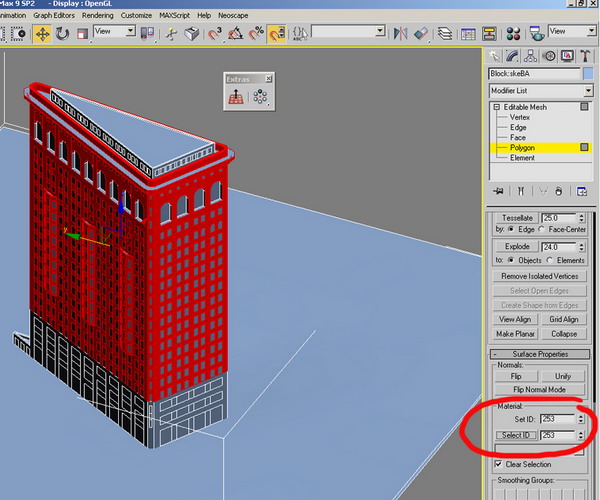
Separate the elements by ID and detach them in order to apply new 3DS Max materials.
Export as 3DS
One advantage of the 3DS export is that it saves the step of doing material assignment in 3DS Max.
Other things to consider are:
- Don't use instances as they just don't show up once imported
- Don't change the pivot point or your object won't be in the correct location once imported
Group by texture before exporting
When you export from SketchUp, check "Export texture maps" and "Welding vertices" in the options. All the surfaces that are smooth in SU will be smooth in MAX/VIZ.
Make sure you select "Export Cameras from Pages" so that you can have the same views in 3DS Max set up that you made in SketchUp.
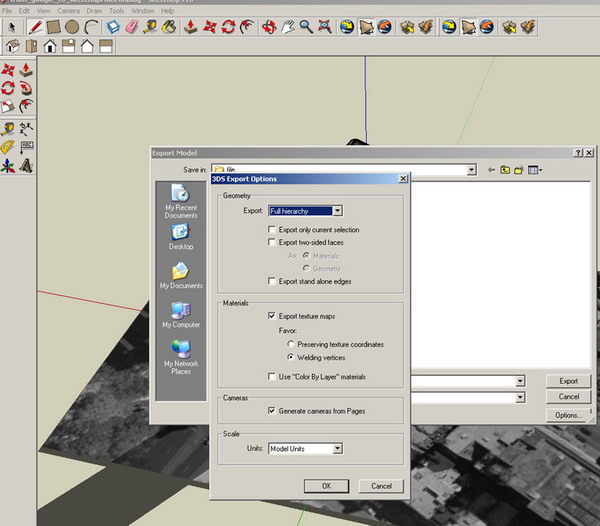
Look at the image above for settings.
Import
Now import the model into 3DS Max. Click "File" and then select "Import." Choose .3ds for the file type.Navigate to your model and select it for import. Max will prompt you to merge or completely replace the scene. Choose "Replace." Different from the DWG version where the file is translated to a Viz model, the 3ds file is translated to an Editable Mesh.
Apply the materials
It doesn't even matter what they are as long as (for example) everything glass is the same material, everything rock is the same material, all water is the same, etc. Now when you get into 3DS Max, open the material editor. Select the first slot and click on the Pick Material (eyedropper icon). Then click on a material in your model. Sometimes it will assign all materials to sub maps automatically. Other times you will need to go through and assign each material manually to a new slot. Either way, just go through and select each material you want to change.Once it is assigned to a material slot, you can change the material and it will change all objects with that material in the model.
If the material is using a texture map, then you will need to change the path of the maps on the diffuse.
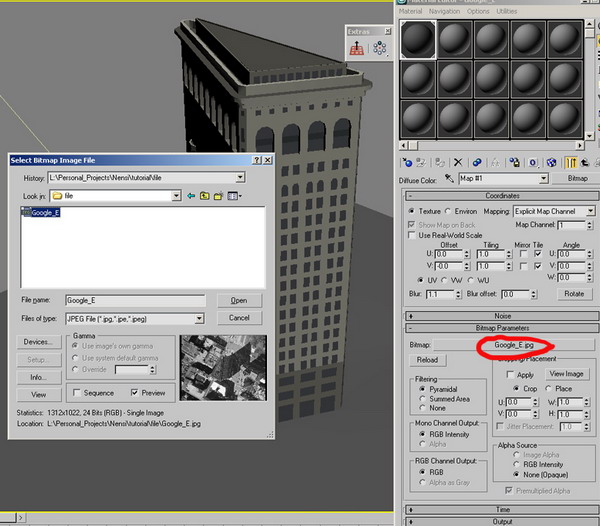
The texture maps are saved automatically on the same file where the exported 3ds is located.
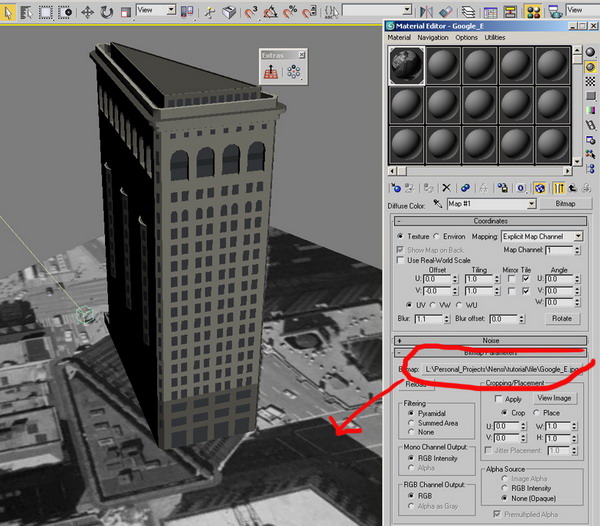
Now the texture is reloaded and the file is ready in 3DS Max.
Lighting
Lighting is one of the most important parts in 3D visualization rendering. It brings not only the look and feel for the image, but also helps to visualize the design in reality. Many artists will find themselves spending more time with interior lighting to make sure every detail in the room is lit perfectly. Exterior lighting is easier to set up but still challenges the artist.
1. Modeling
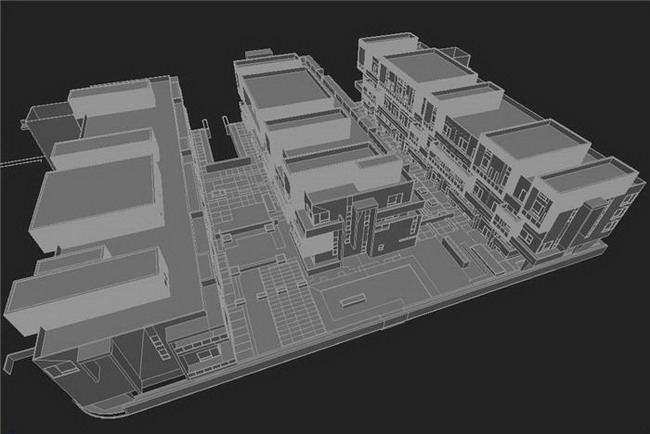
Here we have a model of L5's exterior. The entire model is created based on a CAD plan, then imported into 3D Studio Max and organized into layers.
2. Texturing
Textures and material information are collected and then applied to the model.
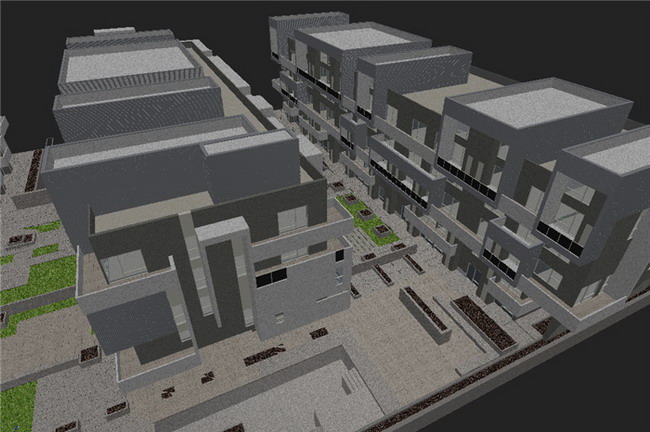
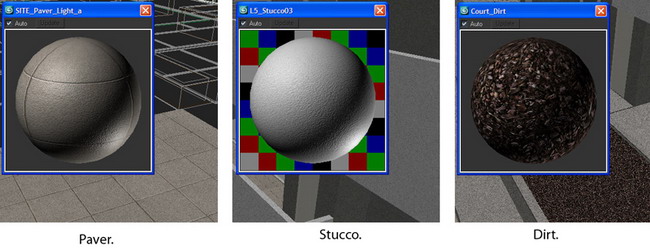
All the materials in the scene are Vray materials.
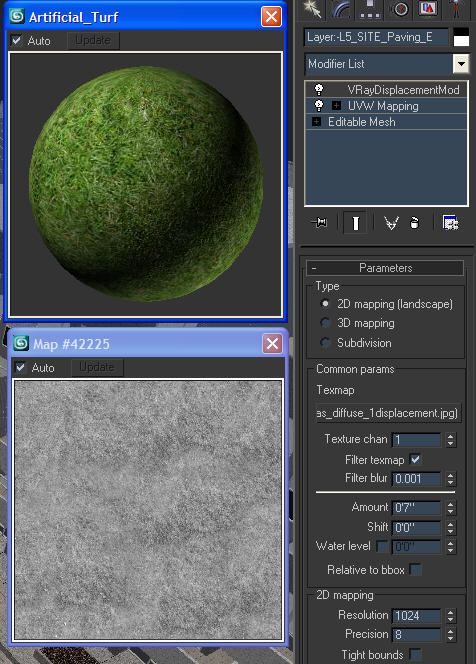
In this scene, besides some basic material, we also apply Vray displacement on the grass to make the render look more realistic and detailed.
For the grass, we use 2D mapping type for Vray DisplacementMod with a grayscale grass bitmap for displacement effects.
3. Camera View Setup
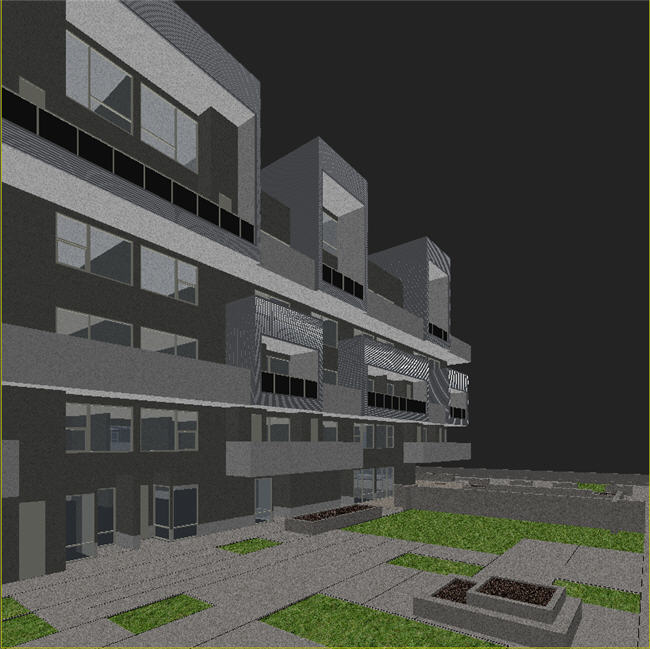
After applying all textures to the model, we set up a couple views and end up with this final view.
4. Lighting
Similar to lighting an interior scene, we start with environment light first. Again, it is a good practice to collect all the reference images about the kind of lighting you want to apply into the scene. In this case, we want to use daylight with yellow sunlight coming down from the right and hitting the whole building's section. The right part of the scene will be in bluish shadow. Both yellow and blue colors will compliment the image.
Instead of using GI Environment (skylight) in Vray render setting dialogue as we used in interior to create ambient light, we use a different way by creating a semi-dome to simulate the sky.
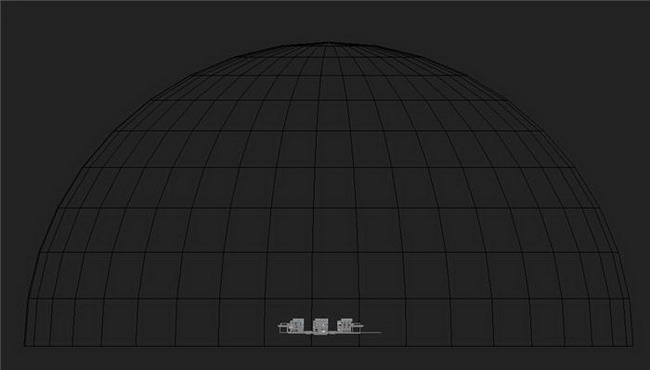
We apply VrayLightMtl with a Sky bitmap for the dome, and also apply UVW mapping cylindrical type for it as well. The benefit of this method is that it creates more natural-looking ambient light and it has bright and dark areas just like a real sky would look. When applying the bitmap on a VraylightMtl, it will reflect those dark and bright areas on the bitmap onto the object to create a more interesting look for the image.
This method sounds the same as the HDRI method but easier to create and adjust since you can move, rotate or even scale the map on the viewport to suit your lighting look or even reflection on the object. Unlike HDRI, you have to enable the background on your viewport and put in some numbers to get it to look right.
For now, we leave the value of brightness at 1.
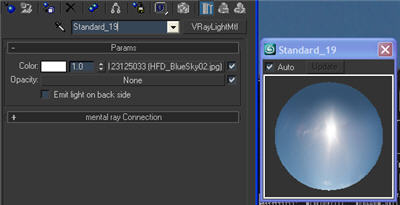
After that, we can go ahead and do a test render. We used a very low setting for test rendering images in order to get a quick preview of the image.
>Color mapping: Exponential
>Irradiance map was set to low
>Light cache with Subdivs at 200 and sample size at 0.02
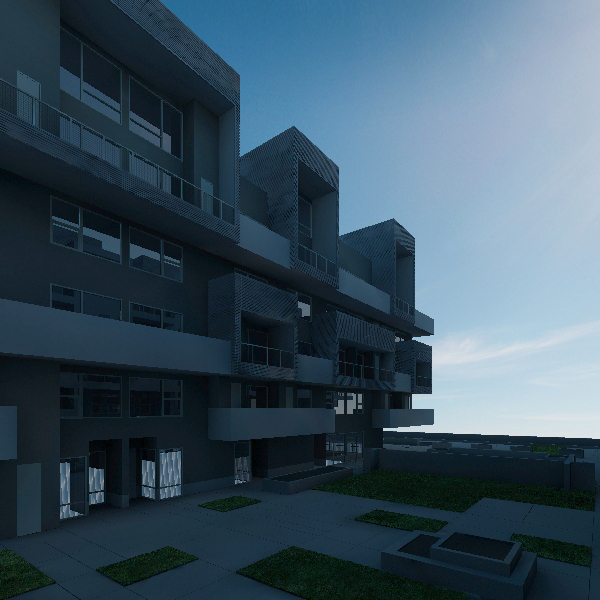
It looks very dark at this point, but we can see some interesting effects on the ambient light. Since we are aiming for a bright-looking day, we need to increase the multiply of the VraylightMtl from 1 to 6.
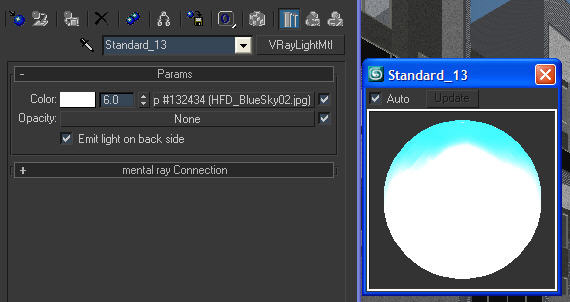
Do the test again to see how it looks.
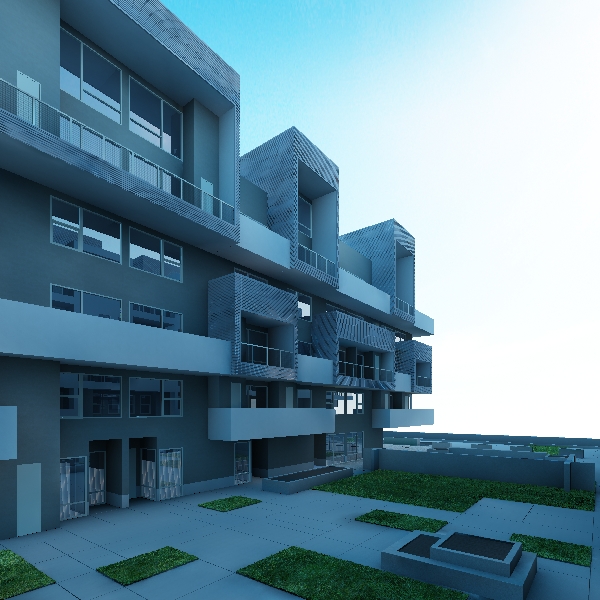
This looks better. We get the shadow to look bluish as we wanted. The render's quality looks really bad due to very low setting of GI, however we will set a higher setting after we get the lighting to look right. This way can save you a lot of time.
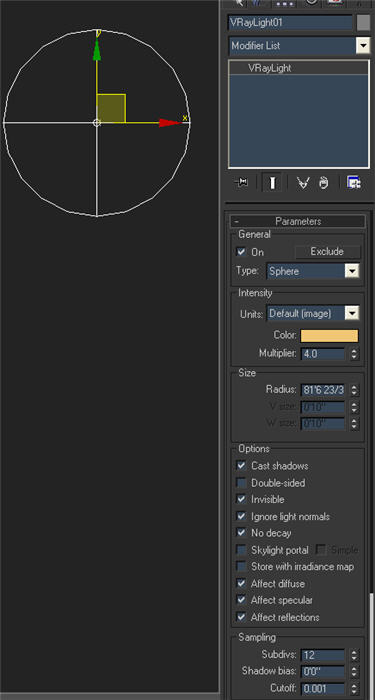
Now, after you get the correct look for the ambient, let's add some sunlight. Again, we use Vray light, Sphere type to simulate the sun, with strong yellow color. The bigger the radius of the light, softer the shadow.
We also add furniture, some plants, flowers and trees to add more details into the scene.
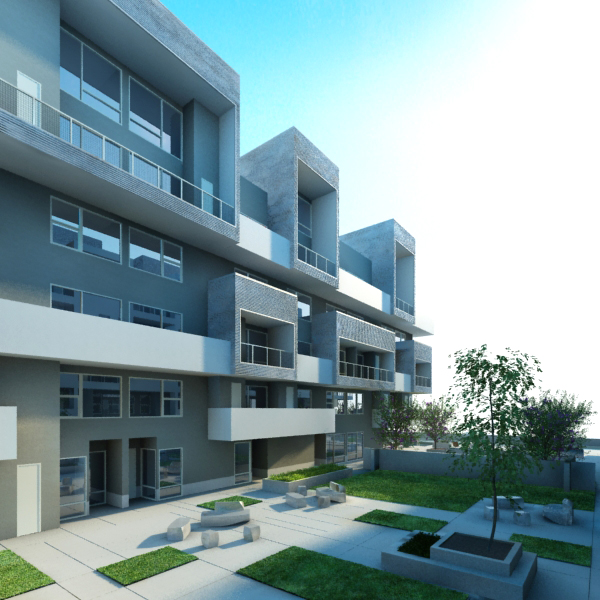
Now, we are ready for the final render.
About the author
Copyright © . All Rights Reserved
