How To Create A Rainbow Gradient In Photoshop
The rainbow gradient has been very popular lately, so this information will be handy for many people. You will also learn how to save it for a custom preset. The updated Photoshop 2020 presented us with new functionality: the "gradients" panel. To fully benefit from this tutorial, make sure that your version of the program matches.
How to Create a Group for Your Gradients
To keep your customized gradients separate from the default ones suggested by Photoshop, you need to create an independent custom group for them. To do that, go to the Gradients panel. It is located next to the Color, Swatches, and Templates sections. Click on the menu button and choose "New Gradient Group" there.
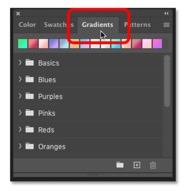
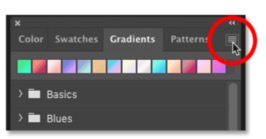

Once you've created a new group, think of a name for it. It will appear at the bottom of the default list.


How to Create a Rainbow Gradient
First, select the tool for creating a gradient. It is located in the toolbar. The gradient pattern in the options bar will open the editor.

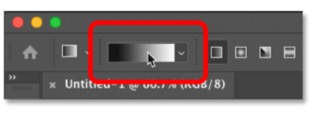
The black and white gradient thumbnail is in the Basics folder. It will be our starting point.
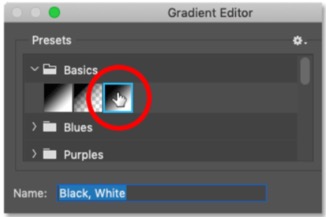
The next step is to change the black color of our gradient to red. Select the black color stop, click on the color swatch and change it to red. In the color palette, set the following values: 255 for red, 0 for green, and 0 for blue. Be careful to set the Location value for red at 0%.

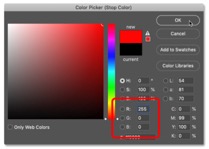
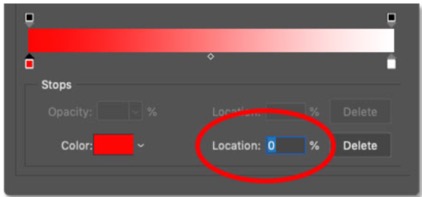
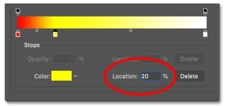
Your next task is to add a different color to the rainbow, yellow. To do this, in the empty area to the right of the red stopper, add a new yellow stopper. Set the parameters G to 255, and leave the red parameters untouched. Set the location of the yellow one at 20%.


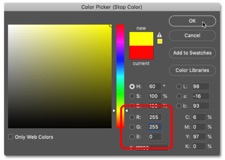
To add green to the rainbow gradient, click to the right of the yellow stop and change yellow to green. Set the parameters for green, where R is 0 and G (green) is 255. Confirm the set parameters.

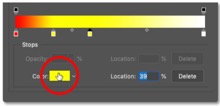
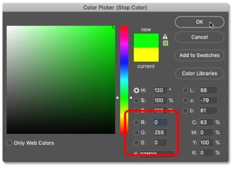
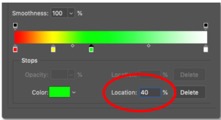
The next color is cyan which you install in the same way, but the parameters are: red is 0, green is 255, but this time set B to 255 like in the screenshot. Set the location for the color by 60%.

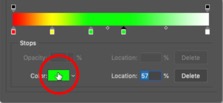
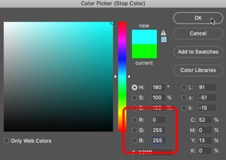
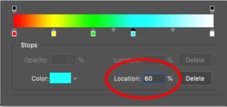
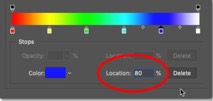
The blue color is set using the same technique as all the previous ones, with the difference in parameters, where R has a value of 0, G has a value of 0, and B has a 255. The location for the blue color is 80%.


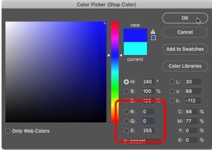
The outermost color in your rainbow should be purple. Repeat the whole procedure as with the previous colors, but change R to 255, G to 0, and B to 255.
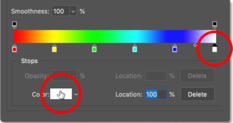
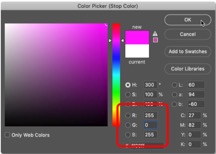
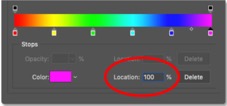
To save the rainbow gradient you created, you have to go back to the group you made with the name you chose, name the gradient "Rainbow," and click the "New" button. This saved gradient will appear as a thumbnail.

How to Use a Rainbow Gradient
You often need these custom gradients in your UI/UX design work, so it's essential to know how to use them on different elements.
To use a gradient you've created, and it doesn't have to be a rainbow, you can use any color, do the following.
Thanks to the innovations of Photoshop 2020, you can do this with drag and drop. So first, open the image you want to apply the gradient in Photoshop. Then go to the "Gradients" panel, select the one you created and drag it onto the image.
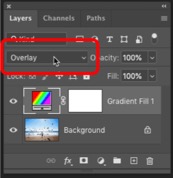
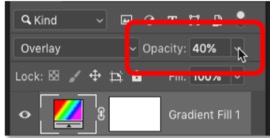
You have three options to apply the filling: "Color," "Overlay," and "Soft Light" which one to use depends only on your preferences and goals. The gradient appears in the Layers panel. You can also change the opacity in percentage.
Other Delightful Photoshop Updates and Their Use in 2022
Since we've been going into such detail about the innovations in Photoshop regarding gradients, we also want to look at some new features that might be even more revolutionary.
One of the most stunning updates of Photoshop that took the program to a new round of development was the addition of neural filters. They have been improved, and some new ones have been added.
- The group clipping of models was updated for retouchers. Previously, Select Subject selected all the objects at once. Now in the top menu, there is an Object Finder. If you activate it, Photoshop will scan the image if it has a lot of objects and offers to clip it selectively. It allows the editor to avoid spending a lot of time manually drawing object frames.
- Improved algorithms for coloring black-and-white photos. Now you can export a chromatic layer containing only color.
- Landscape blending. Neural filters allow the program to redraw your landscape to match the reference image. In addition, you can adjust the filter in percentage.
- Layers when importing vectors. Finally, Photoshop has made friends with vectors. Copying a file from Illustrator creates layers for each shape, and now each can be recolored through an adjustment layer.
These updates have become some of the most useful for anyone involved in graphic design and illustration.
About the author
Copyright © . All Rights Reserved
