How to Optimize Images for WordPress to Improve Website Speed
Did you know 90% of people remember what they see and only 10% remember what they read?
Yes, that’s a fact. Also, the average time it takes for the human brain to analyze an image is just 13 milliseconds. Compared to reading text, the human brain can process an image 60,000 times faster.
Moreover, 67% of buyers say that a high-quality image is "very important" when making a purchase decision. Research says this factor is more important than detailed product information (63%), lengthy product descriptions (54%), and customer ratings and reviews (54%).
These statistics, along with many others, lend credence to the idea that pictures or web images really can say a thousand words. Their universal understandability makes them useful in many ways, but perhaps most importantly, they help break down linguistic barriers.
However, unoptimized images can have a number of bad impacts on your WordPress site, and as a result, you may lose traffic and revenue. In this article, we will discuss how to optimize Images for WordPress in detail.
But first, let’s find out what WordPress image optimization is and why you need to optimize images for WordPress website.
What is image optimization?

WordPress image optimization entails providing high-quality images in the appropriate format, dimension, size, and resolution while maintaining the smallest possible size. There are numerous techniques for optimizing images, such as downsizing, caching, and compression.
Before we jump into learning the optimization techniques, let’s first find out the benefits of image optimization for WordPress.
Why do you need to optimize images for WordPress?

If you don’t optimize your images properly, your pages, posts, or product pages will take longer time to load. Ultimately, it will decrease your website performance and speed.
Now, does website speed matter?
- Nearly half of users (47%) anticipate a 2-second wait time for web pages to load.
- 57% of visitors will abandon your site if it takes longer than three seconds to load.
- The majority (80%) of those 57% of visitors who leave your site will never return.
- A whopping 44% of dissatisfied customers will spread the word to others about their bad experiences.
- 70% of customers say page load time affects their decision to buy from an online store.
- With every additional second that a website takes to load (between seconds 0-5), conversion rates decrease by an average of 4.42%.
The above statistics clearly state how significantly important speed is for your WordPress website. And one of the best ways to improve your website speed is to optimize images for WordPress.
Now that we have learned how unoptimized images can impact your site, let’s learn some of the benefits of WordPress optimize images.
Boost site speed
The time it takes for a device to request and download data from your website is cut down considerably when you reduce file size and compress images for WordPress. The end result is an increase in your site's speed.
Enhance user experience
Customers who have a positive experience with your site due to its quick loading times are more likely to make repeat purchases from you. For this reason, optimizing web images is a great way to boost user satisfaction and happiness by reducing the time it takes for a page to load.
Improves SEO ranking
Optimizing your images can increase their visibility in Google Image Search results, which will improve your site's SEO (search engine optimization) ranking. Furthermore, page speed is a major factor in Google's search algorithm, so optimizing your images will help you avoid the organic search penalties that come with having a slow website.
Saves server space
Typically, optimized images are smaller in size than their unoptimized counterparts, meaning they take up less room. As a result, you will be able to store images with less expensive hardware and cloud storage.
Also, saving server space will also increase your page load time and overall WordPress website performance.
Boost conversion rate
As we have discussed already, optimize images for WordPress can improve your SEO ranking. And there is a direct correlation between page load time, search engine rankings, and sales. When your search engine rankings rise, you will be able to attract a larger audience and increase your conversion rate.
Even if you have a WooCommerce store and sell your products across multi-channels such as marketplaces (Amazon, Walmart, eBay, etc.), price comparison engines (Google Shopping, Idealo, PriceSpy, etc.), or social media channels to reach more audience and increase conversion and revenue, you will still need to optimize your images so that your images looks the same in all those channels.
How to optimize images for WordPress: step by step

There’s a series of tasks you can perform to optimize images for WordPress. Let us walk you through the steps.
Compress images
Simply put, image compression reduces the number of bytes in an image file without significantly degrading the image's quality. Therefore, it is a fantastic method to reduce page load times without sacrificing the quality of the images.
There are two ways you can compress images for WordPress.
Lossy
During lossy compression, information within an image is represented through approximations, and some of the original data is discarded. Some image file formats, such as JPGs, interpret color pixels and reduce some information in the image to shrink the file size while preserving the image's quality as much as possible.
Lossless
Compressing photos without losing quality is called "lossless compression." With this method, your data stays safe. PNGs are an example of this kind of compression.
You can compress images before uploading to WordPress or use a plugin to optimize images for WordPress. You can use websites like TinyPNG to compress images manually.
TinyPNG is not limited to processing only PNG files. In addition to PNGs, it also supports formats such as JPEG, WebP, etc. This website also allows you to compress images in bulk.
Choose the right image file format
JPEG, PNG, SVG, and WebP are currently the most popular file types used on the web. Yes, GIFs exist as well, but they're not ideal for use as website images. Let’s take a quick look at these file formats and when to use them.
PNG
If you need to save a graphic with a small color palette, the Portable Network Graphics (PNGs) format is your best bet. It's common practice to use the.png file format for logos and icons.
However, you shouldn't use PNG for photographs because the file sizes can quickly balloon when dealing with images with lots of colors.
JPEG
Due to the fact that the pixels of color within the image can use millions of colors, JPEG (.jpeg, also known as .jpg) files are ideal for photographs taken with a camera or camera phone. Images with many colors can still be saved quickly and easily with JPEGs. JPEG file format uses the lossy compression method.
They can reduce the number of colors used to create the image to a more manageable number while still producing a high-quality web image by combining some of the millions of colors and eliminating some information to make the file smaller.
WebP
WebP is a new image format developed by Google to optimize web images with lossless and lossy compression. In WebP format, images are compressed without compromising quality. Websites using them benefit from decreased load times and bandwidth usage.
Resize images
In addition to ensuring that your images are in the correct file format, you'll also need to resize them so that they fit into your website's design. The typical width of a website's content area is between 700 and 1000 pixels.
Adding images to your site with dimensions much wider than the content area will do nothing to improve the image quality but will result in much larger file sizes. Therefore, you need to resize the images to the right sizes.
One of the easiest and most efficient ways to optimize images for WordPress is to provide them in a scaled format. By scaling images, you can reduce the number of bytes transferred without sacrificing the ability to render the asset in its native resolution in the browser.
WordPress also resizes images automatically when you upload them in order to serve them in different screen sizes. However, it also keeps a copy of the original file, which takes up server space. So make sure you resize files before uploading to WordPress.
Use lazy loading
With lazy loading, resources aren't downloaded until they're required. These resources are not immediately loaded when the page loads, as is customary, but are instead saved for when they are needed by the user.
Simply put, images on a page won't load until the reader scrolls to that section. That means your audience won't have to wait for the entirety of your media to load before they can start engaging with your material.
Use CDN
A content delivery network, also known as a CDN, is a collection of remote servers that are situated in different parts of the world and collaborate with one another to ensure that users can access your website at any time. If you configure WordPress to use one, you will have the ability to cache images on every server that is part of the network.
When someone visits your website, the visitor's browser will be able to retrieve the images from the CDN location that is geographically closest to it rather than having to retrieve them directly from your website's server. Because of the shorter physical distance, the image files will load more quickly, resulting in an overall acceleration of the speed of your website.
Your website will not only load more quickly with this configuration but also will become more secure and use less bandwidth due to these improvements.
Clean up media library
As your WordPress site expands, more and more images will be stored in its media library. Some of the images that are uploaded to your site may never be used. For instance, if you remove a blog post but don't completely remove its accompanying images, they will continue to be stored in your media library.
Unused images in your library can cause your website to load slowly, consume valuable storage space on your hosting server, and be a pain to organize. Due to the increased size of site backups, the time required to create and restore them will increase.
Therefore, it’s crucial for you to delete unnecessary images from your library. Make sure you create a backup before deleting anything.
Optimizing images for different channels (WooCommerce)
If you have a large WordPress WooCommerce store and sell products across different channels, you will have to optimize your product images for all those channels. Now, this will take an enormous amount of time if you have a large number of products.
Instead of optimizing images for all different channels, you can actually upload your already optimized images directly from WordPress to those channels. All you will need is a product feed plugin such as CTX Feed.
This plugin has premade templates for 100+ channels. You just need to select the template of the channel/marketplace you want to show your product images. The plugin will automatically gather all your product information, including your optimized product image links, and generate the product feed file.
After that, you can upload the file to the channel using the URL method, and the platform will fetch your product data from the product feed file and display your optimized images as well as other details on their product pages.
This is a great method for displaying and promoting the same SEO-optimized data across multi-channels. However, you must compress and optimize your images before creating a feed file.
Best WordPress plugins for image optimization

If you have a static website with limited images, you can simply use an image compressor website like TInyPNG and compress and resize your images before uploading them.
However, if you have, for example, a blog site, travel site, or a WooCommerce WordPress store with many products, then the manual process wouldn’t be the best choice because it will take a long time to optimize the images.
In this case, an automated image optimization plugin can save your day. Let’s checkout some of the best plugins for optimizing photos for WordPress.
Smush
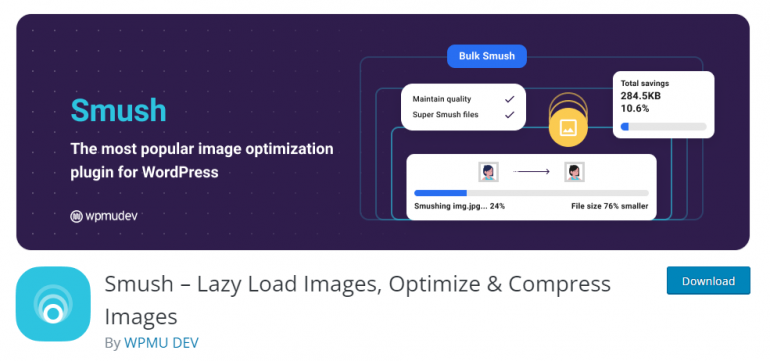
Developed by WPMU DEV, one of the most reputed WordPress developer companies, Smush is by far the most popular and best image optimizer for WordPress. The free version of this plugin has a whopping 1+ million active users.
In contrast to competing plugins, Smush's free version gives you the freedom to optimize as many images as you like. To shrink the saved images' size, it employs lossy and lossless compression methods.
In addition, Smush offers many other image optimization features, such as lazy loading, a dedicated image size detector, image resizing support, etc. If you upgrade to the pro version, the plugin will automatically resize your images to the dimensions you specify. It also supports WebP format.
EWWW Image Optimizer
Another popular plugin with 1+ million active WordPress users. With EWWW Image Optimizer, optimizing your uploaded images is a breeze. Your previously uploaded images can also be optimized and compressed in bulk.
You won't be able to tell the difference in quality between the compressed and uncompressed versions of your images.
In addition, the entire procedure of compressing and optimizing is done automatically. This entails performing various image-related tasks, such as resizing for optimal viewing on various devices, lazy loading, and even converting to the cutting-edge WebP image format.
It offers a similar freemium model to Smush. The core/free plugin allows you to compress unlimited images. There is, however, a paid upgrade to the plugin that unlocks even more functionality.
TinyPNG – JPEG, PNG & WebP image compression
Along with the manual web image compressing services, TinyPNG also has its own WordPress image optimizer plugin. The plugin has over 200,000 active WordPress installs, making it quite popular among WordPress users. The plugin has a ton of features and capabilities that are on par with the rest of the options we listed here.
TinyPNG has an automatic optimization mode for fresh uploads and a bulk optimization mode for your existing collection. Without noticeable quality loss, the plugin or its compression algorithm system can reduce JPEG images by 40–60% and PNG images by 50–80%.
Images can be automatically resized to the new dimensions. The best part is that there is no maximum file size. Therefore, you can feel free to upload images of any resolution. The free plugin lets you optimize 100 images per month. To compress more than that, you'll need a paid plan.
Imagify
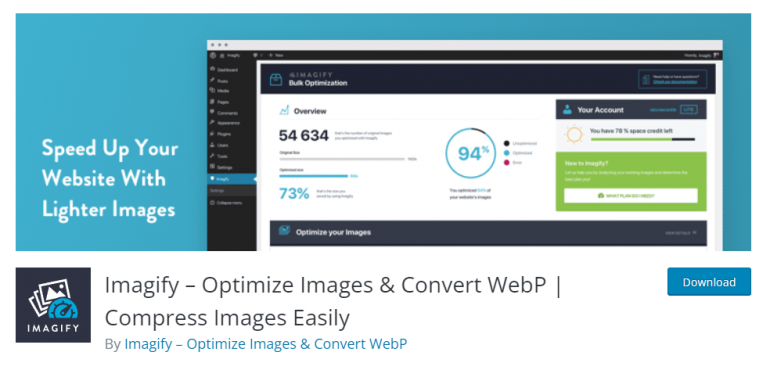
Imagify, like several of the other options presented here, can compress both newly uploaded images and those already present in your WordPress media library. There is no manual labor involved, so your efficiency and productivity will both increase greatly.
Imagify has three distinct optimization modes (lossless compression, lossy compression, and strong lossy compression) that you can select from the plugin's settings. As a result, you have more leeway in determining the final quality level and file size.
The plugin is compatible with WooCommerce, WP Rocket, NextGen Gallery, and many other well-known plugins, making it an excellent choice for websites that needs to compress many images. Additionally, Imagify has a backup feature that lets you restore the original version of the image.
Optimole
Optimole Image Optimization & Lazy Load is one of the best plugin to optimize images for WordPress. It comes pre-loaded with a ton of cutting-edge features that will assist you in fully automating all of your image optimization requirements.
Moreover, it uses a content delivery network (CDN) to ensure that your images load quickly. One of the best features is the ability to keep tabs on which images were optimized and how much space was freed up. Lazy loading and image resizing are just two of the many optimization tools that come standard with Optimole, which is available for absolutely no cost.
Wrap up
As a website owner, you can do your part to ensure you are creating lightning fast WordPress sites with quick loads by optimizing the images you use. Understanding the differences between the WebP, JPEG, PNG, and SVG file formats will allow you to significantly reduce the file sizes you use on your website.
Don't post extremely large images because they take forever to download. A website will load faster if its images have the right size, weight, and format.
We hope this guide on how to optimize images for WordPress was informative and helpful. Let us know in the comments if you have any questions or suggestions on the topic.
Copyright © . All Rights Reserved