Make a Planet
This tutorial should step you through making a simple, yet realistic-looking planet using Adobe Photoshop 7, and ONLY Adobe Photoshop 7. We're working small here, so keep in mind that the larger you work, the harder the planet will be to create (just a bit more work as size increases).
To complete this tutorial and match what I'm showing you
in the sample images, you'll need this
image for a texture, so save it in a safe spot, we'll get
to it in a moment.
A thank you to Kyle Nervik of Bougal.com,
who helped me figure out how to best relate my methods to a general
audience by being my development guinea pig (sitting on AIM for
over an hour, listening to me argue with myself, and offering suggestions).
Thanks, Kyle!
Subscribe to our newsletter and get useful tutorials and huge bundles with design freebies once in two weeks:
Start with a plain black image, 500x500 pixels. Make a new layer and, using the circle marquee select a circle about 2/3 the size of the root image.
Fill it black, and leave the marquee active (do not deselect).
Grab the Airbrush Soft Round 300 (we need a big, fuzzy brush).
Set the opacity of the brush to 30% and the mode to Linear Dodge.
We're going to pretend our light source is coming from the upper left (this is arbitrary).
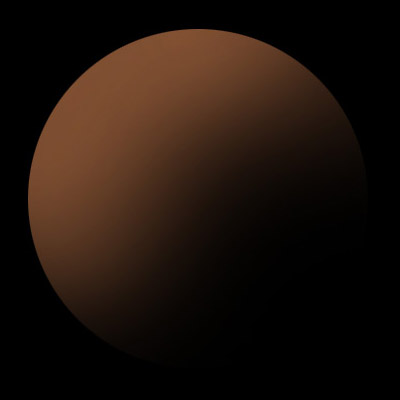
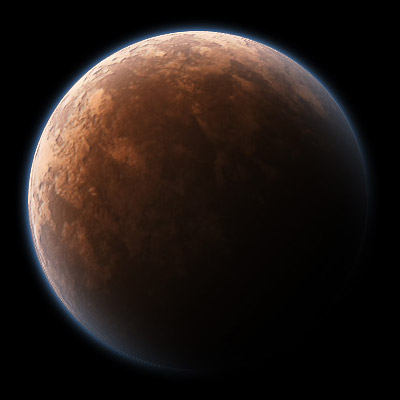
Start brushing color (we'll use hexadecimal value 664029) from about 8 o'clock to 2 o'clock, working towards the upper left corner. You want the result to look like the image to the left of this text. Basically, we've just established the main "sphere" of our planet.
Alrighty, time to grab that planet texture I had you download. Open it up and go to Edit > Define Pattern. Name it whatever you want.
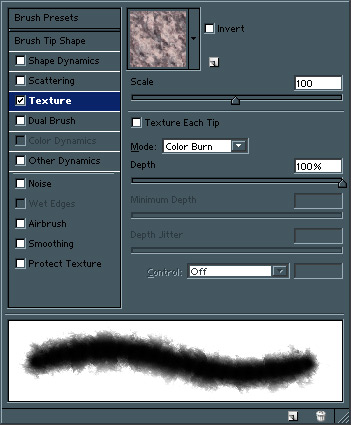
This done, grab your trusty brush tool again (same exact settings as before, and go up to the brushes tab at the top of your screen in Adobe PS. You need to set the texture of your brush to the planet texture for the next step. The window for the brush settings looks like so...
Select the pattern we just made from the menu of available patterns.
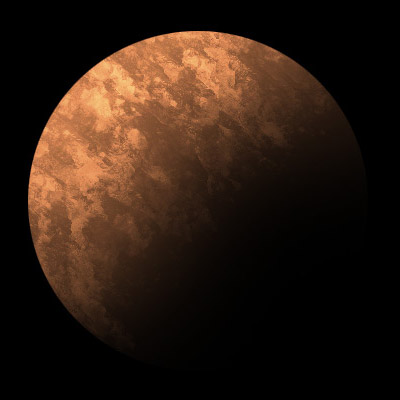
Repeat the brush motions that we used to define our basic sphere, only this time we're adiding texture to the planet. Again, brush from 8 to 2 o'clock only, leave the dark area dark, as it's the shadow on our planet. The result should look like so...
(we've still got our marquee selecting the circle of our planet... don't deselect the planet quite yet).
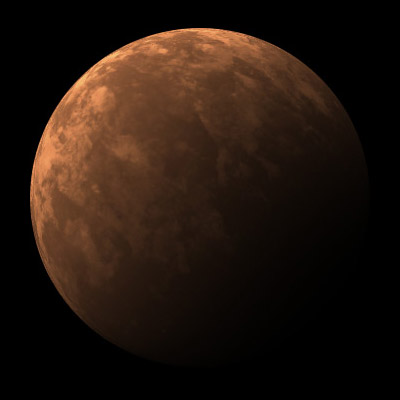
Now we're going to help our sphere a little via Photoshop's sphereize filter.
Go to Filter > Distort > Sphereize, set it to 100%,
and click OK. Just for good measure, repeat this action for an additional
50%.
Once that's done, cut your planet from the layer it is wth
the Edit > Cut command
(or ctrl - x if you're shortcut savvy).
Paste it into a new transparent layer and delete the old layer.
This gets rid of some annoying pixel-y artifacts around the rim
of the planet, leaving you with a nice, smooth edge to work with
(because real planets don't have pixels!).
This is now our "planet" layer. It would be a good idea to rename it as such so you know what you've got.
Next we'll add some atmosphere.
Duplicate your planet layer, and then go to Layer > Layer Style > Blending Options. You can also get to the resulting window via right-clicking on the layer in the layer palette and selecting Blending Options.
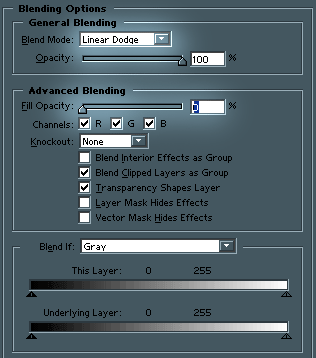
Change the Blend Mode to Linear Dodge, and the Fill Opacity to 0% (as shown)
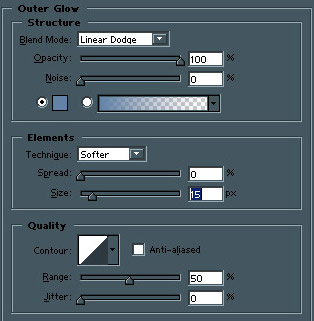
Add an outer glow as shown... for the purposes of this tutorial, we'll use hexadecimal color value of 6283A7 for the glow color.
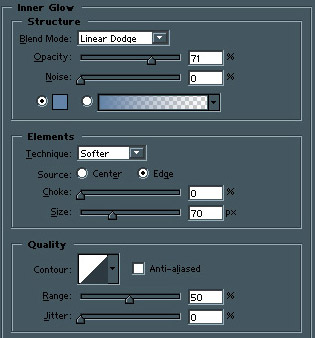
Add an inner glow as shown... again, we'll use hexadecimal color value of 6283A7 for the glow color, because the two glows need to match, or they'll look really silly where they meet at the planet outline.
Your planet should look something like this now. Not too shabby,
but we've got way too much atmosphere on our planet.
Create a new layer on top of your second planet layer. Link
this layer to the top planet layer (the one with all the effects),
and then merge the two together. This will make your effects
just a layer instead of actual effects... so you'll now have a layer
with just your blue ring of atmosphere in it. Youll need to set
the layer mode of the atmosphere layer to Linear Dodge again
to make it match the image once more. This is now our "atmosphere"
layer. Again, it is a good idea to rename it as such so you know
what you've got.
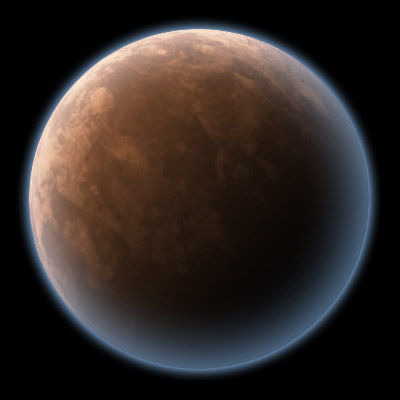
Next we'll grab the eraser tool... Same brush size as the one we used to set our original sphere (Airbrush Soft Round 300 or sme equivalent big fuzzy brush).
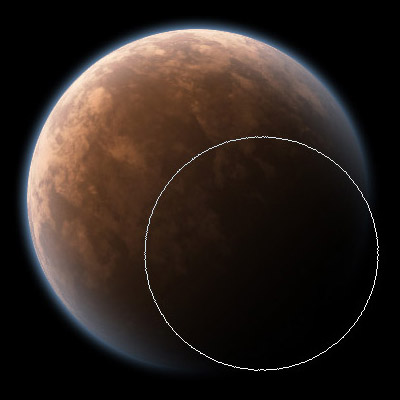
Gently erase between 6 and 3 o'clock on your atmosphere layer. You should get a result like this... (the white circle is the brush erasing).
We're looking pretty good right now, but we're not done yet.
Let's be nitpicky and add a tiny bit of embossing to the planet to really make it pop. Right now you should still have three layers total... atmosphere on top of planet on top of black background. Duplicate the planet layer.
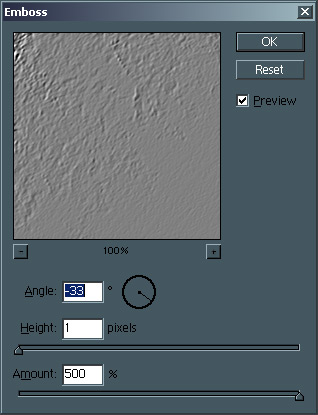
Go to Filter > Stylize > Emboss and emboss the sucker at
an Angle of about -33 degrees, Height of 1 and Amount
of 500%.
This done, desaturate (ctrl - shift - u) the embossed layer
and duplicate it again so you have two of the suckers.
We need to isolate the light and dark elements of the embossed layers, because we'll play with both seperately (hence the two layers.)
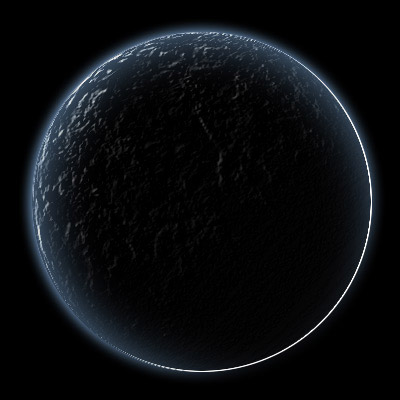
Use levels on the topmost one to isolate the lights by increasing the darkness until the main part of the layer is black with just a few white squiggles. This is now our "highlights" layer. You might want to rename it as such.
Repeat this with the lower embossed layer, only this time pull the lightness up so you've got all white with black squiggles. This is now our "shadows" layer. Again, it might be a good idea to rename it as such.
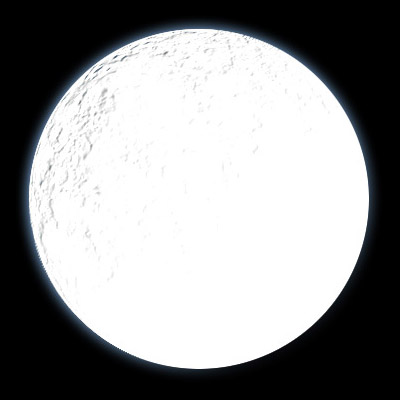
Change the black embossed layer mode to Linear Dodge, and the white embossed layer mode to Multiply. You'll notice a strong white outline in the shadow of our planet... use your big fuzzy eraser brush to erase it like you did the extra atmosphere we had earlier.
At this point, you're just about done. Our embossing is a little blatant, however. Planetary details need to be subtle to work with the right sense of scale, so make our "highlights" layer about 50% opaque. The "shadows" layer should be good at about 70% opacity.
I personally like a good amount of contrast, so I toyed slightly with curves (ctrl - m) to make the planet a little more vibrant. This is optional... you've now got a finished planet!
Space | Photo Manipulation Video Tutorial
Copyright © . All Rights Reserved