Transformers Logo Exclusive Tutorial
Transformers logo can be easily created by you! Have doubts about it? Just read this tutorial and learn how to do it!
This is how it all started for me. I went to the cinema not long ago and watched the "Transformers". What a movie! I was impressed by the effects and decided to create a tutorial - How to Draw the Logotype.
I used the emblem from the official site as a desktop wallpaper for a long time, but after it became boring I decided to create my own logo. Here is how I created an example of Transformers logo.
Wanna get more useful tutorials and freebies? Subscribe to our newsletter!
Open Photoshop. Create a new document 400x400 px and begin to draw the Transformers logo. The first part is the most tedious - the drawing of the logo itself. I've chosen Decepticons.
Select the Pen tool, set Paths in the adjustments panel and draw the right outline of the Decepticon's logo. You can use the original image to make it easier.

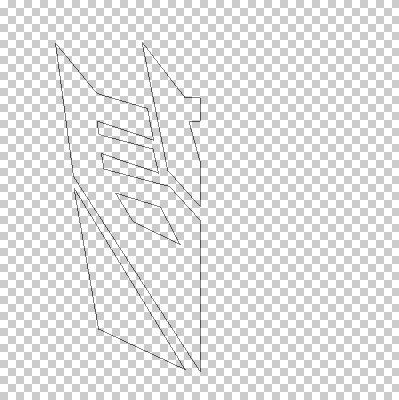
Now push the right button in any part of the path and select Fill Path. Paint it black. Then duplicate the layer and Flip Horizontal, move it to the right until you have the mirror reflection of the right side.
Next merge and duplicate layers.

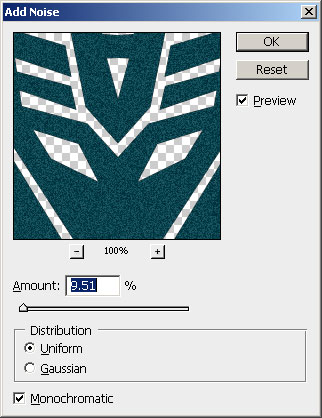
Now Ctrl+click on the layer, then paint the selection using the #07424d color. After that add noise.
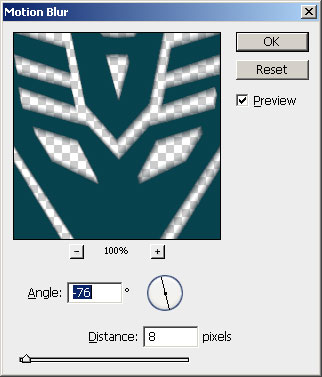
And use Motion Blur.
Next Ctrl+Click on the layer with no changes, invert the selection and click Del (the layer with the filters should be active).

Create the new layer saving the selection, render the clouds on it and set Blending Mode Overlay.
Create another new layer, render clouds on it and use Difference Clouds several times. Set the Blending Mode Overlay and reduce the opacity to 50%. After that merge all the layers.
Here's what I've got.

The first part is done. Now let's draw the background. Hide the layer with the logo.
Go to the channels and create three new channels. On the Alpha 1 channel use Render Clouds, on the Alpha 2 layer use Render Fibers with the following values (the color should be mainly white).
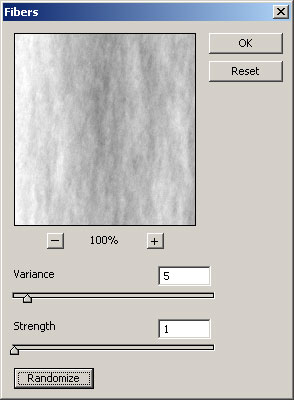
Paint Alpha 3 channel white. Now Ctrl+Click on the layer with the logo, and paint the selected in the Alpha 3 black.
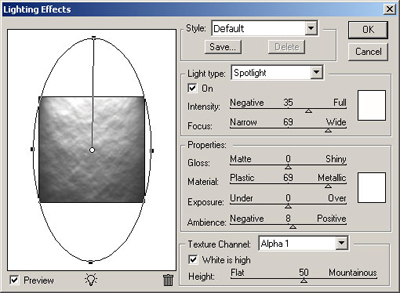
Select Background layer (if you've deleted it, just create a new layer, send to back and paint it white) and use Lightning Effects with the following values: set Alpha 1 in Texture Channel.
Repeat the procedure for Alpha 2 and Alpha 3 channels.

Add color using the following settings.
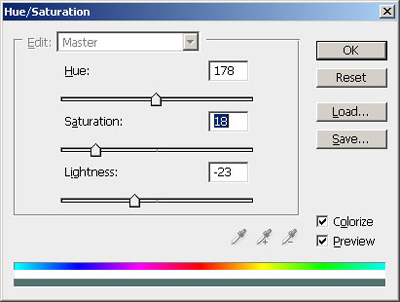

Now make visible the layer with the logo. Set the Opacity 50% and Fill 25%.

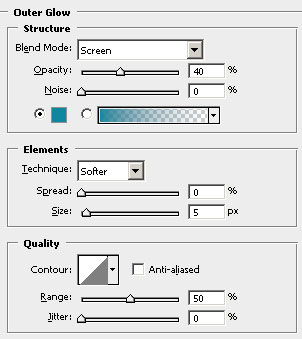
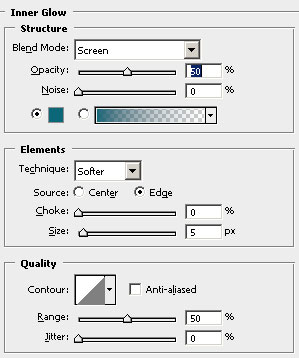
Now go to the Blending Options and add the following settings for Outer Glow and Inner Glow.
Here's the final result. Isn't it a splendid sample of Transformers logo?

About the author
Copyright © . All Rights Reserved
