Create a Retro Vintage WWII Style Poster
Open up photoshop, and create a new document with canvas size 1654px
by 2338px. (If you're wondering, that's the rough resolution of A3
Paper)
Next off, insert this old paper image from Sxc.hu, and resize it over the canvas.
To this, we then add some noise: select Filter>Noise>Add Noise. I'm adding around 45%, but feel free to experiment around a little!
Drop the opacity of the paper layer to around 80%. This adds a little more of the white from the canvas in, to keep the background unobtrusive to the main elements.
Insert this image of clouds into the document, covering the top half of the canvas.
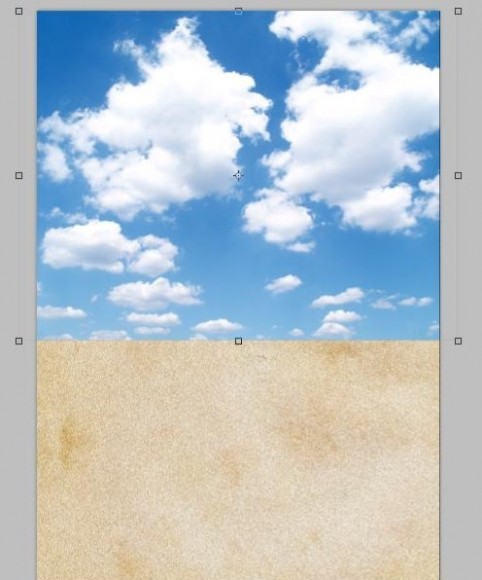
Then, with the new layer selected, click the "Add Layer Mask" button at the bottom of the 'Layers' Palette.
With this selected (a little icon next to your layer thumbnail), select the gradient tool, and draw a linear Black>White gradient from the top of the clouds to the bottom; this creates a fade-out effect.
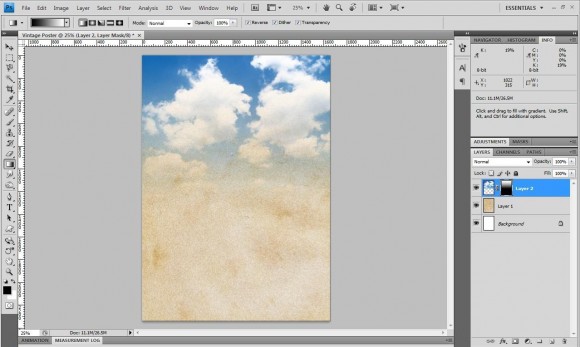
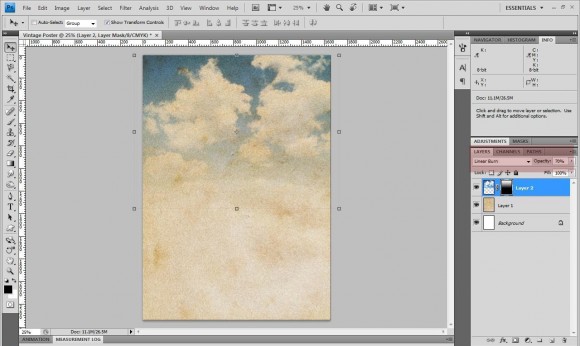
Set the blending mode to 'Linear Burn' and the Opacity to 70%.
Now to add in the rays of light. This is probably the trickiest bit of the whole tutorial, but it can be done fairly easily:
The key is to switch the guides on (View>Show>Grid) and the 'Snap To Grid' command on (View>Snap To>Grid).
With the pen tool selected, and a fill colour of #fff799, start drawing a japanese sun ray shape. Here's what you want to create:
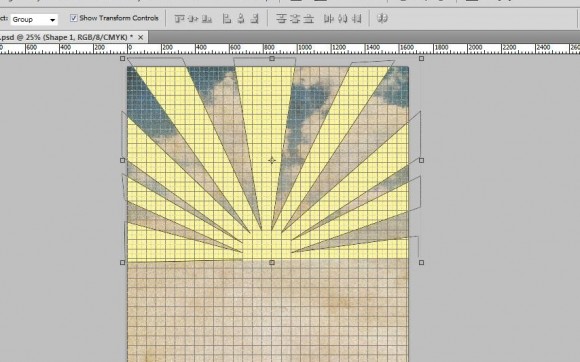
If it's not exact, don't worry too much - mine definitely isn't. The origin of the rays will be hidden anyway, so don't panic!
Change the Blending Mode of the rays to 'Soft Light'.
Insert this image of bread (or another image of your choice - bread isn't my most creative inspiration of the year).
Then select the Magic Wand tool, with a Tolerance of 40, and delete the white area around the image.
Change the Brightness and Contrast to -45 and 60 respectively, and then we'll add a "Dry Brush" effect from the presets (Filter>Artistic>Dry Brush), with the following settings:
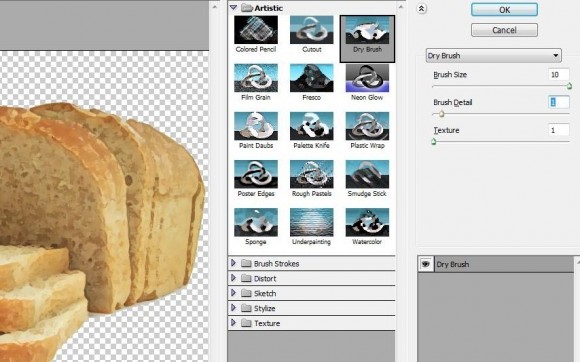
After this, stick this image of some planes into the document from SXC. Just use the 'Magic Brush' tool with a Tolerance of 40 to get rid of the surrounding sky, to show our clouds in the background.
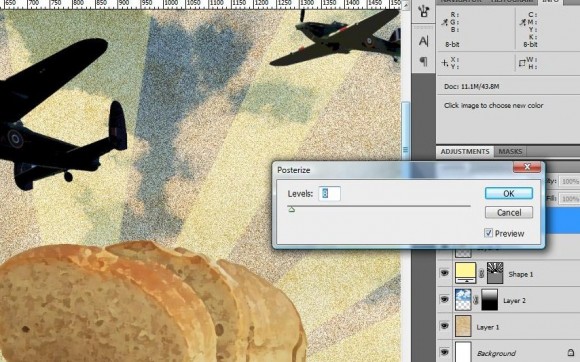
Then, with the layer selected, click Image>Adjustments>Posterise and select '8? as the 'Number of Layers'.
For the text, I'm using the Freely Available Font Wrexham Script, which is an Awesome WW2 Style Font, and free, even for Commercial Use. Select a font size of 250px, and a Line Spacing of 200px, and a colour of #45340f. Then write the text of your choice. I've chosen "Homemade Bread Wins The War", a useless propoganda phrase for your poster.
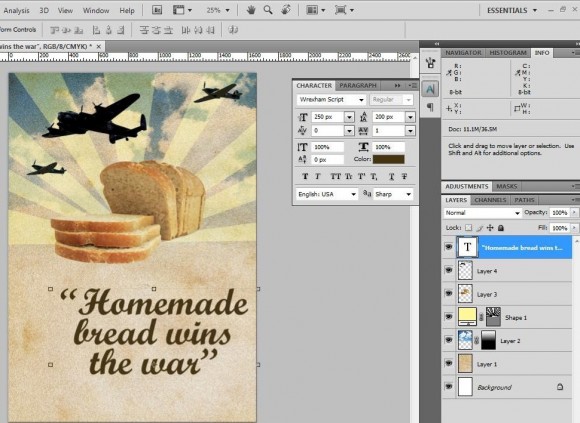
To add an underline to one of your words, just use the line tool, with a 10px width, and the same colour as before. To ensure that it sticks with the text layer, just select both layers, and select 'Link Layers' - it ensures that when you move the text around to suit your liking, the underline stays with it!
For a finishing touch, you want to add an image of the WWII Housewife. You could, of course find a photo of your choice, then add a Cutout Effect, or a Dry Brush Effect, but I've decided to browse a Google Image Search for "1940's Dress Patterns". Seriously don't ask how I searched that in the first place.
Find a suitable image which you can use without infringing copyright, and stick it onto your canvas.
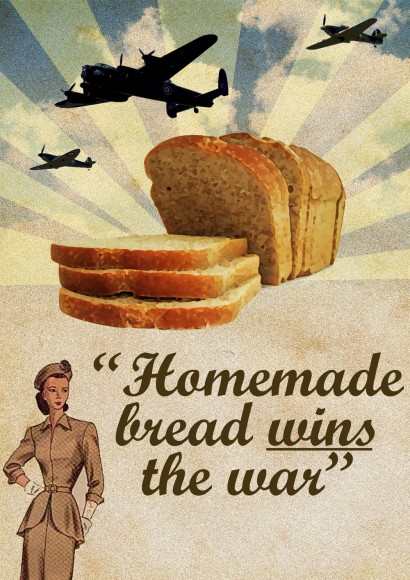
Then, you're finished! If you need to, continue to modify some elements' Brightness and Contrasts. It takes a little playing around, but you should get a nice result (for example I've changed the contrasting on the Bread Again to - 45 and 100 respectively, to add a golden colour to the bread).
Copyright © . All Rights Reserved