Girl of My Dreams (Exclusive Tutorial)
Step 44
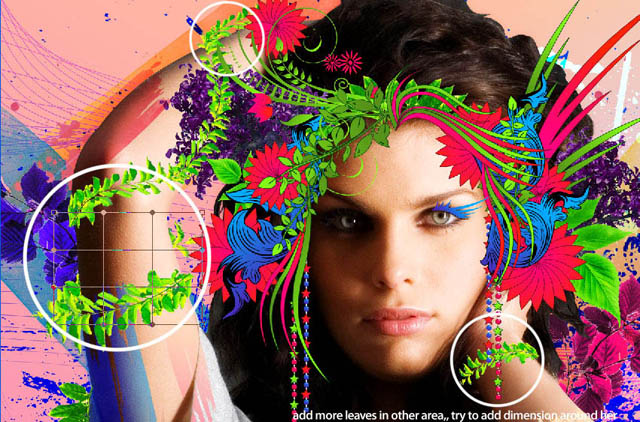
Duplicate and add more leaves stock, make more dimension around the girl, be creative. Different form and size will work.
Step 45
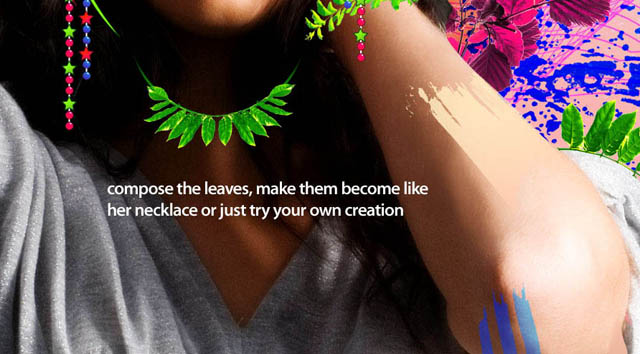
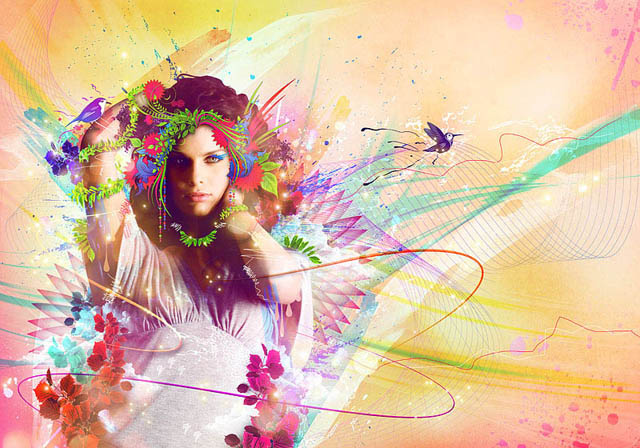
Next, I compose the leaves as the girl's necklace, you can try your own creation to make natural accesories for her, maybe earring, hairband, etc.
Step 46
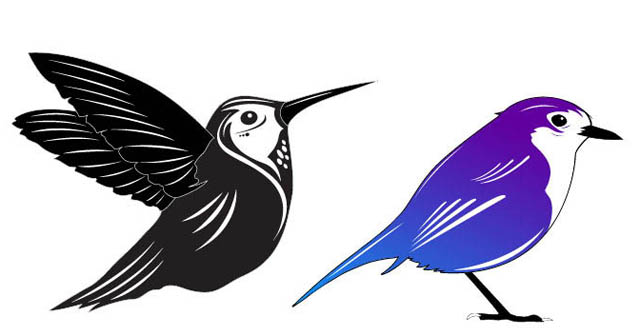
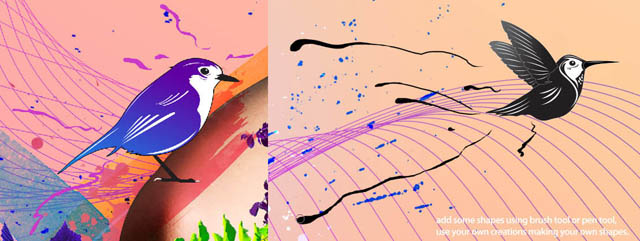
Open Illustrator, make bird illustrations using Pen Tool, you can draw your own or trace from photo references will also work.
Step 47
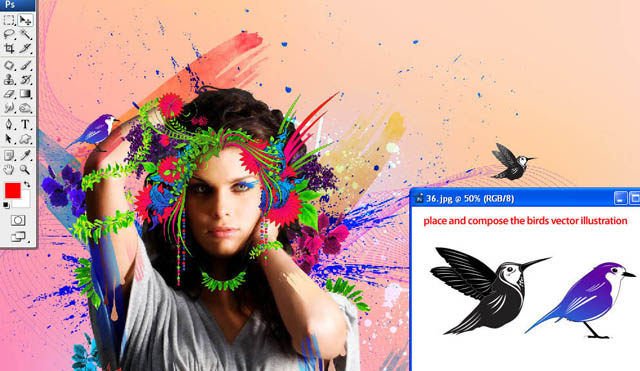
Import the bird illustrations and compose them into the working document. One is on her elbow and the other one is flying to the right.
Step 48
Add more tiny details, abstract shapes, make them directly using Brush tool or Pen Tool. If you have a graphic tablet, you can directly draw the shapes on a new layer.
Step 49
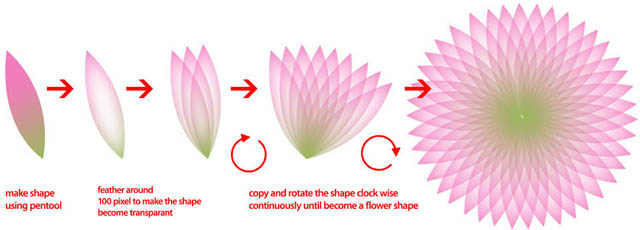
On this step, I'm making transparant shape using Pen Tool and Feather on Photoshop. Firstly, make a single flower petal using Pen Tool. Fill it with gradient color. Then, make a selection on the petal, go to Selection > Modify > Feather. Input 100 as the feather value, greater size will soften the edge of the shape more. After that, push Delete button to erase the selection and you will get a transparant single flower petal like shown in the image.
Then just duplicate and rotate the single petal clockwise continuously until become a complete flower shape.
Step 50
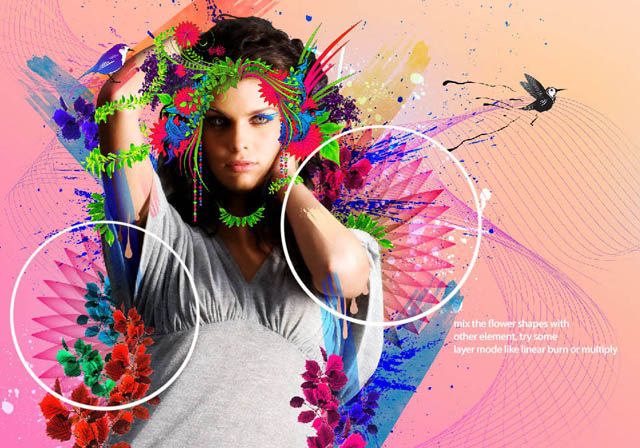
Place and mix the transparant flower shapes with other elements, use Linear Burn or Multiply layer mode to have darker color of the shapes.
Step 51
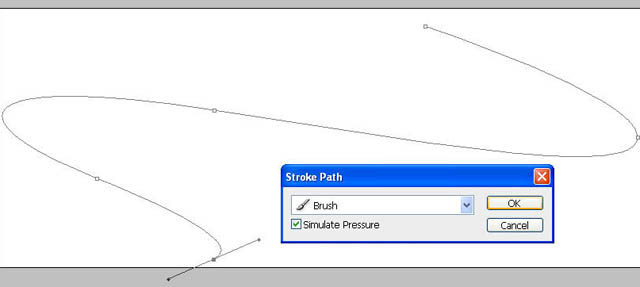
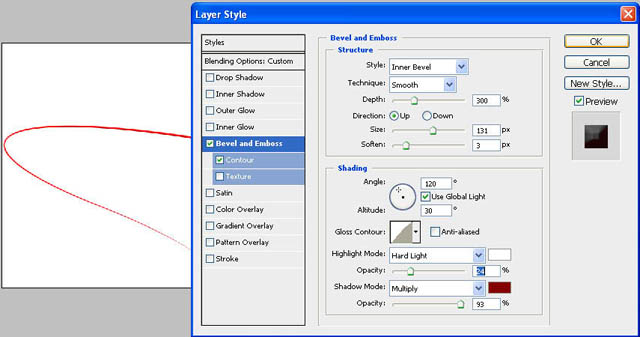
Make a new layer, make sure your Brush tool have a 15-20 point size. Then use Pen Tool, make a path like shown in the image. Right click and choose Stroke Path and don't forget to activate Simulate Pressure option by ticking the checkbox. Click OK if you're done..
Step 52
Then, we will add more effect on the line using Bevel and Emboss on layer style. Select Inner Bevel style and activate Contour option. Add more depth will give more 3D effect, just try some value on the options to get some various effects.
Step 53
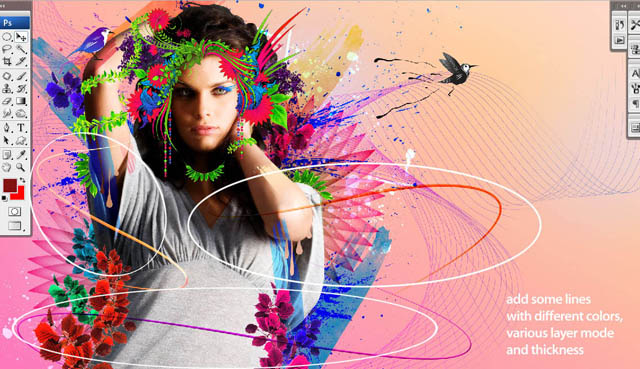
Try to make other lines with different brush size, colors and other layer modes. All the techniques are same like what we have done on the previous steps.
Step 54
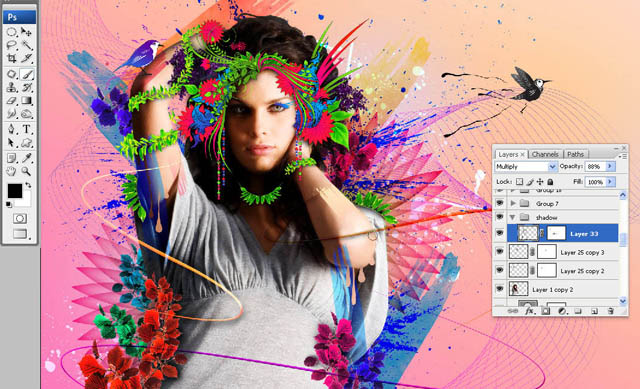
One of the most important thing to add depth and dimension is adding some shadows. Make a new layer and start to paint some shadows around. I'm using Brush tool choose Airbrush and set to Multiply layer mode around 88% opacity. Paint some shadows below all the shapes, just see the image below as your reference.
Step 55
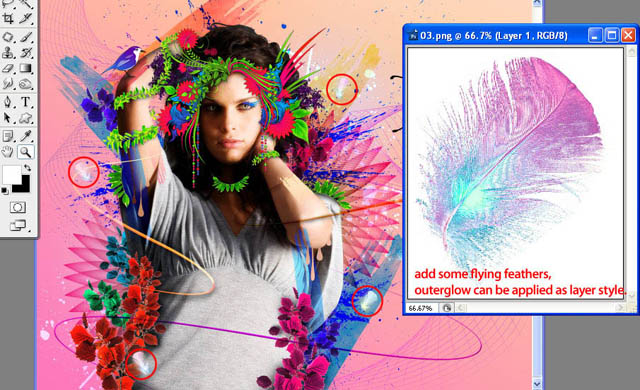
Add a fantasy feel by adding some flying feathers around the girl and apply Outer Glow layer style on them.
Step 56
Now let's doodling! Use your imagination, make some doodling on some parts. Don't be afraid to add some doodling elements as long as they look good and have a good combination with the other shapes.
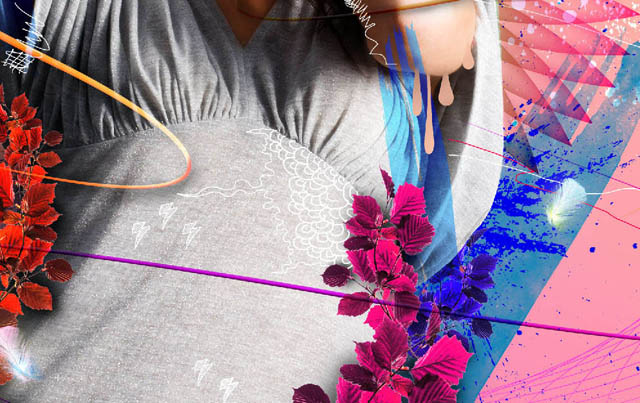
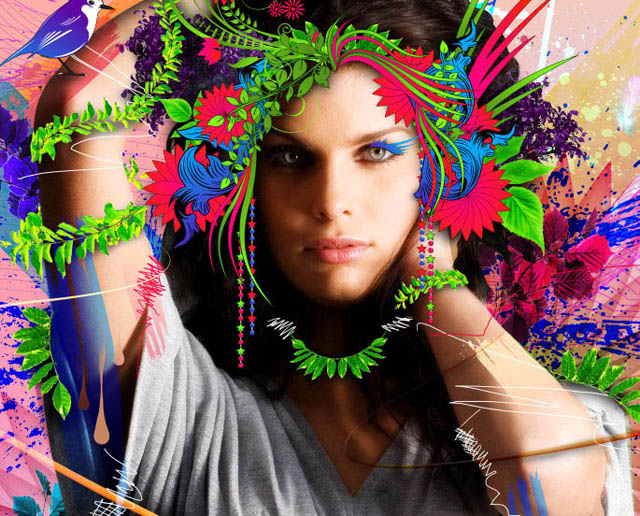
b

a
Step 57
Next, I'm adding more vibrant colors around, make some layers and use Brush Tool, choose big size Airbrush and paint some colors around. Try some layer modes, Linear Light, Screen, Overlay, Softlight with some different colors will give vibrant light effects. Lighten some areas around the model and darken some areas on the edge of the working document.
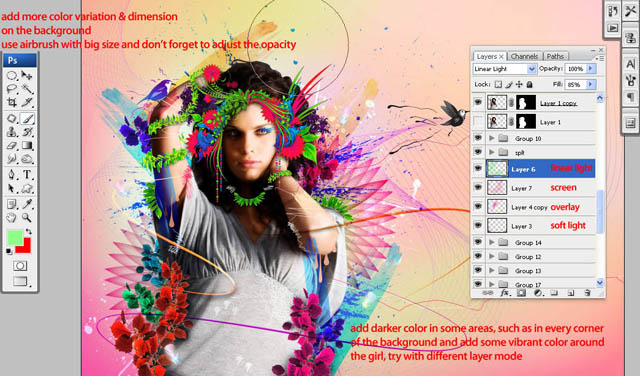
Step 58
Try to mix the background with some abstract fractal, open background.jpg, make a selection on the fractal thing, drag and mix it with the background, use our previous technique before to compose it. Use Warp tool and experiment on layer mode will work on this step.
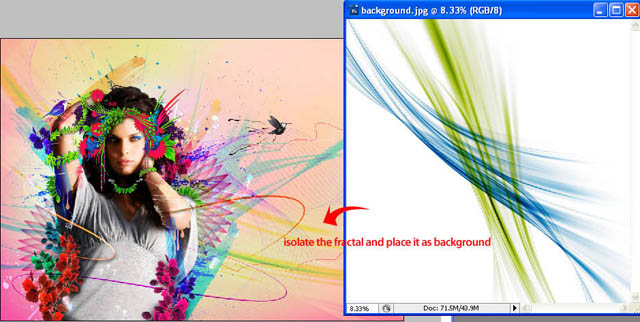
Step 59
Add more grunge splatter and brush stroke with different size and colors. Open brushstroke2.jpg and grungesplatter2.jpg or use your own splatter and stroke stock.
Step 60
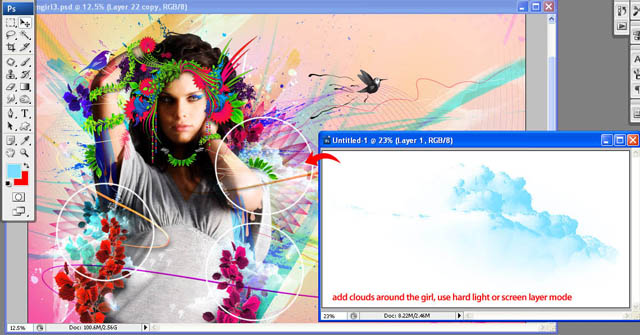
Open cloud.jpg and add the cloud stock around the girl and set the layer mode to Hard Light or Screen.
Step 61
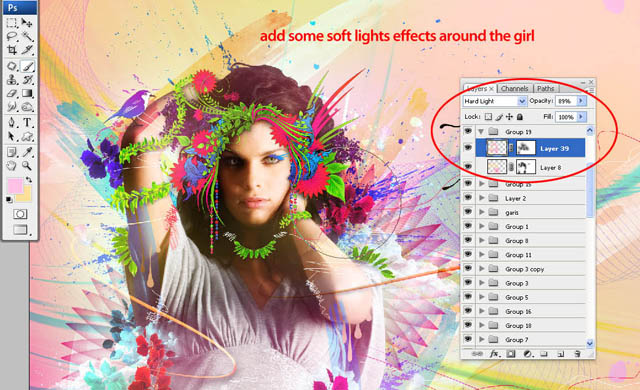
Make new layer above all the other layers, set the layer mode to Hard Light with 89% opacity, pick a soft pink and soft yellow color, start brushing around using airbrush tool to have a soft lights effects around the girl.
Step 62
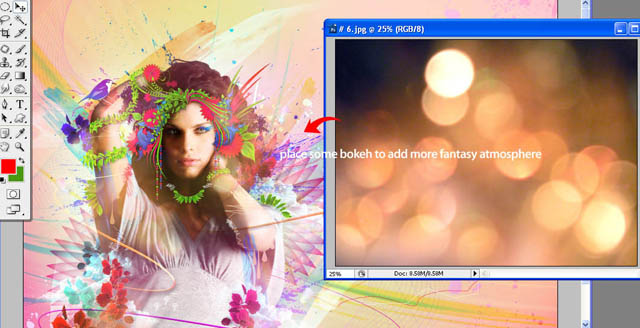
Open bokeh.jpg and duplicate and place it to add more fantasy atmosphere. Set the layer mode to Lighten and use Masking to erase some parts of the bokeh lights.
Step 63
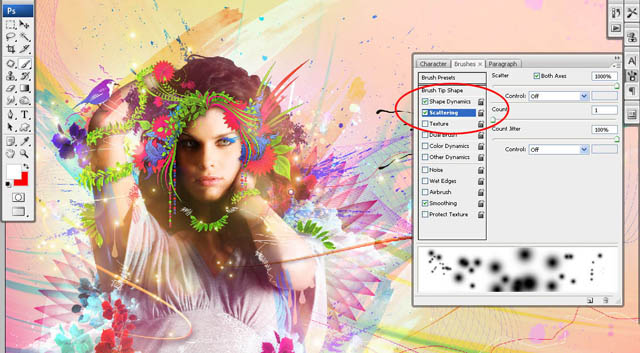
Next we will add sparkling fantasy light effects. Make new layer, pick airbrush tool. Open Brushes window and activate the Scattering option adjust the option depends on your need and start brushing around. Apply Outer Glow on the layer style to make the them glowing.
Step 64
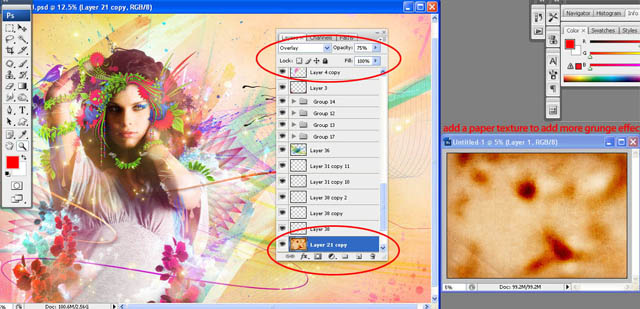
Open paper.jpg and place it as a texture on the background. Set the layer mode to Overlay with 75% opacity. You can also use Dodge and Burn tool in some areas to add more depth and grunge effect.
Step 65
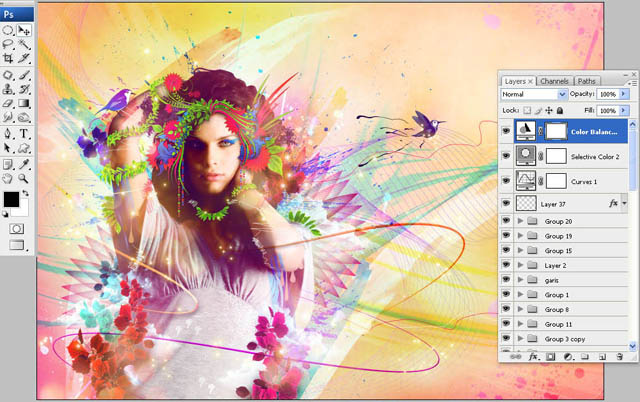
Adjust the color using color adjustment. Try to combine Color Balance, Selective Color and Curve. I'm making a reddish color adjustment here, feel free to use your own color adjustment pallete. There is no limitation on this step.
Step 66
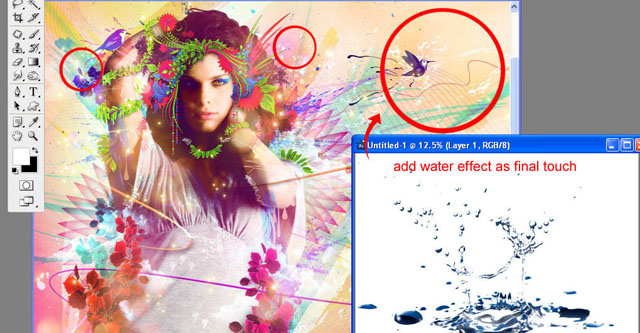
And for the final splash effects, open water.png, duplicate and transform it using Warp tool. Start to place and compose the water around. Set the layer mode to Color Dodge to make it white and transparant.
Step 67
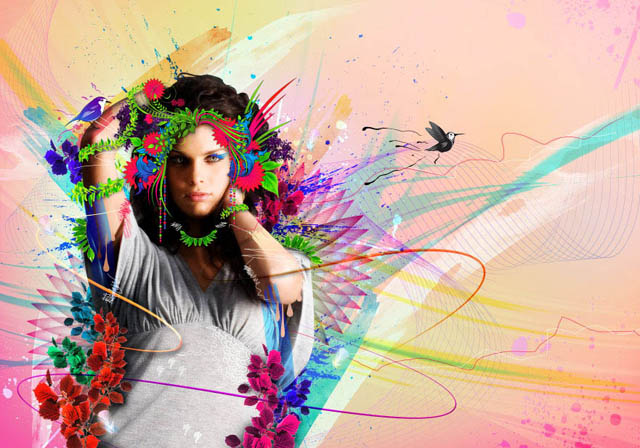
Make copy of all the layers into a group and then merge it. Apply Sharpen once for finishing touch and voila we're done with the final artwork :)
About the author
Copyright © . All Rights Reserved
