Golden Skin Tutorial

In this intermediate tutorial you'll learn how to give skin a golden shimmer by mastering adjustment layers, filters and layer masks.
The stock photo I used for this tutorial can be downloaded for free here.
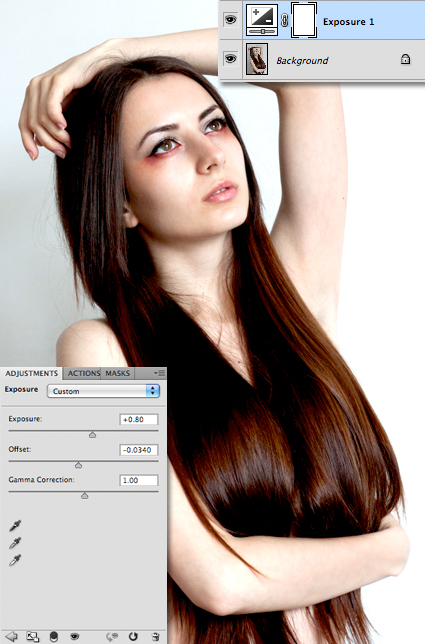
First of all we want to brighten the image, so add an Exposure adjustment layer and balance the sliders so you get strong highlights and shadows.
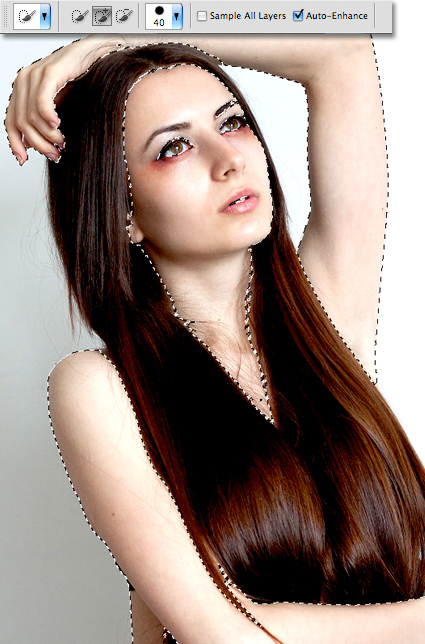
Next we need to make a selection of the model's skin.
To do this, first use the Quick Selection Tool to draw over areas of skin on the face and body.
You can hold down the alt key to switch between selecting and deselecting, and reduce the brush size when selecting smaller areas like the eyes and teeth.
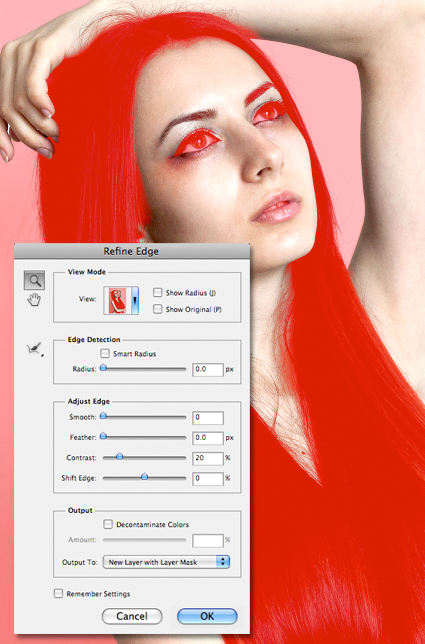
When you've made the best selection you can, click on Refine Edge and use the Refine Radius Tool with a large brush size to paint over stray hairs, adding them to the selection.
When you're done, set the Output as a New Layer with Layer Mask, and click OK.
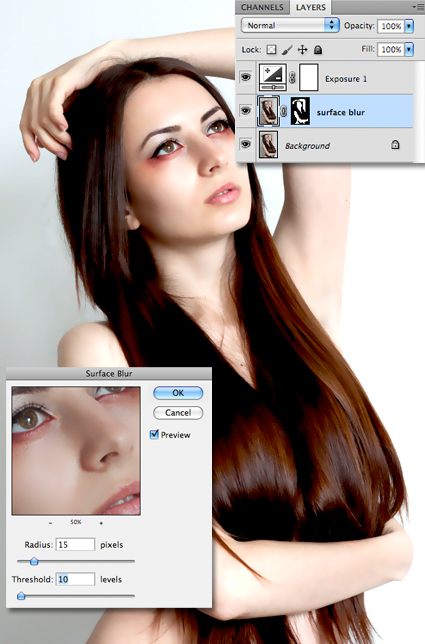
Rename your new skin layer 'surface blur', then go to Filter > Blur > Surface Blur, and set the Radius to 15 pixels, and the Threshold to 10 levels.
This will smooth the skin, while keeping edges sharp.
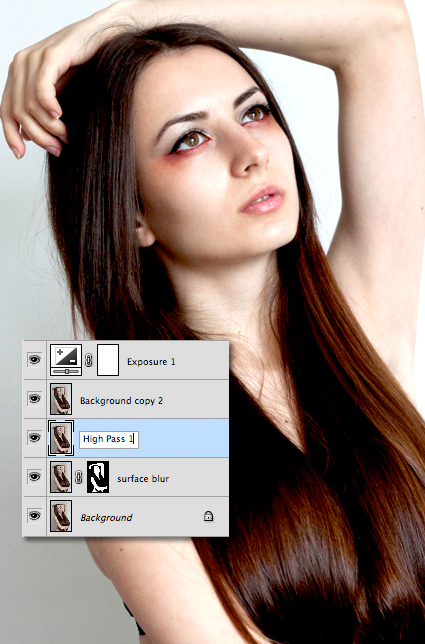
Next duplicate the background layer twice, and move them above the 'surface blur' layer, but below the Exposure layer.
Name the bottom one 'High Pass 1?, and the top one 'High Pass 2?, and give them both layer masks.
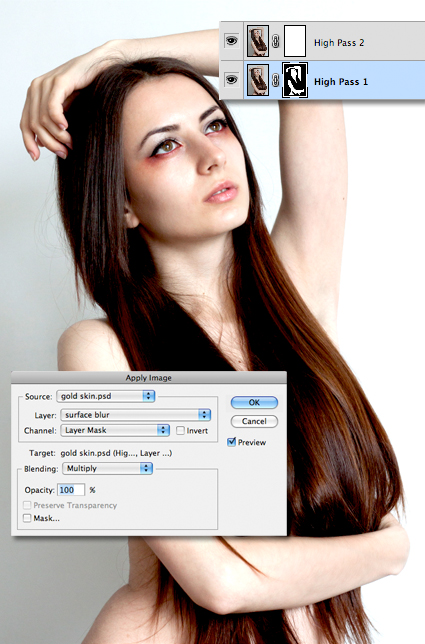
Click on the layer mask thumbnail of 'High Pass 1?, and go to Image > Apply Image.
Choose the 'surface blur' layer, and it's layer mask from the drop down menus.
Now add the same layer mask to the 'High Pass 2? layer mask, using the same process.
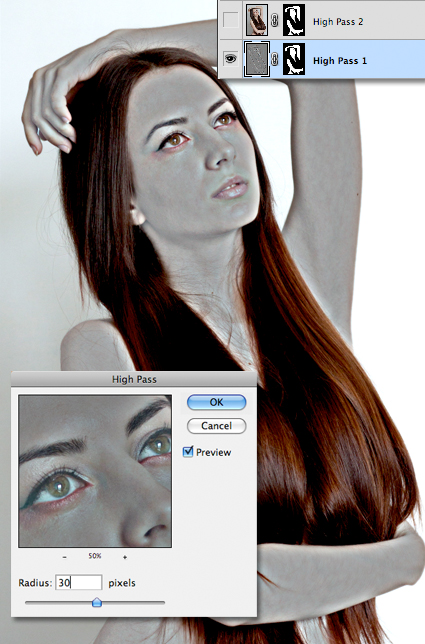
You can now hide the 'High Pass 2? layer, and select the 'High pass 1? layer thumbnail.
Go to Filter > Other > High Pass, and set the Radius to 30 pixels.
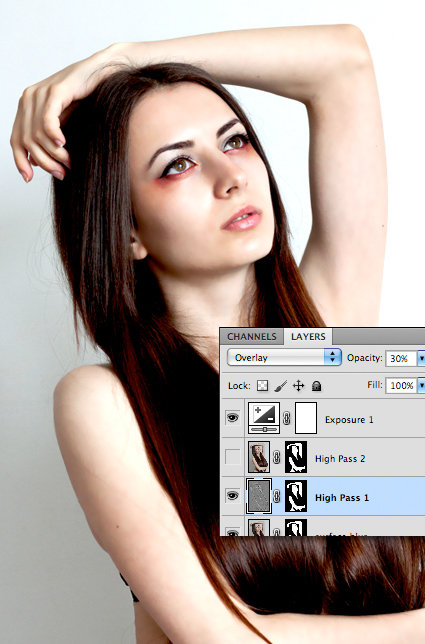
Now set the layer's blending mode to Overlay, at 30% Opacity.
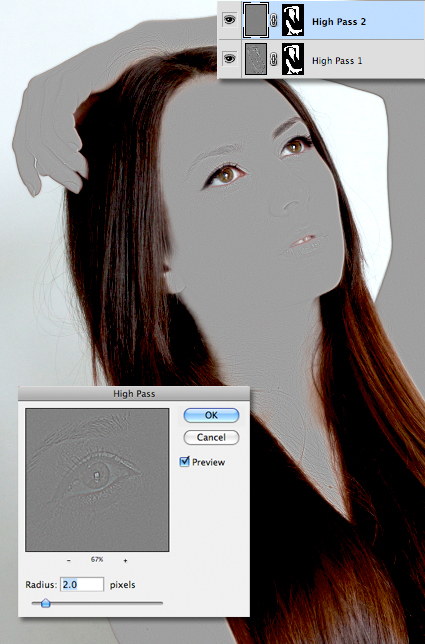
Unhide the 'High Pass 2? layer give it a High Pass set to 2 pixels.
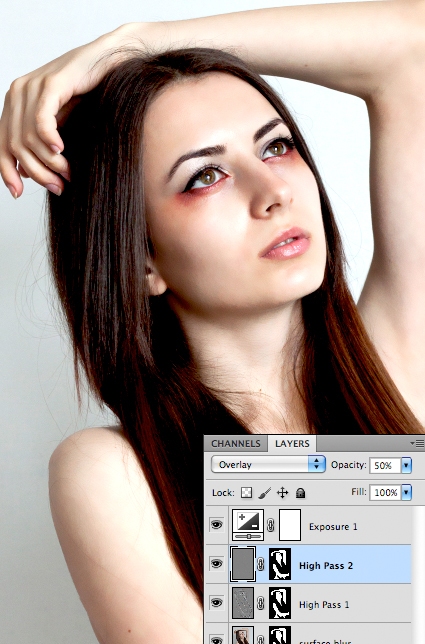
Again, set it's blending mode to Overlay, and set it's Opacity to 50%.
Doing this will have given a glow to the skin highlights, and smaller details.
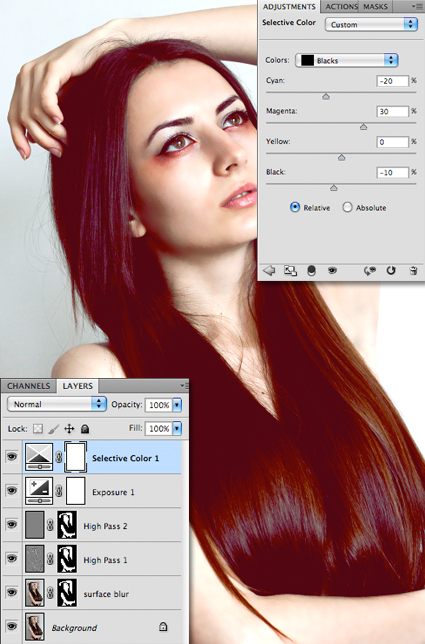
Now add a Selective Color adjustment layer above the Exposure layer.
Choose Blacks from the Colors menu, and adjust the sliders as I've done above.
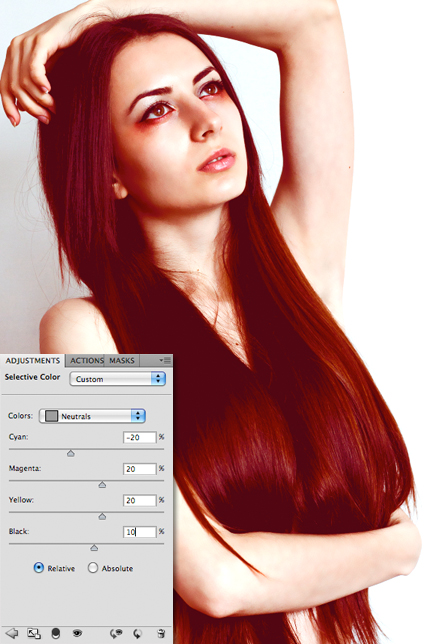
Then choose Neutrals and adjust the sliders so they match mine above.
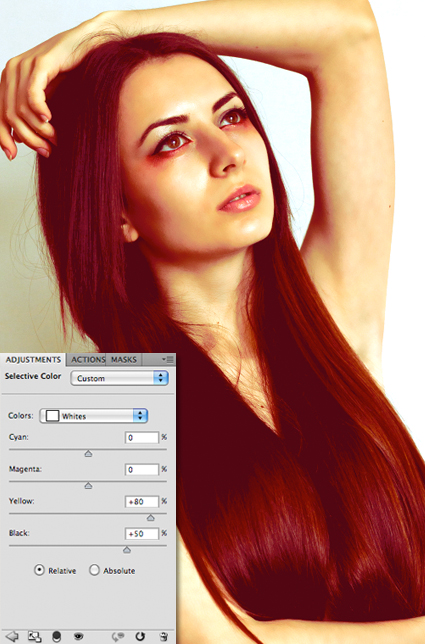
And finally, choose Whites from the menu, and change the sliders so they match mine.
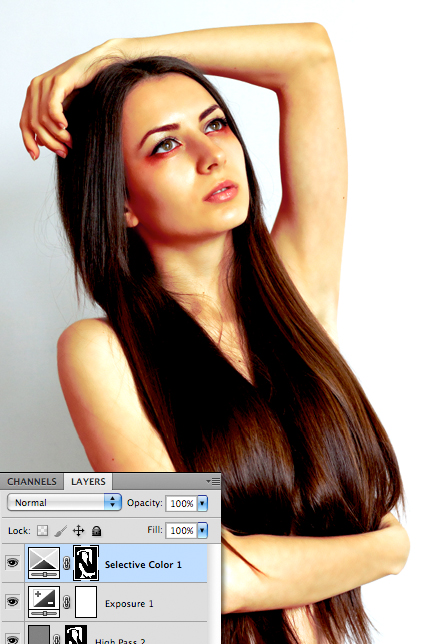
Select the layer's layer mask and add the same skin mask as you did for the High Pass layers.
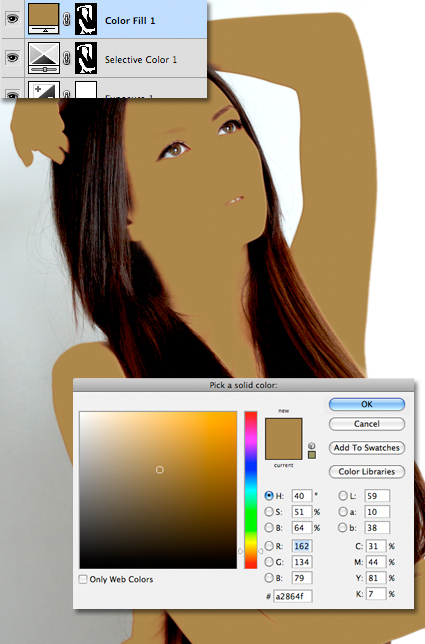
Now add a Solid Color adjustment layer, and choose a tan colour.
Add the same skin layer mask as before.
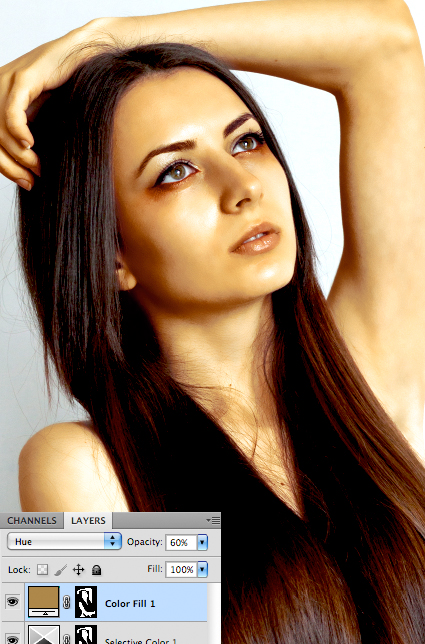
Set the layer's blending mode to Hue, and set it's Opacity to 60%.
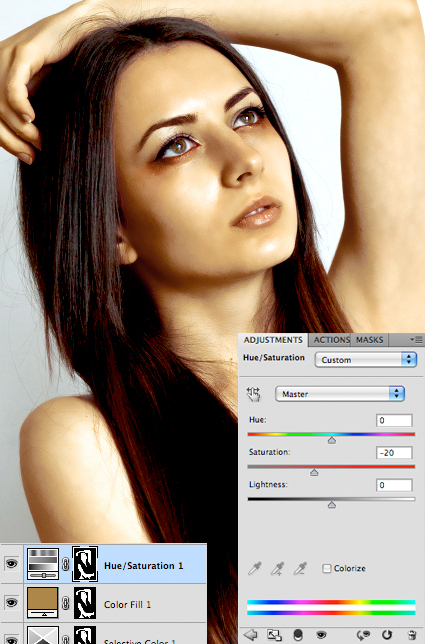
Next add a Hue/Saturation layer and take the Saturation down to -20.
Add the skin layer mask to confine the adjustment to the skin areas.
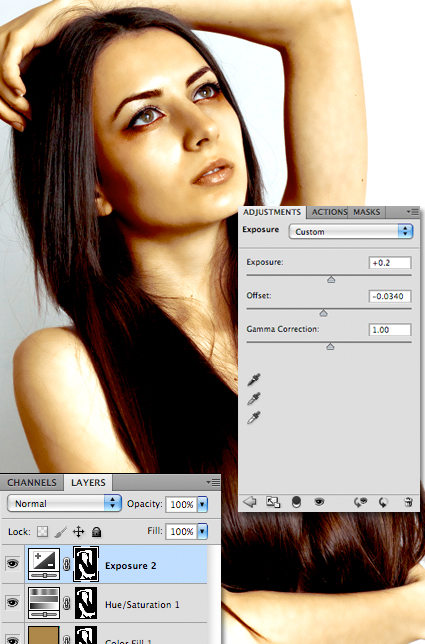
And finally, add another Exposure layer, and balance the sliders as I have above to give the skin an added glow.

And here's the final outcome.
Copyright © . All Rights Reserved