Neon Records - Animated Neon Sign Photoshop Tutorial
Step 10
Above the "Background adjustment copy" layer create a new layer and
name it "window shadow". With the Polygonal Lasso Tool draw a selection
around the window in the lower right corner.
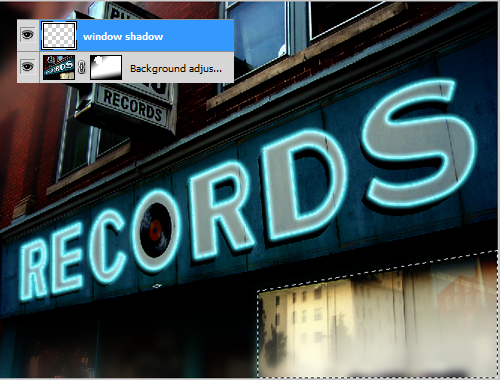
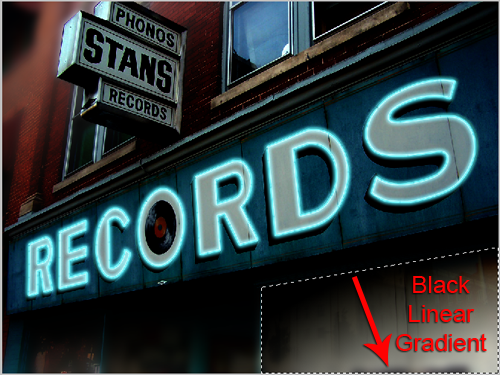
Once you have your selection choose the Gradient Tool with a
foreground color of black and draw a linear gradient from the top of
the window to the bottom. Reduce the the Opacity of the layer to 95%.
Step 11
Select the "Background adjustment copy" layer and using the Magic
Wand Tool select all of the text on the "PHONOS STANS RECORDS" sign by
shift+clicking on each letter. Create a new layer above the "Records
multiply" layer and name it "Stans sign".
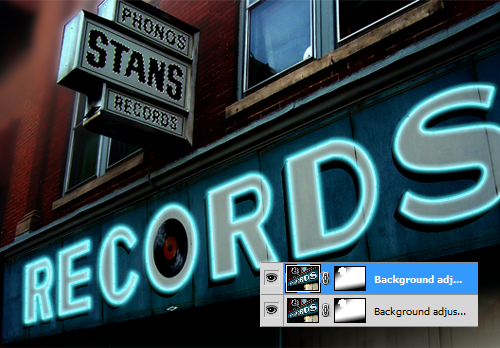
With the new layer selected fill the selection with the color #bf0000.
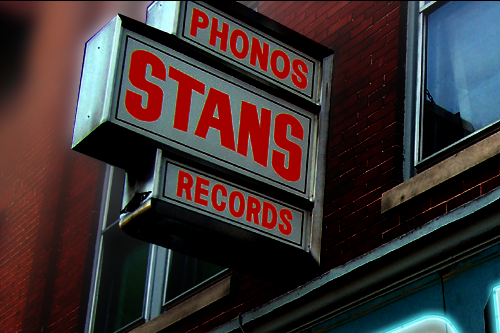
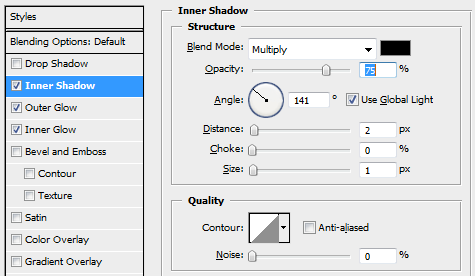
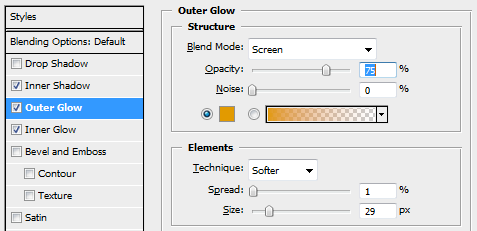
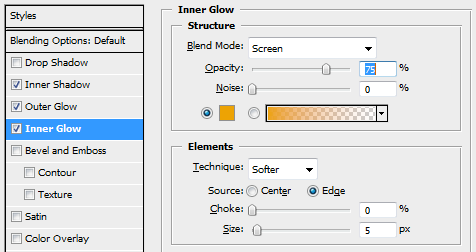
Next we need to add three layer styles to "Stans sign", an Inner Shadow, an Outer Glow and an Inner Glow.
Inner Shadow: Angle-141 degrees, Distance-2 px, Size-1 px
Outer Glow: Color-#e29a00, Spread-1%, Size-29 px
Inner Glow: Color-#e29a00, Choke-0%, Size-5 px
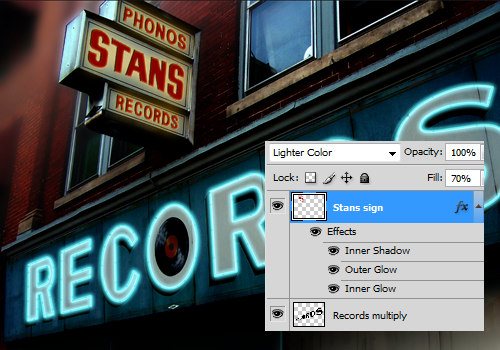
Change the Blend Mode to Lighter Color and reduce the Fill to 70%.
Step 12
Create a new layer above the "Stans sign" layer and name it "Stans
sign burn". Select the Brush Tool, with a soft brush, a foreground
color of black, Opacity set to 25%, Flow set to 13% and paint over the
end of the sign to reduce the glare.
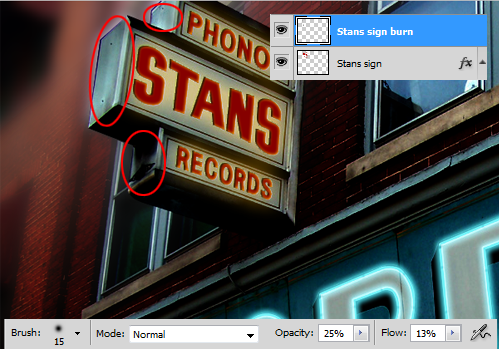
Step 13
Above the "Stans sign burn" layer create a new layer and name it
"radial burn". Select the Gradient Tool with a foreground color of
#400303 and draw a radial gradient from the upper left corner to the
bottom right of Stans sign. Change the Blend Mode to Color Burn and
reduce the Opacity to 85%.
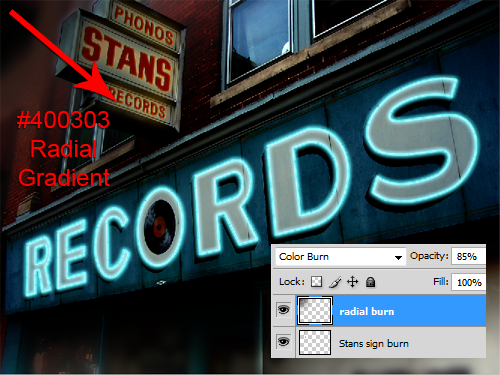
Step 14
Select the "neon tubes" layer and press Ctrl+J to duplicate it. Drag
the layer which should now be named "neon tubes copy 4" below the "neon
tubes" layer. Press "V" to select the Move Tool and nudge the layer
down and to the right. Reduce the Fill on the layer to 40%.
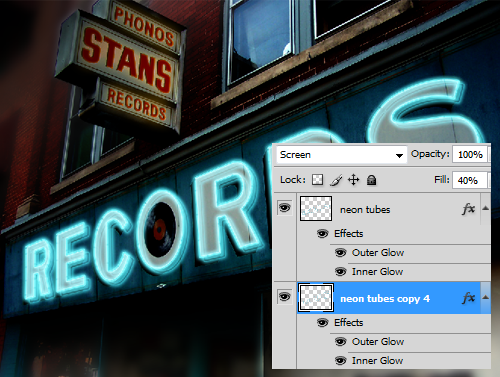
Step 15
The top of the image is still lighter than I'd like it to be so
create a new layer above the "Records multiply" layer and name it "top
gradient". Use the Polygonal Lasso Tool to draw a selection around
Stans sign as we did in "Step 7". Press Ctrl+Shift+I to invert the
selection. Select the Gradient Tool with a foreground color of black
and draw a linear gradient from the top left to the top of the neon
sign. Slightly reduce the Opacity to 80%.
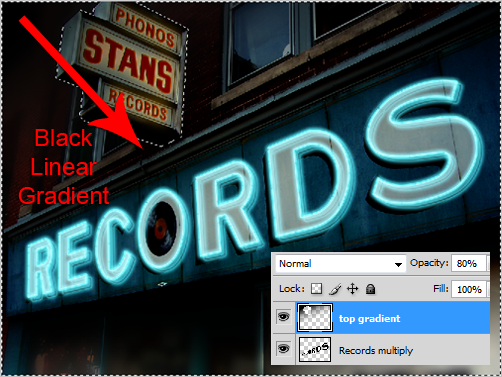
Step 16
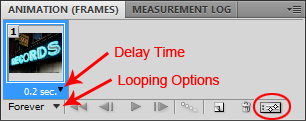
Now it's time to create the neon tube animation. Go to:
Window>Animation. Press the icon in the lower right of the animation
panel to convert it to frame animation. Set the delay to 0.2 seconds
and change the looping option to Forever.
Step 17
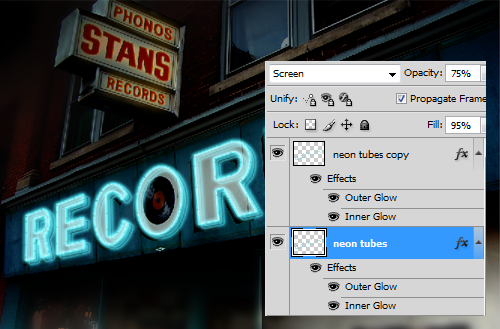
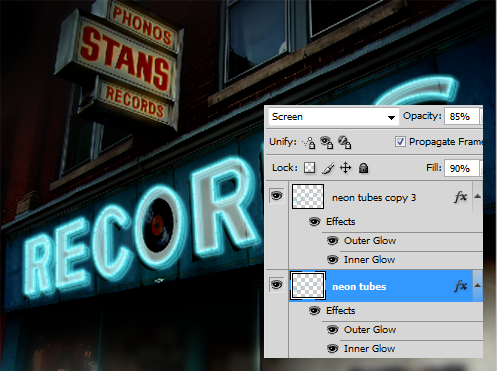
Select the "neon tubes" layer and reduce the Opacity to 75% and the
Fill to 95%. The "neon tubes copy" layers visibility should be turned
ON and the "neon tubes copy 2" and "neon tubes copy 3" should both be
turned OFF.
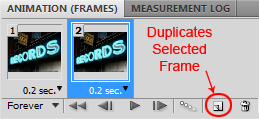
After insuring that these things above are as described duplicate
frame one in the animation panel by pressing the icon that looks like
the icon to create a new layer in the layers panel.
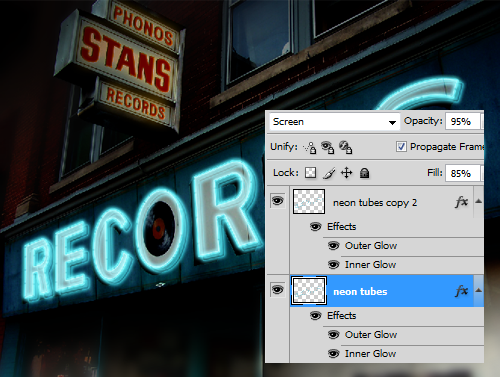
Now with frame two in the animation selected change the Opacity on
the "neon tubes" layer to 95% and the Fill to 85%. Turn the visibility
ON for the "neon tubes copy 2" layer and turn the visibility OFF for
both the "neon tubes copy" and "neon tubes copy 3" layers.
Duplicate frame two in the animation panel. With frame three
selected in the animation panel change the Opacity on the "neon tubes"
layer to 85% and the Fill to 90%. Turn the visibility ON for the "neon
tubes copy 3" layer and turn the visibility OFF for both the "neon
tubes copy" and "neon tubes copy 2" layers.
*You can now demo your animation with the play button located at the bottom of the animation panel.
**You can achieve different amounts of flicker or brightness by
adjusting the Opacity and the Fill on the "neon tubes" layer in each
frame of the animation. The amounts above are something that I thought
looked nice and subtle, but feel free to play around to see if you can
find something you like better.
Step 18
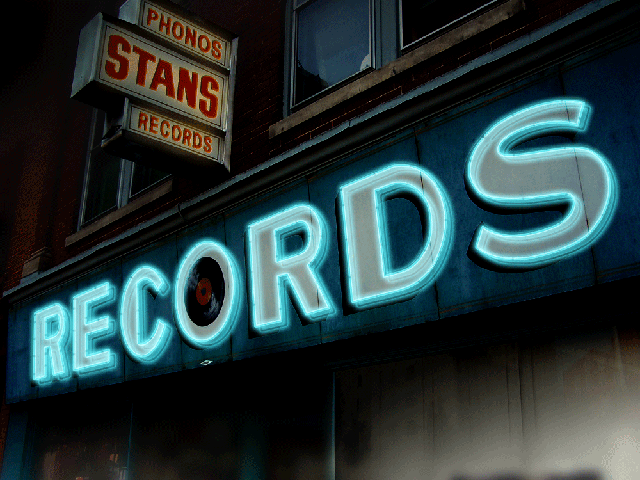
Now we need to save the animation as a GIF so that it can be viewed
on the web or just in your browser. Press Alt+Shift+Ctrl+S or go to:
File>Save for Web & Devices. In the panel that opens you'll
notice there is a lot of settings to choose from, but we'll just use
the default settings. The important part is to make sure the output
file type is a GIF. Press save and enjoy while glowing with excitement
knowing you just completed another tutorial!
About the author
Copyright © . All Rights Reserved
