Amazing Abstract Cubic Wallpaper Photoshop Tutorial.
In this simple photoshop tutorial you will use simple creative techniques to create a cool abstract cubic wallpaper.Like in any other photoshop wallpaper tutorials we will use simple photoshop effects to create abstract designs.To create the wallpaper we will first create simple cubes,then group them in to elements and with them create the final abstract cubic composition.
We will use photoshop cs5 for this wallpaper tutorial but you don't have worry you can follow along with any other older version.
This is how the final result should look like.
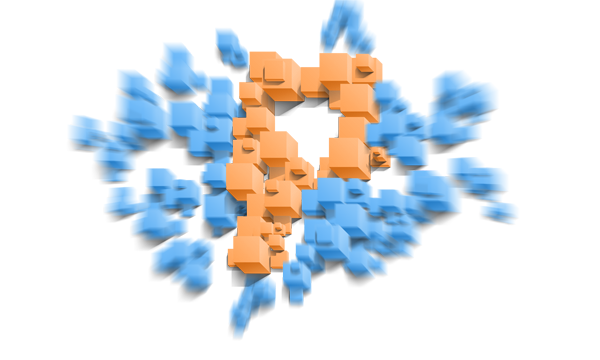
STEP 1 - Creating the Cubic Abstract Shapes - abstract wallpaper photoshop tutorial
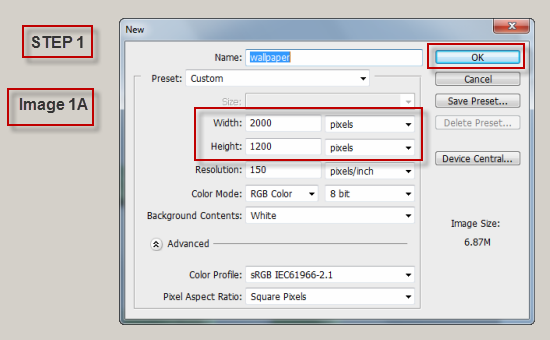
STEP 1A - Create a new document 2000 px in width and 1200 px in height.Then click OK.
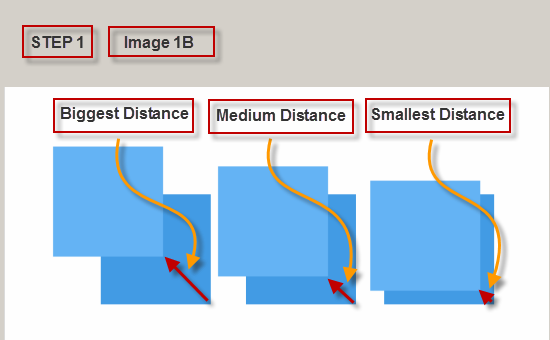
STEP 1B - Create a square shape 400 px by 400 px. Fill the shape with this color (R:66,G:154,B:229). Now Duplicate the layer.Change the color of the layer to this color (R:100,G:178,B:245).Make sure that your MOVE Tool is active.Select the new duplicated layer and by holding the Shift Key move the layer in 45 degree angle to the left.The distance is not relevant.The 2 shapes that we have created are one shape element.
STEP 1C - In order to speed up the creation of the abstract wallpaper photoshop tutorial you will have to repeat the STEP 1B - 2 times.But every time you repeat the process make the distance of the moved layer smaller and smaller.At the end you should have 3 shape elements. This final result should look like in Image 1B.
STEP 2 - Creation of the Cubic Abstract Shape's 3D look - Abstract photoshop wallpaper tutorial
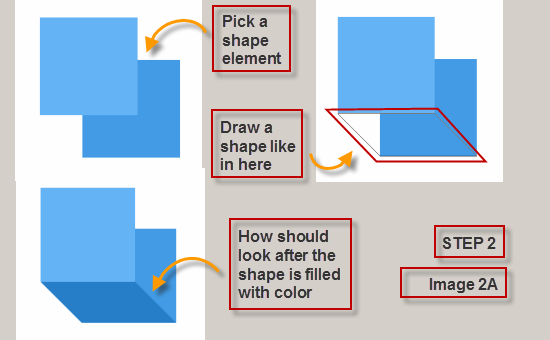
STEP 2A -In this part of the wallpaper photoshop tutorial we will give a 3D look of the shapes.Now pick one shape element,it doesn't matter which one. Create a new layer and name it Bottom_Cube_Side.Pick the P key on your keyboard to activate the PEN Tool and draw a shape similar to the one shown in image 2A. Switch from the LAYER tab to the PATHS tab and load the shape as selection. Make sure that the Bottom_Cube_Side layer is selected.Fill the shape with this color (R:38,G:126,B:200)
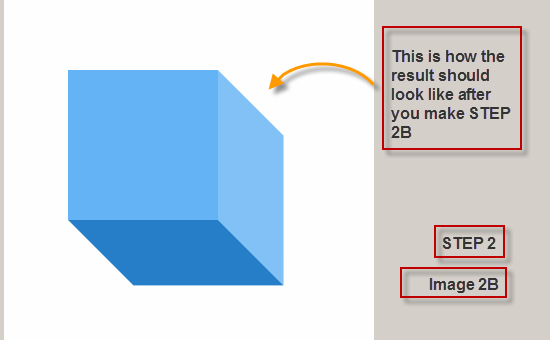
STEP 2B - Now you have to do the same for the right side of the cube.Repeat STEP 2A.The only changes you have to do is set the name of the layer Right_Cube_Side and fill the shape with this color (R:129,G:193,B:246).The result is shown in image 2B.
STEP 3 - Adding shadows to the Cube element - abstract wallpaper photoshop tutorial
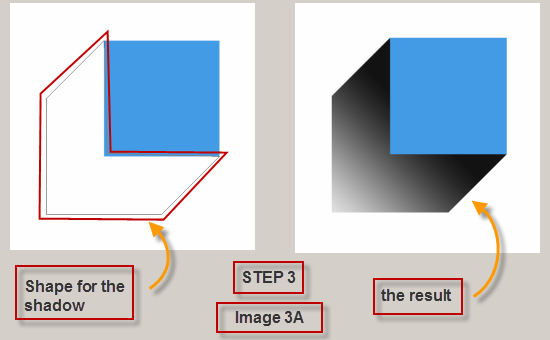
STEP 3A - In order to make the photoshop abstract wallpaper tutorial more realistic we need to add shadow to it.Now Turn of the visibility of all layers and leave the square that is the bottom part of the element.It will be used as a guide to help us draw the shape for shadow of the cube.Now create a new layer and set it to be at the bottom of the other layers and name it Shadow Element. Now pick the P key on your keyboard and draw a shape similar in the image 3A.After that load the shape as selection and fill it with gradient from black to transparent.
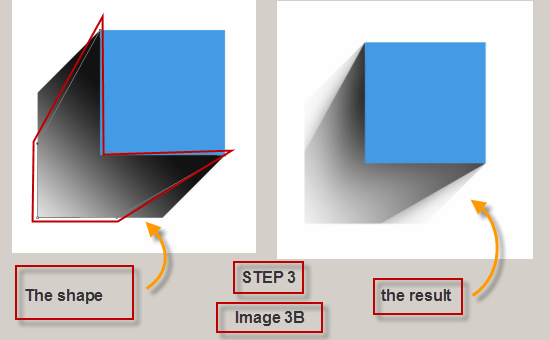
STEP 3B - This step is all about refining the shadow.Pick the P key on your keyboard and activate the Pen tool. Draw a shape similar to this one shown in image 3B. After that load the shape as a selection and inverse it so the outside parts are selected. Then pick the Eraser tool and start erasing the outer side of the shadow. You should get something similar shown on the image 3B.
STEP 4 - Enhancing the Cube by adding gradient - abstract wallpaper photoshop tutorial
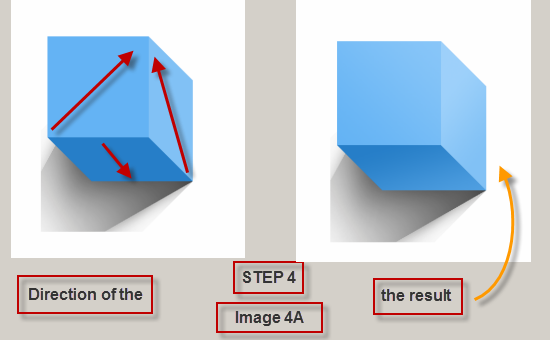
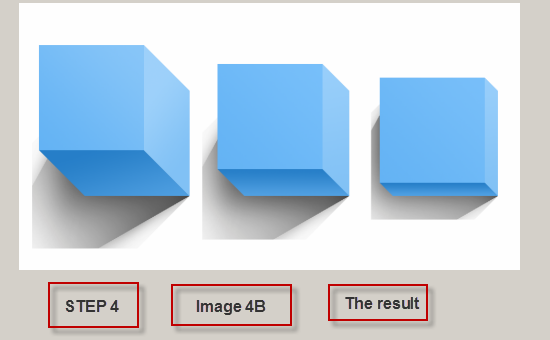
STEP 4A - In this part of the abstract photoshop tutorial we will soften the cube with a gradient to give the cube a more realistic look.Turn the visibility on for the layers that we turned off in STEP 3A.Add gradient to the top, bottom and right side of the cube. Use the colors that we have on the cube as dark colors of the gradient and from those colors chose a tiny lighter color as light side of the gradient. The result si shown in image 4A.
STEP 4B -Repeat from STEP 2 to STEP 4 for every other Shape Element. What you should get can be seen on image 4B.
STEP 5 - Grouping the elements in to forms - abstract wallpaper photoshop tutorial
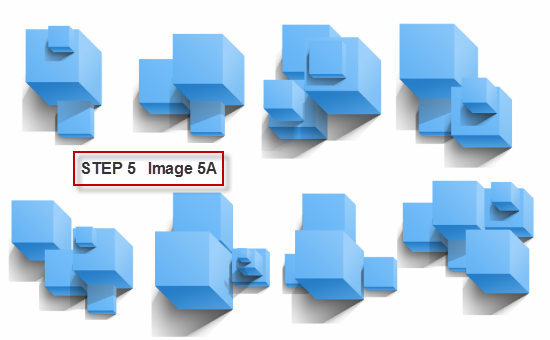
To give the wallpaper a realistic 3D look we need to group the elements in to forms.We have created the 3 cubes that we needed.Now fist thing you have to do is put every cube in separate groups. I named the groups Big,Medium and Small Box.Now you can start your creativity and start grouping the 3 Cubes in to Forms by duplicating and transforming them.Here are the group elements i have created shown in image 5A.
STEP 6 - Creating the final composition of the wallpaper - abstract wallpaper photoshop tutorial
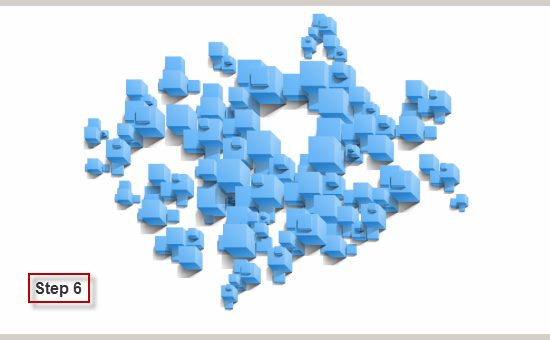
STEP 6 - We have created the base for the photoshop abstract background.Now we have to add some photoshop background effects to it.This step takes a lot of time because its a creative design process and in order to make it right you have to spent all the time you think its neccessary.It took me around 1 hour to setup the elements as they are shown in the image below.There is no right and wrong you just need to transform the elements till you get what you need.This is what i came up with.
STEP 7 - Separate objects in to areas - abstract wallpaper photoshop tutorial
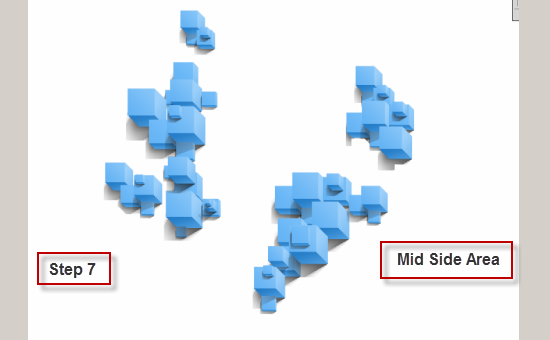
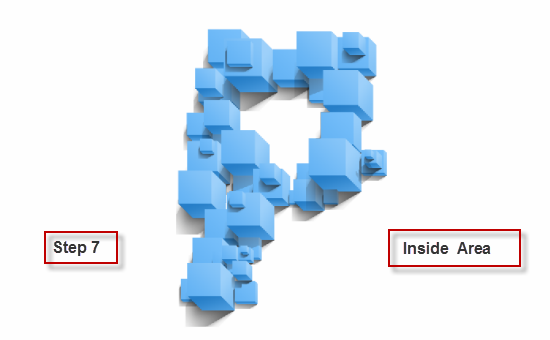
STEP 7A - In this step we will build the base for the background designs by separating the background in 3 groups.First thing you have to do is separate the objects in 3 major areas. First area will be the objects on the outer side. Then in one area you are going put the objects that are in the middle and on a separate area will be the inside center objects. You can see how it should look like in images below.
Take the elements on the outside,duplicate them and then merge them so they will be on one layer.Name the layer Outside.
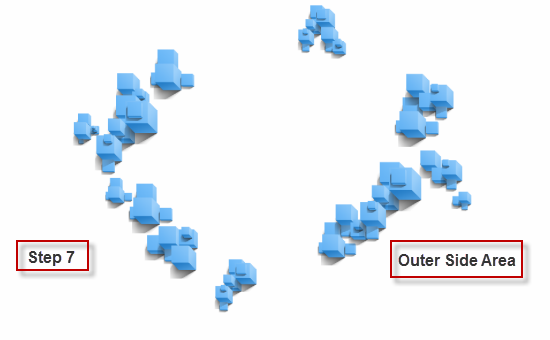
The same goes here to.Take the elements on the middle,duplicate them and then merge them so they will be on one layer.Name the layer Mid_Side.Set this layer on top of the Outside layer.
Here the inside area takes a shape like the letter P as a starting letter for Prodezen. Again duplicate the elements,merge them in to one layer and name the layer Inner_Side. Set this layer on top of the other 2 layers.
STEP 8 -Adding blur to the area elements
Here is the part where we will use some amazing photoshop effects like the Radial Blur that will enhance our design.
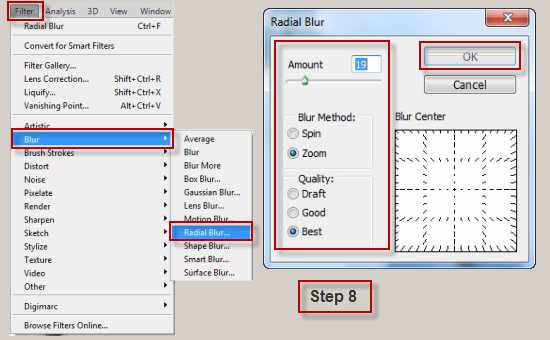
STEP 8A - Select the Outside layer and go to Filter -> Blur -> Radial Blur. Set Amount to 19 , Blur Method to Zoom, and Quality to Best and then click OK.This is what you should get.
This is what you should get with this photoshop cool effect.
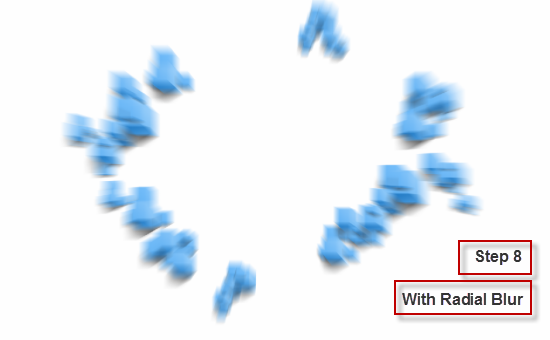
STEP 8B - Repeat STEP 8A on the Mid_Side layer. When you come to the Radial Blur window change the Amount to 12 and click OK. Here is what you should get.
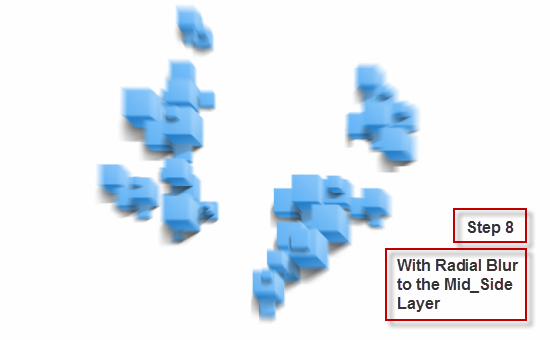
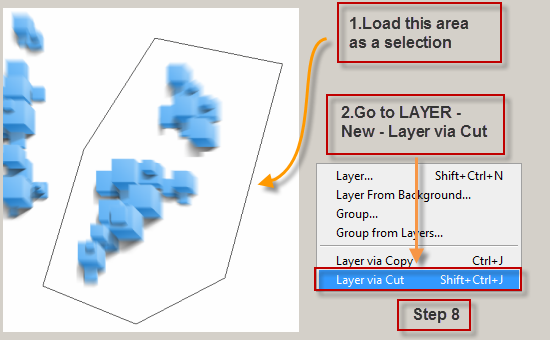
STEP 8C - Make sure that the Mid_Side layer is selected.Pick the P key on your keyboard to activate the Pen Tool and draw a shape around the right block. Make an active selection and go to Layer -> New -> Layer via Cut. Name the new layer on the right Upper_Mid_Side and the other part on the left side Bottom_Mid_Side.
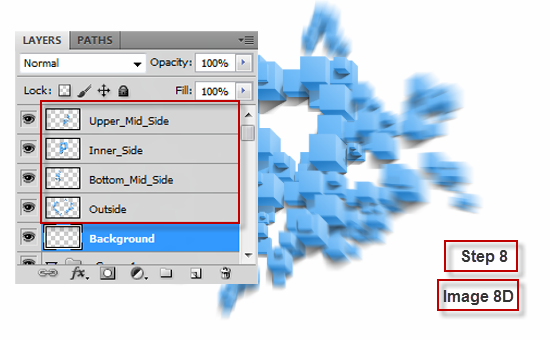
STEP 8D - Set the layer order to be like in image 8D.
STEP 9 - Add additional elements
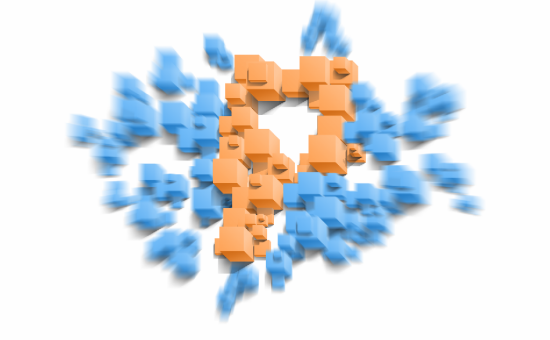
STEP 9A - Go to Layer -> New Adjustment Layer -> Hue/Saturation. Make sure to apply it to the Inner_Side layer. Set Hue to -180 and Saturation to to 14. This step is by choice.You can set any color you think its good with any value.This step is a personal choise. The values i have chosen gave me this result.
This is what you should get at the end.The creative design and inspiration comes from you and you can shape it as you like.Thats why i encourage you to spent some time and create something like this.
About the author
Copyright © . All Rights Reserved
