Ghostly Text Effect

Note: You might need to load the Contours used in the tutorial, so check this image to see how to do so.
Step 1
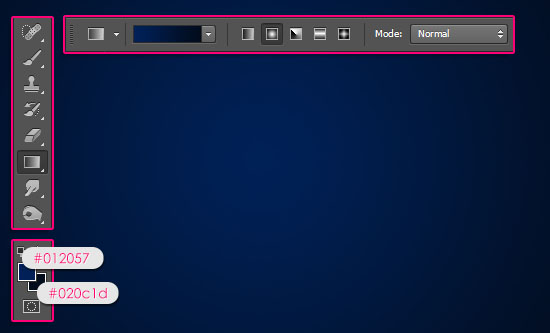
- Create a 1152 x 846 px document, set the Foreground color to #012057 and the Background color to #020c1d. Pick the Gradient Tool, click the Radial Gradient icon in the Options bar, then click and drag from the center of the document to one of the corners.
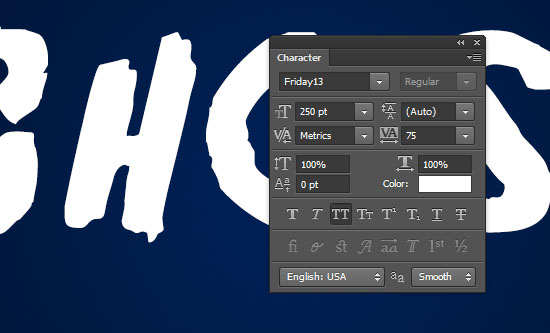
- Create the text in white using the font Friday 13. The font size is 250 pt and the Tracking value is set to 75 to avoid overlapping of the glowing edges.
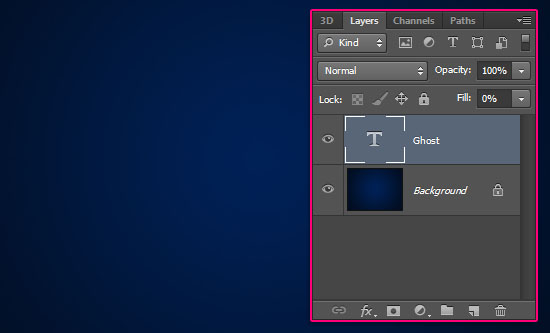
- Change the text layer's Fill value to 0.
Step 2
Double click the text layer to apply the following Layer Style:
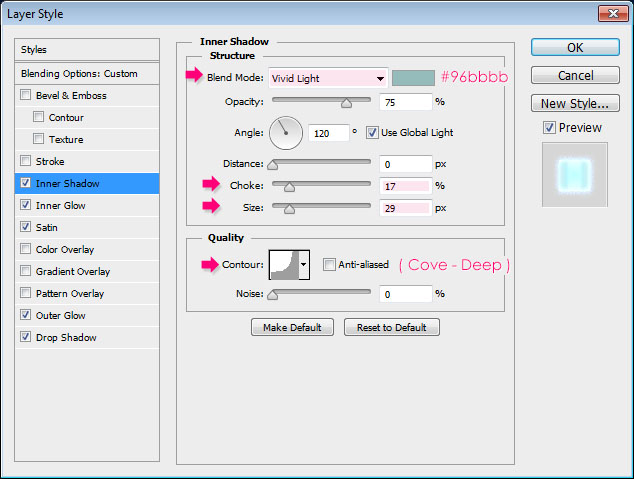
- Inner Shadow: Change the Blend Mode to Vivid Light, the color to #96bbbb, the Choke to 17, the Size to 29, and the Contour to Cove-Deep.
- Inner Glow: Change the Blend Mode to Hard Light, the color to #47c2fb, the Technique to Precise, the Source to Center, the Size to 46, and check the Anti-aliased box.
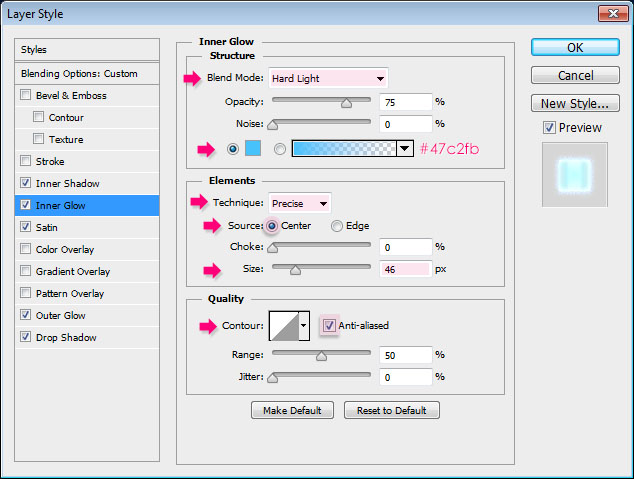
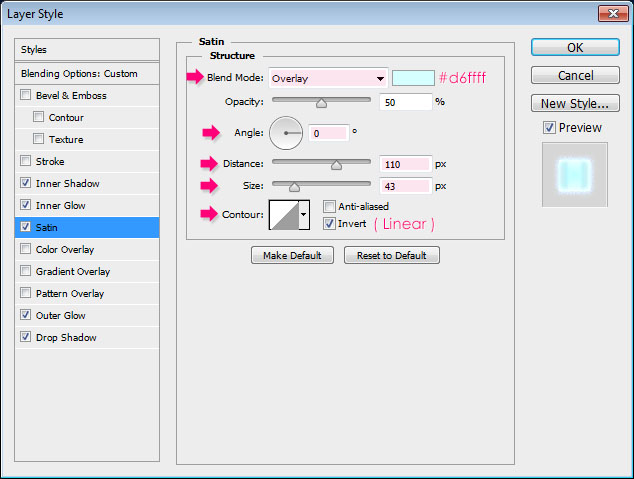
- Satin: Change the Blend Mode to Overlay, the color to #d6ffff, the Angle to 0, the Distance to 110, the Size to 43, and the Contour to Linear.
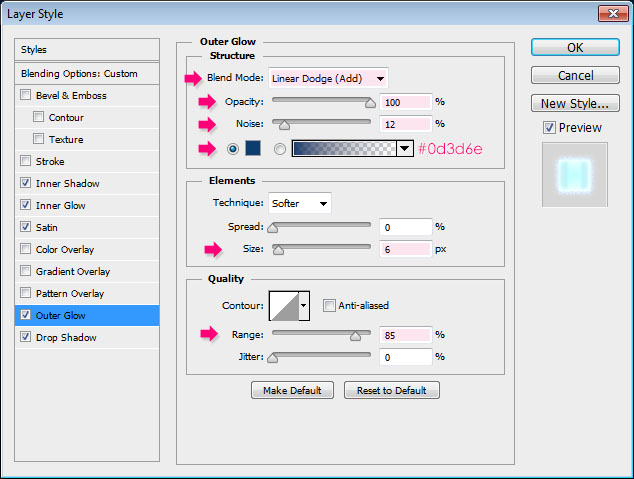
- Outer Glow: Change the Blend Mode to Linear Dodge (Add), the Opacity to 100%, the Noise to 12, the color to #0d3d6e, the Size to 6, and the Range to 85.
- Drop Shadow: Change the Blend Mode to Overlay, the color to #9ca6b7, the Distance to 0, the Size to 10, and the Contour to Half Round.
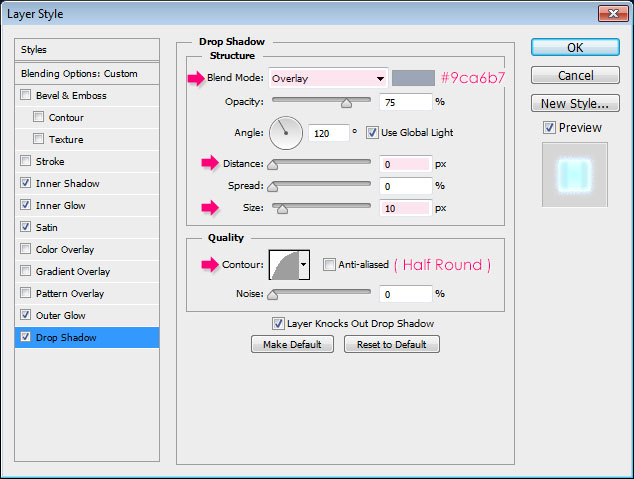
This will create a glowing hazy effect. Notice that we modified the Blend Mode and color values for the Satin and Shadow effects to use them as Glow effects, in order to intensify the brightness of the different parts of the text.

Step 3
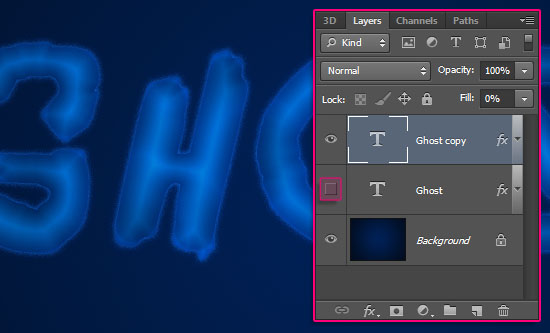
- Duplicate the text layer then make the original invisible by clicking the eye icon next to it.
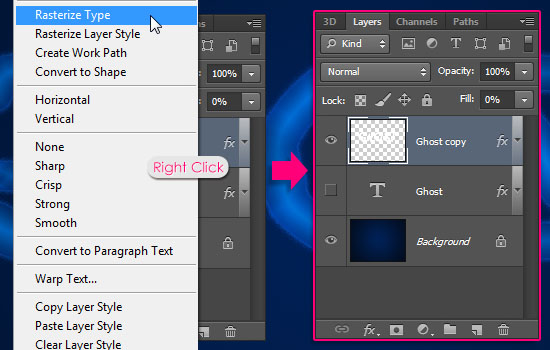
- Right click the copy text layer then choose Rasterize Type. This will convert the Type layer into a rasterized layer, in which you can't modify the text.
We need to rasterize the layer in order to apply Filters to its content. That's why we kept the original text layer and made it invisible, so that we can modify it easily if we want to edit the text.
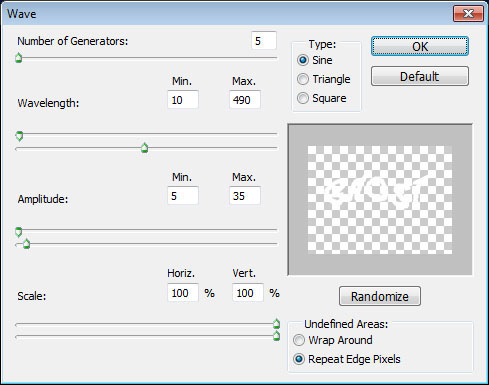
- Go to Filter -> Distort -> Wave, and type in the values below. The Wavelength Max. value controls how "wavy" the text looks, with lower values resulting in a wavier effect. So you can play around with the values if you like.
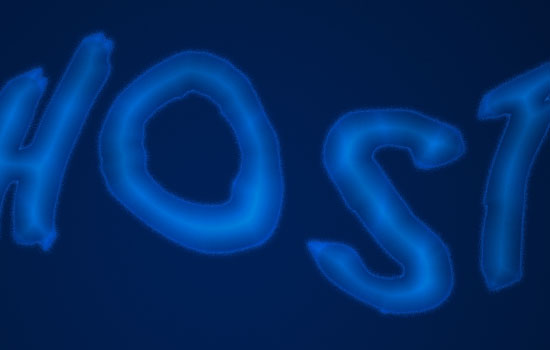
- You should get a glowing wavy effect now.
Step 4
- Duplicate the rasterized wavy text layer then right click the original one and choose Clear Layer Style to get rid of any effects.
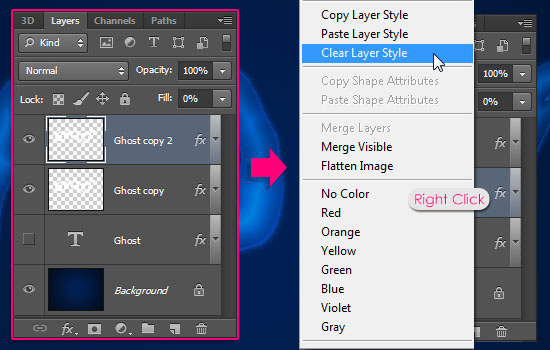
- We will use this layer to make the edges more hazy.
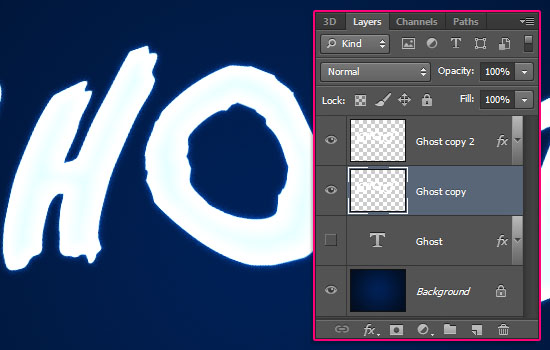
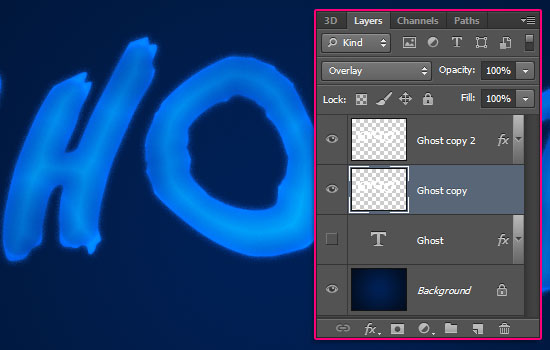
- Change the un-styled text layer's Blend Mode to Overlay.
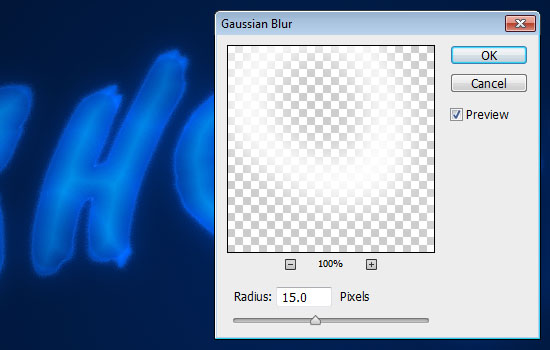
- Go to Filter -> Blue -> Gaussian Blur, and change the Radius to 15. Bigger values will create hazier edges, while lower ones will create a more defined glow. Try different values until you like the result.
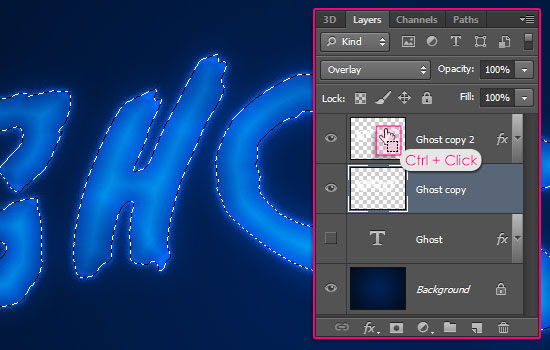
- Ctrl + Click the styled layer's thumbnail to create a selection.
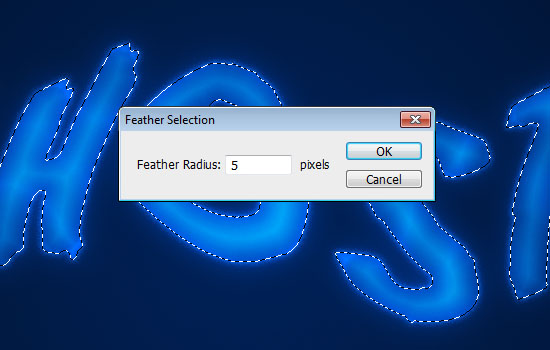
- Go to Select -> Modify -> Feather, and set the Feather Radius to 5. This will make the selection smoother.
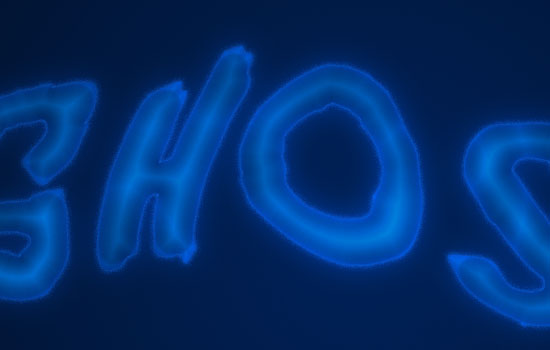
- Make sure that the blurred text layer is the active (selected) one, then hit the Delete key to get rid of the inner parts. Go to Select -> Deselect (or press Ctrl + D) to get rid of the selection.
Step 5
- Click the 'Create new fill or adjustment layer' icon down the Layers panel and choose Gradient Map.
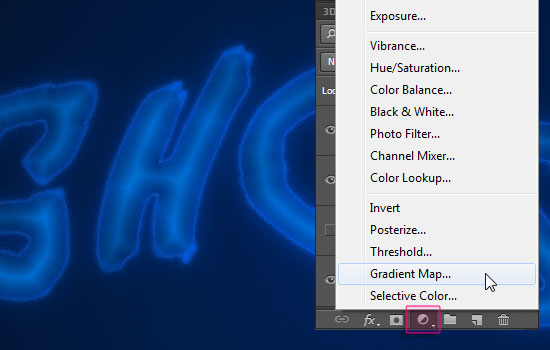
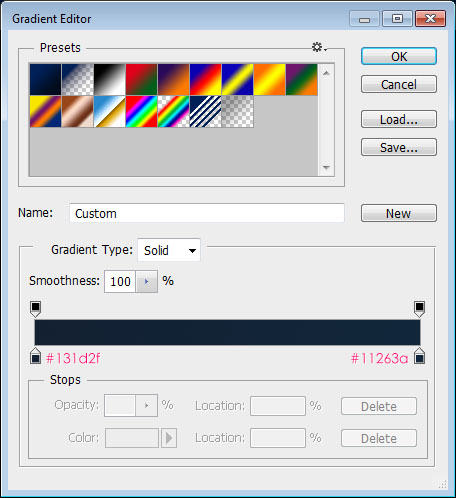
- Place the adjustment layer on top of all layers then change its Blend Mode to Soft Light and its Opacity to 20%, then click the Gradient box to create the gradient used.
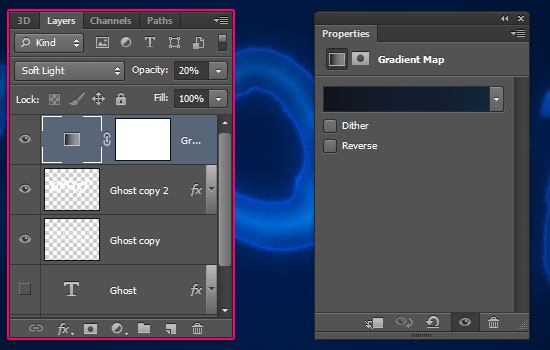
- The gradient uses two colors, #131d2f to the left, and #11263a to the right.
Step 6
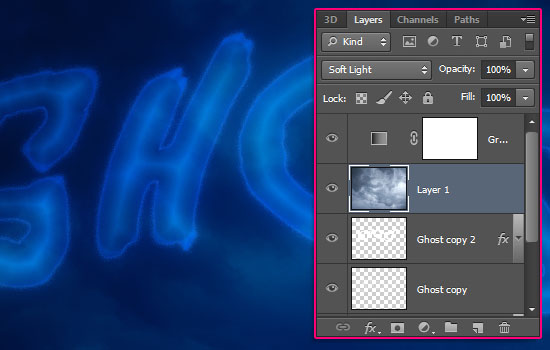
- Place the Stock Stormy Clouds image right below the adjustment layer, resize it as needed, then change its layer's Blend Mode to Soft Light.
- Create a new layer right below the two rasterized text layers, call it "Lightning", then change its Blend Mode to Overlay.
Pick the Brush Tool and set the Foreground color to #ebebeb.
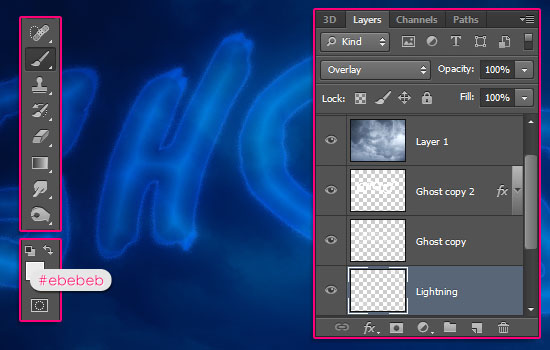
- Add some of the Lightning Brushes around the text.

- You can finally use the Eraser Tool to remove any unwanted parts of the lightning.
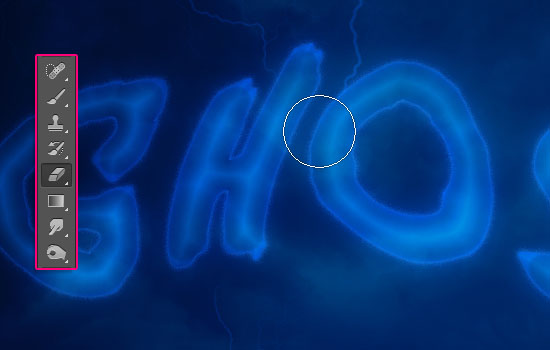
And there you have your glowing ghostly text effect ready!

Copyright © . All Rights Reserved