Type Tool in Photoshop CS6 - The Basics
The Type Tool is one of the powerful tools in Photoshop, which is mainly a graphics editing program. It is the tool used to create text inside Photoshop, and it has plenty of settings to control the created text's properties.
- Adobe Photoshop CS6 Classroom in a Book
- Photoshop CS6: Visual QuickStart Guide
- Photoshop CS6 For Dummies
- Adobe Photoshop CS6 Digital Classroom
- Photoshop CS6: The Missing Manual
- The Adobe Photoshop CS6 Book for Digital Photographers
- Adobe Master Class: Photoshop Inspiring artwork and tutorials by established and emerging artists
"Type Tool in Photoshop CS6" is a mini-post series that will tell you all about the different Type Tool settings, and show you the many tips and tricks for using the tool's amazing capabilities efficiently and effectively.
Introduction
The Type Tool has always been a part of Photoshop's "Tool Box" since its first release as Photoshop 1.0 in 1990.
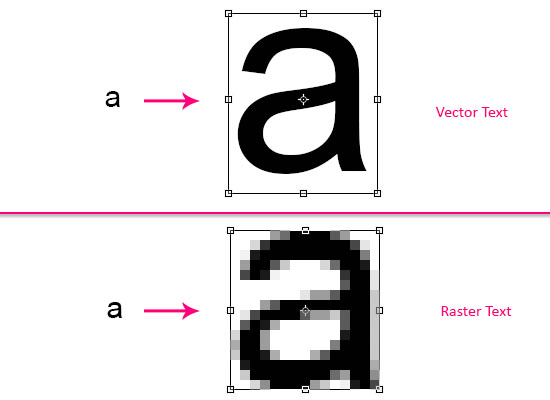
The text used to be created rasterized at first, which means that it was represented by a grid of fixed pixels (or points of color). But when Photoshop 7.0 was released back in 2002, the text became fully vector-based, which means it is now represented by mathematical calculations (expressions).
So while the raster text loses its quality and looks jagged when enlarged, the vector text maintains its quality and readability throughout any resizing process.
And even though the Type Tool's capabilities have come a long way since then, Photoshop is still not a page-layout software or a word-processor like InDesign or Microsoft Word. So basically it is not the smartest choice for huge amounts of text. It is more about adding great looking text to your images, web design, or banner and flyer designs.
Type Tool Location and Options
The Type Tool is located on the Tools panel at the left side of the screen. Click the T icon once to select the tool.
If you click and hold the Type Tool icon, you will get three more options that will be discussed later on.
Tip: You can press the (T) key on the Keyboard to select the Type Tool as well, and press (Shift + T) to cycle through the options.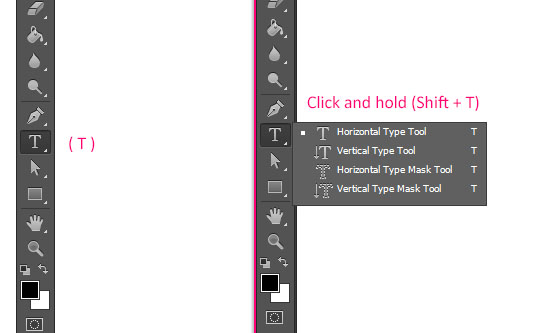
Where to look for the Type Tool settings inside Photoshop CS6
Note: each of the following will be discussed in further detail in the upcoming posts of the series.
1- Options Bar
Notice that when you select the Type Tool, the Options bar at the top of the screen changes immediately to display a couple of the tool's settings.
The Options bar provides quick access to the most important properties of the text, such as the font family, font size, and font color.

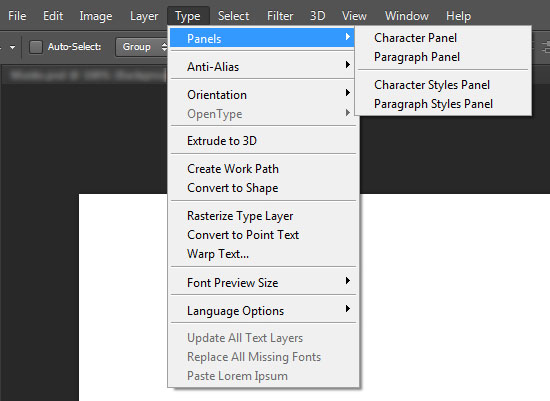
2- Type Menu
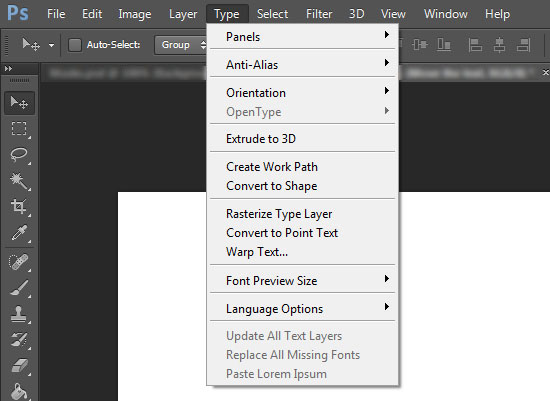
Introduced in Photoshop CS6, the Type menu is another place where you can look for, and find, some more Type Tool options.
3- Type Panels
There are four panels: The Character and Paragraph panels, and the new Photoshop CS6 Character Styles and Paragraph Styles panels. The panels can be found under the Window menu, or under Type -> Panels.
The panels have all the settings related to the text formatting.
You can read more about the Character Styles and Paragraph Styles panels here.
4- Type Preferences
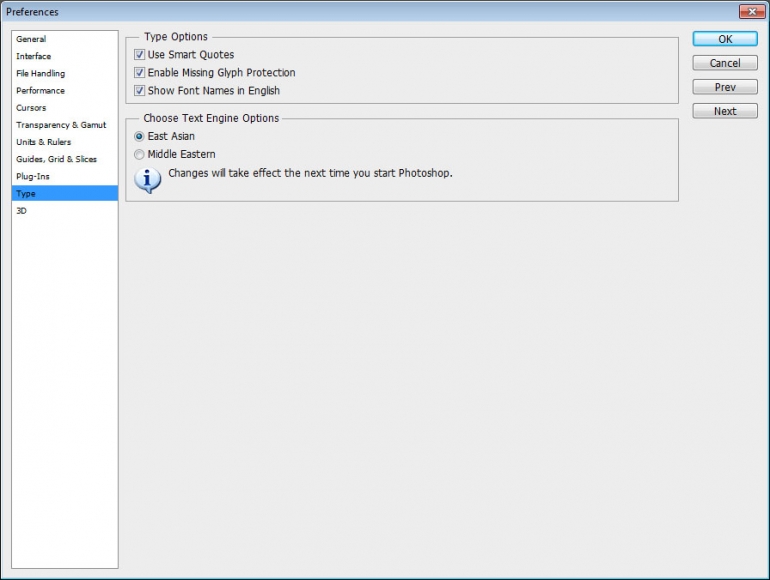
A few other Type Tool options can be found in the Preferences window (Edit -> Preferences -> Type).
Confirming and Canceling Type Changes
An important thing to keep in mind when creating text is that any changes must always be confirmed or declined.
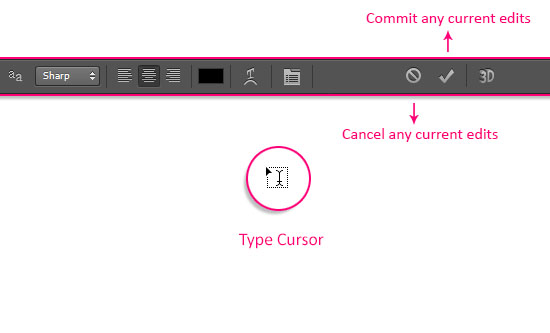
When the text is created or modified, two icons appear to the right side of the Options bar. The first one is the "Cancel any current edits" icon to ignore any changes made, and the other one is the "Commit any current edits" icon to confirm the changes.
Just make sure to click the correct icon whenever you're done creating or modifying the text.
Tip: You can confirm the changes by hitting the Keyboard's numeric keypad "Enter/Return" key, and you can cancel the changes by hitting the "Esc" key.
Also, the Type Tool has its own cursor shape, the Type cursor, which indicates that the tool is selected and ready to be used.
That's it for now. Next, creating Point Text and Paragraph Text will be discussed to help you create the text in both ways.
Copyright © . All Rights Reserved