5 Quick Selection Tools in Photoshop
Photoshop is the leading image editing software worldwide. Released more than 30 years ago, it still keeps its leading positions among experienced designers and beginners. It’s the number one choice for everyone working in the web design niche. It’s also the essential tool for every online marketing specialist, blogger, content maker, etc.
It may seem to be difficult to handle at first. However, once you learn a little bit more about its functionality, you’ll know that building high-quality visual content is easier than it seems. The quick selection tool in Photoshop is a great example of tools that make your life easier.
What makes Photoshop so popular is its vast choice of photo editing functionality. Photoshop (PS) provides impressive versatility, making it easy to modify the whole image or any selected element. By means of quick selection tools, highlight a certain part of a picture and modify it according to your requirements. If you spend some time learning how to use the quick selection tool in PhotoShop and all its benefits, you’ll know how to remove background in PhotoShop, adjust brightness, work with contrasts, and handle many other image settings.
Among many other things, PhotosShop quick selection lets you easily change backgrounds. For example, you have an awesome picture and you like everything about it except for the background. Using PhotoShop fast selection, you can get rid of the imperfect background and put the subject of your photo on another background. You can choose a different color or PhotoShop effect for it. You can also put the subject of your image on a popular location background, or anything else that you choose.
PS provides several features that let you highlight objects on images and edit backgrounds. Depending on the composition of the picture that you’d like to edit and your skills, you may use the quick selection tools in PhotoShop that we discuss in this guide. Let’s learn more about their features and how each of them works.
Where can I find selection tools in PhotoShop?
As the name implies, a selection tool in PhotoShop lets you choose what specific elements of an image you’d like to edit. It’s easy to find the 5 main selection tools in the sidebar of your working area, which include:

- Rectangular Marquee - lets you choose rectangular, eclipse, or other image portions.
- Lasso - draw a custom form of a selected area around an object.
- Magic Wand tool works similar to Lasso, but it’s more applicable to areas featuring edges that are clearly defined.
5 Most Popular Quick Selection Tools in PhotoShop:
Quick Selection Tool 1: Magic Wand Tool
PhotoShop Magic Wand tool lets you alter one part of an image, and leave other parts intact. It’s commonly used for removing the photo’s background layer and leaving other objects in place. It will come in handy when you’d like to display one object in different settings, put against multiple backgrounds.
This is the easiest way to make a selection but is only effective if the background you are selecting is one solid color. The tool will work best if you work with an image featuring a solid object placed on a blank background. The best example is a simple product shot.
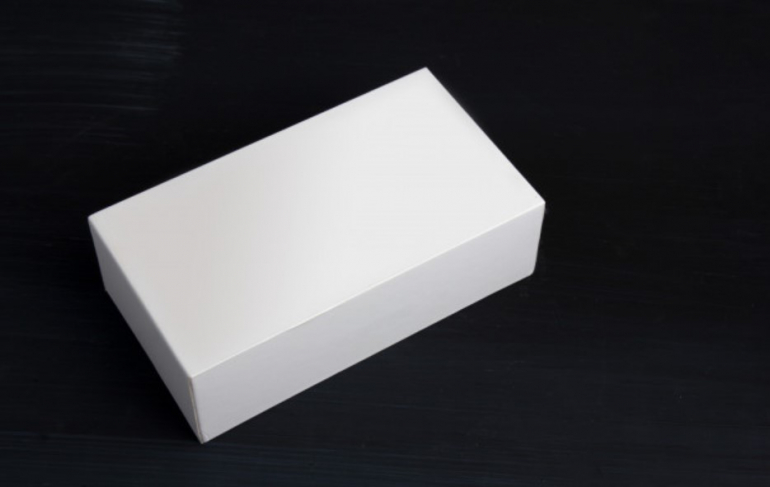
To select an element, first, make sure you work with a layered image. Right-click on the Background layer, and choose 'Layer from Background.' Now simply choose the Magic Wand tool, and click on the background.
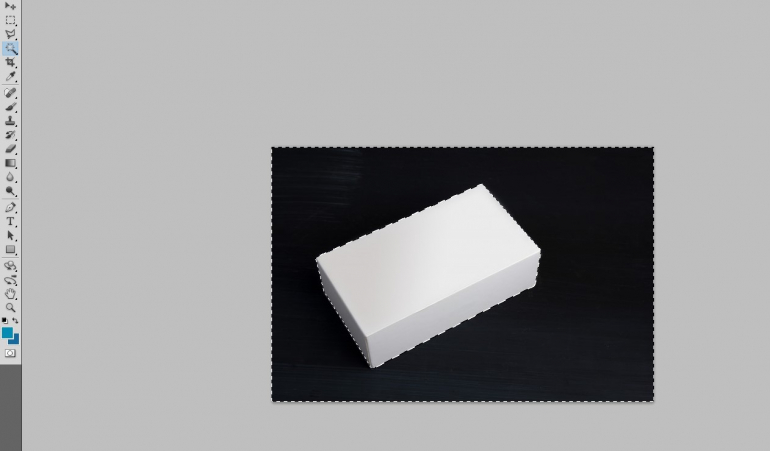
With the background layer selected, you can now delete it, and place your new background beneath the object's layer.

Quick selection tool 2: The Pen Tool
The first thing that you should know about the Pen Tool in Photoshop is that it’s not a pen. It’s a selection tool that selects objects while converting the path(s) that you have drawn on an image into sections. In PhotoShop, a path is a straight or curved line that goes from one point to another. Let’s see how it works.
This selection method works best if you have a smooth, curved object, with hard edges.
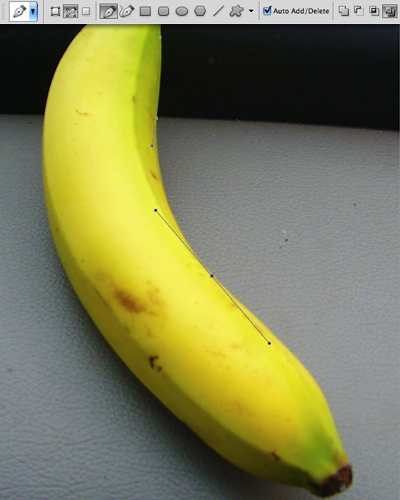
Select the Pen Tool then click, drag in the direction of the edge, and release. Carry on along the edge of your object until you meet up with the path again.
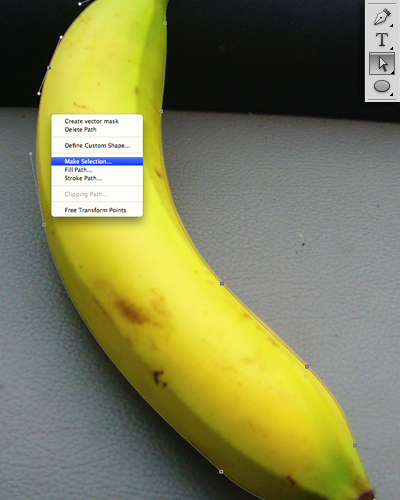
Now choose the Direct Selection Tool. You can use this tool to tidy up your path by clicking on the anchor points and moving them, or adjusting their angle. Once your path is finished, right-click on it and choose 'Make Selection'.

With your object now selected, you can invert the selection and delete the background.
Quick Selection Tool 3: Color Range
Selections don’t always deal with choosing objects or people. When it comes to changing the color of certain elements of an image, the color range tool comes into play.
If the object you are selecting has a contrasting color to its background, you can use the Color Range method to make complex selections like a water splash, easily.
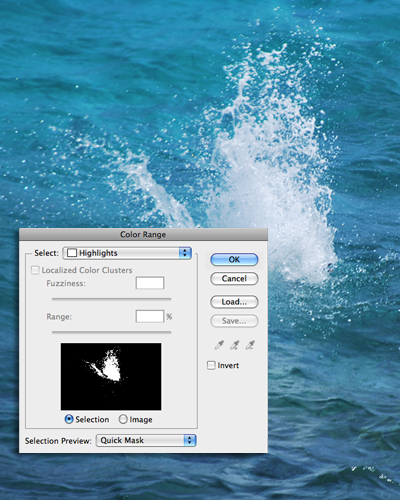
Go to Select > Color Range, then use the colour picker to click on the object. In the example, I clicked on the whitest part of the splash.
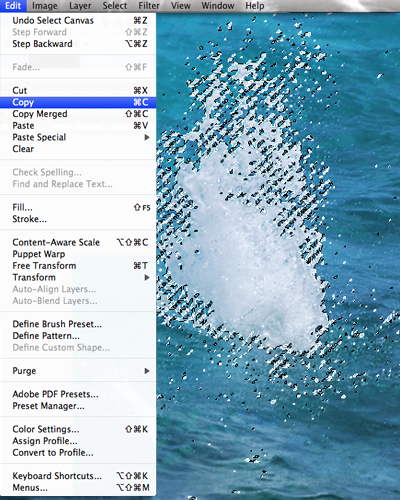
Clicking OK will make the selection, then all you need to do is copy the selection and paste it into another image.
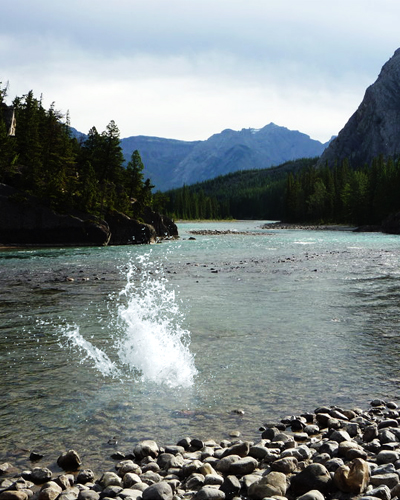
Method 4: Quick Select Tool and Refine Edge
The Quick Selection tool in photoshop is great for making simple selections fast, then you can tidy up the selection using the Refine Edge controls.
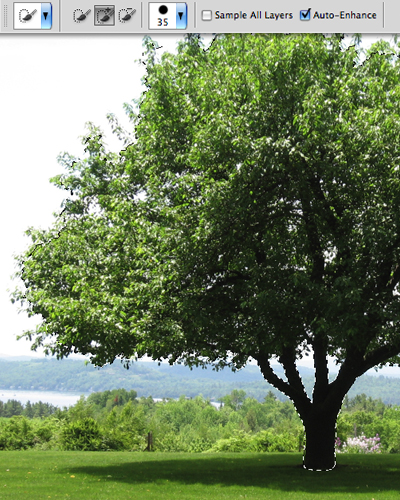
Drag the Quick Selection brush over the object you want to select - you can decrease the size of the brush to select smaller details. Hold down the alt key to alternate between adding or subtracting from the selection. When you've made the best selection you can, go to Select > Refine Edge.
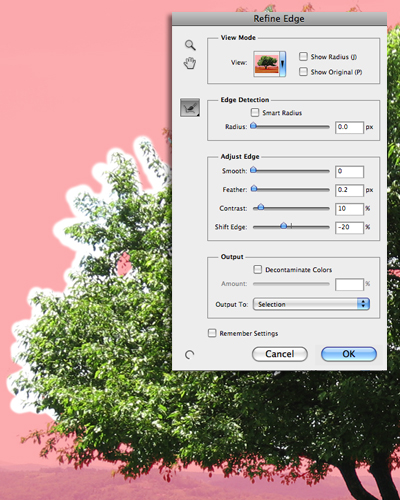
Now you can use the Refine Edge tool to draw along the edges of the selection. Use a large size for leaves, and a smaller brush to trace along harder edges like the tree trunk. You can also tweak the Adjust Edge sliders to smooth, feather, or harden the edge.

When you're happy with the adjustments, click OK. You can now copy your selection, and paste it onto a new background.
Quick Selection Tool 5: Color Channels
If you want to make a selection of something complex like hair, using channels can be an easy way of doing it.
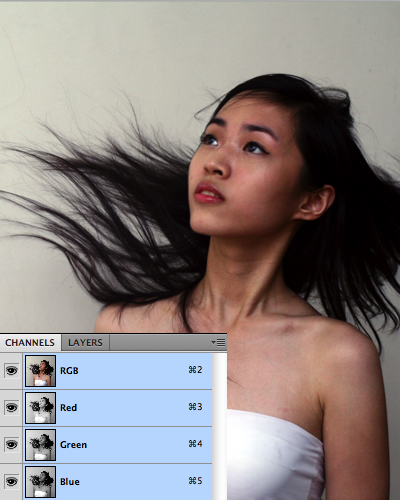
First click on the Channels palette.
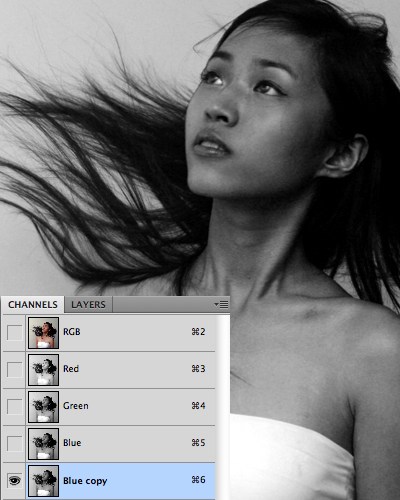
Click on each of the layers to see which has the greatest contrast between the background and the hair. Then duplicate the layer with the best contrast.
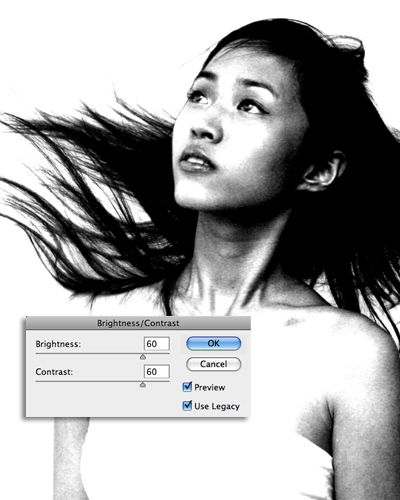
With the duplicated layer selected, go to Image > Adjustments > Brightness/Contrast, and bring up the brightness and contrast as high as you can without loosing any strands of hair. Ideally you want the background to be fully white, and the hair fully black.
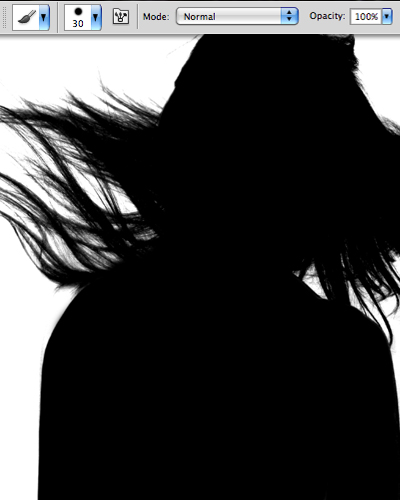
Now use a black brush to fill in the rest of the models body, and a white brush to whiten any darker areas of the background.
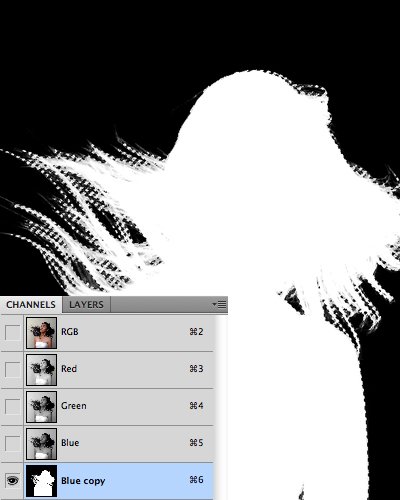
When you're done, go to Image > Adjustments > Invert to invert the image, then cmd/crtl click on the layer thumbnail to make the selection
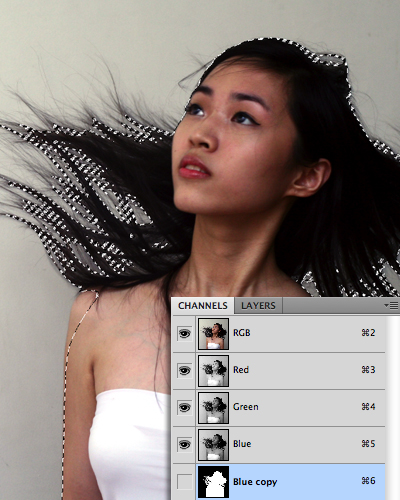
You can now hide the layer, and go back to your original RGB layer.

Now you can copy your selection and paste it onto a new background.
Bonus: Select Object Tool
The latest PS versions offer a wider choice of tools that let you highlight parts of images and modify them in a number of ways. The Select Object tool is one of such handy alternatives. With its help, you can select any object in your visuals. Once you draw a rough selection around a selected object, PS shrink-wraps selected edges of your subject.
Hope this photoshop tutorial for beginners will make it easier for you to learn PhotoShop basics.
And if you aim to become a pro in Photoshop here are a couple of cources we checked out and can recommend:
About the author
Copyright © . All Rights Reserved
