Fantasy Photoshop Tutorial to Create Awesome Effects
In this tutorial you'll learn how to use stock photos, adjustment layers, and blending tricks to compose a dark fantasy photo manipulation in Photoshop.
.jpg)
There's nothing too complicated here, but you are expected to have a good grasp of the basics in Photoshop in order to use this tutorial. For those who are just starting, I am afraid this is not part of the photoshop tutorials for beginners.
Step 1: The Background
So let's begin by opening a 1900 x 2500 document in Photoshop.
First we'll create the background for our image.
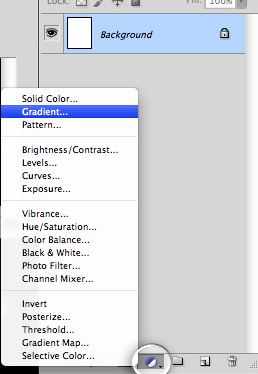
Click on the Adjustment Layer button at the bottom of your layers panel, and choose Gradient.
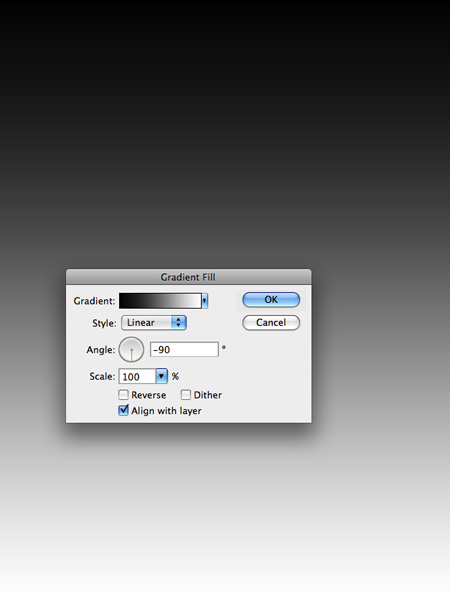
Here in the Gradient fill options you need to set the style to Linear at a -90 degree Angle, and set the Gradient from black to white.
Step 2: Photoshop The Moon
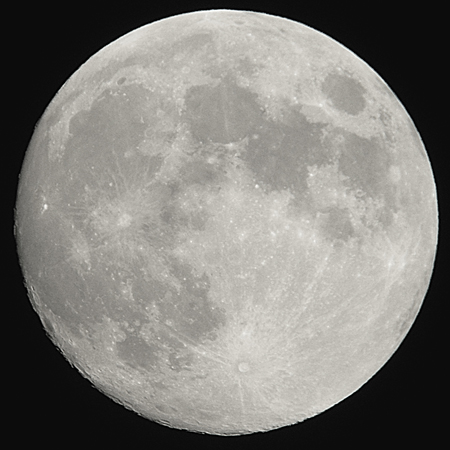
Next we'll place the moon on our background.
You can download the moon from here: http://swashbuckler.deviantart.com/art/Stock-Full-Moon-130369659
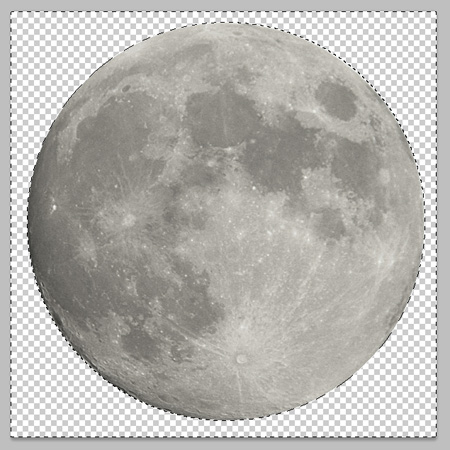
Once downloaded, open the photo in Photoshop.
Right click on the layer, and choose 'Layer from background', then use the Elliptical Marquee tool to make a circular selection around the moon.
Invert the selection, and then delete it.
Now save the photo as a .psd file called 'moon' then close it.
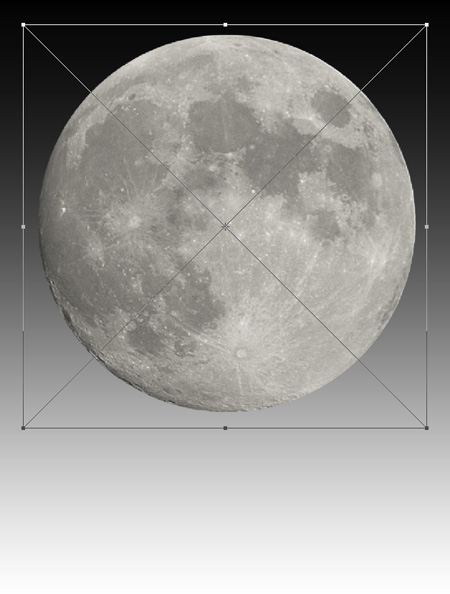
You can now drag the 'moon' file directly into your project file, creating a Smart Object.
Resize and position it with the Transform tool.
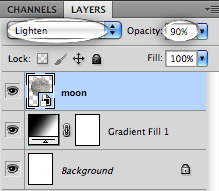
Set the 'moon' layer's blending mode to Lighten, and it's Opacity to 90%.
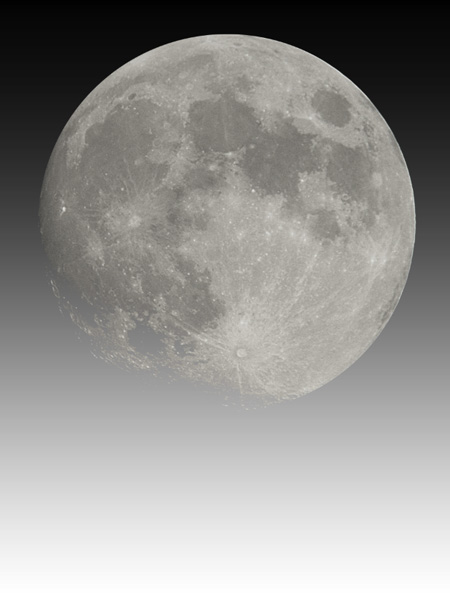
This will have lightened the dark areas of the moon, and helped it to blend into the background.
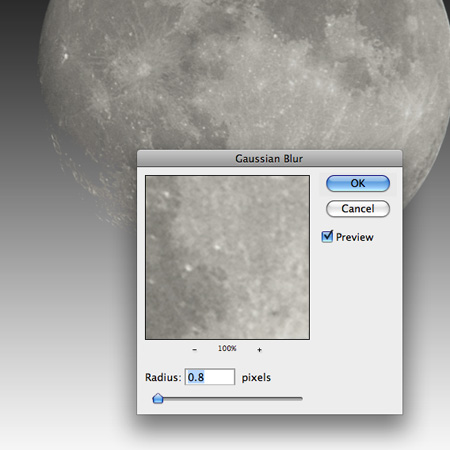
Next go to Filter>Blur>Gaussian blur and put the Radius at 0.8 pixels.
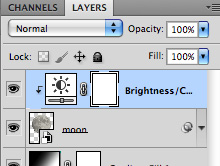
Finally add a Brightness/Contrast adjustment layer, then right click on it and choose 'Create clipping mask'. This ensures the adjustments will only affect the 'moon' layer.
Put the Brightness at +10 and the Contrast at +35.
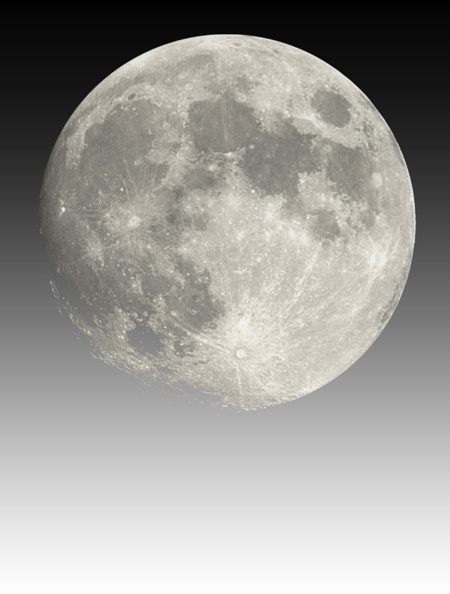
With the moon finished, we can now move onto the trees.
Step 3: Photoshop The Trees
You can download the trees here: http://two-ladies-stocks.deviantart.com/art/fir-trees-84841194
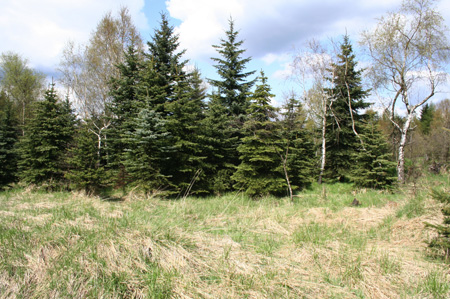
Once opened in Photoshop, go to the Channels panel and click on the Blue layer, where the contrast between the trees and the sky is strongest.
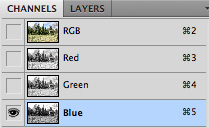
Now take down the Brightness, and increase the Contrast so that the sky is completely white and the trees are black.
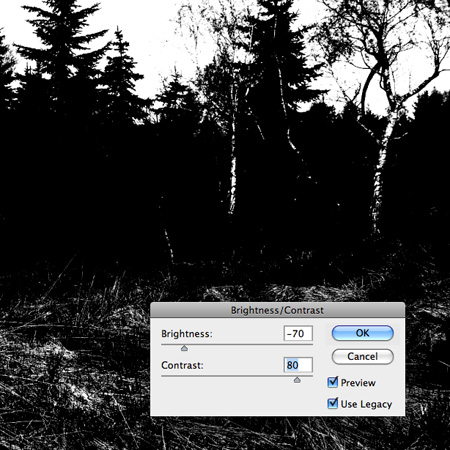
Take a black paint brush and fill in any white parts in the lower part of the photo, so that the tree area is completely black.
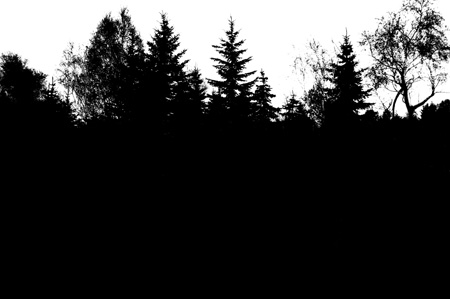
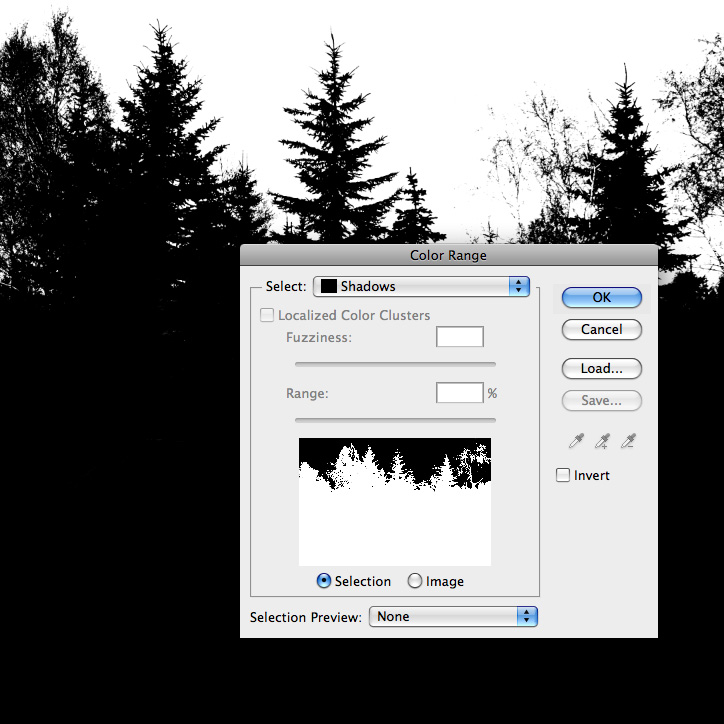
Next go to Select>Color Range, and choose to select the Shadows. This will create a selection over the trees, which you can now copy and paste into your project file.
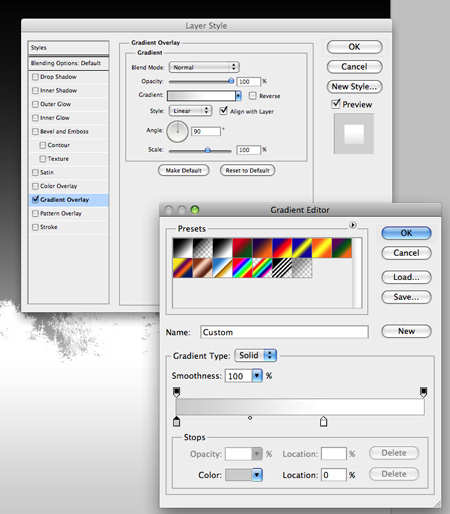
Resize and position the trees, then double click on the 'tree' layer to bring up its Layer Styles dialog box.
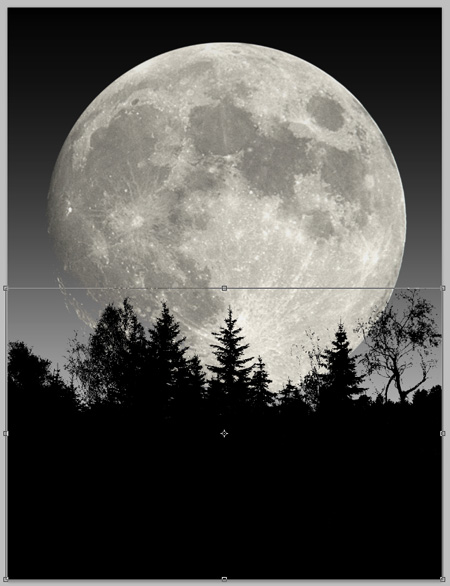
In the Layer Styles dialog box, click on the Gradient Overlay option, and create a light grey to white gradient as shown above.
Step 4: Ph0toshop The Woman
Next we'll add the woman. You can download the stock photo here: http://lisajen-stock.deviantart.com/art/Dark-feelings-16-79668178

You can use the Quick Selection Tool to make a selection around her, then go to Select>Refine Edge to tidy up the selection. For more info on making selections, have a look at this tutorial: http://blog.designnocturne.com/2011/04/08/photoshop-tip-making-selections/
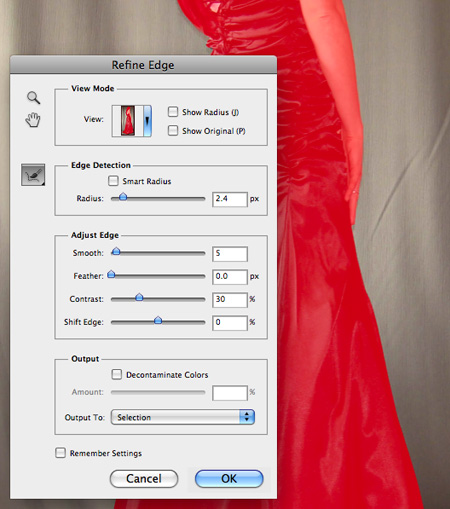
Once you've made a selection around the woman, delete the background and save it as a .psd file called 'woman'.
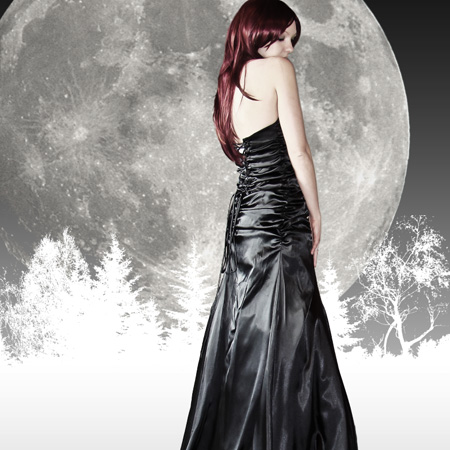
As we did with the moon earlier, drop it into your project file as a Smart Object.
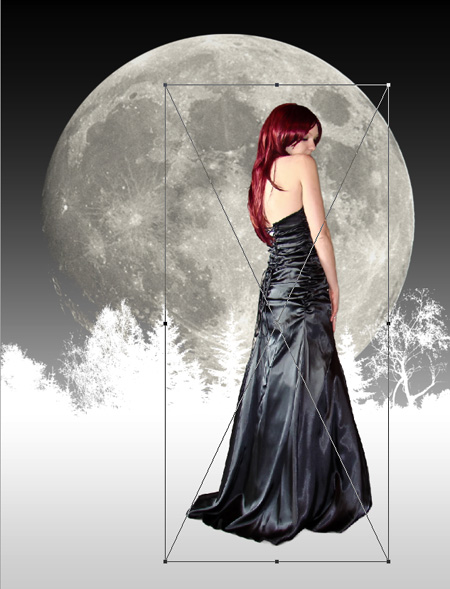
To decrease the saturation of the entire image, we're now going to add a Hue/Saturation adjustment layer above all the other layers, taking the Saturation down to -70.

Now, back to the 'woman' layer, we'll add a Curves adjustment layer with a clipping mask, and arrange 3 points on the chart as shown above, to give the contrast a subtle boost.
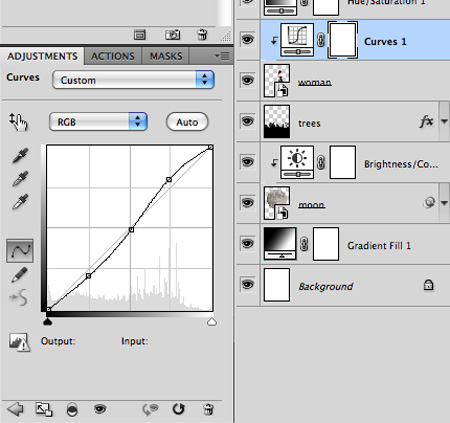
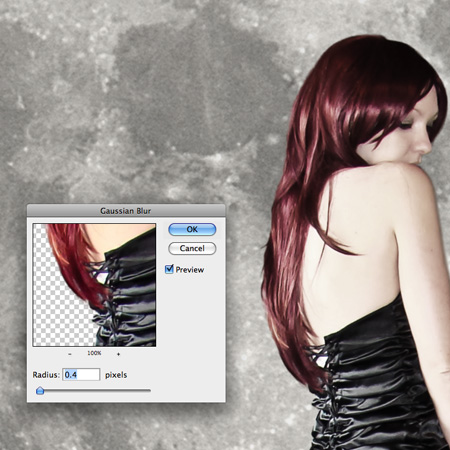
And finally, give the 'woman' layer a Gaussian blur set to 0.4 pixels.
Now we'll give the woman an outstretched arm by using another stock photo that you can download here:
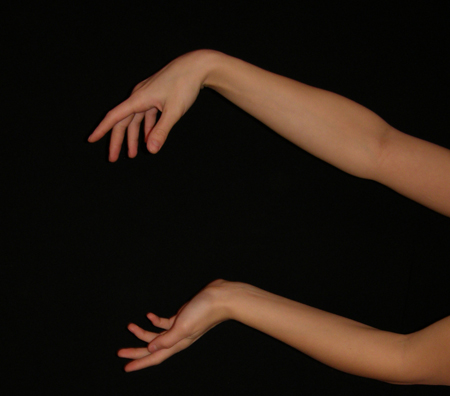
http://blog.designnocturne.com/wp-content/uploads/2011/04/arms_and_hands_7_by_bobbistock.jpg
Cut out the top arm, then go to Image>Trim and set it to Transparent Pixels. This will trim away all the transparent pixels leaving just the arm.
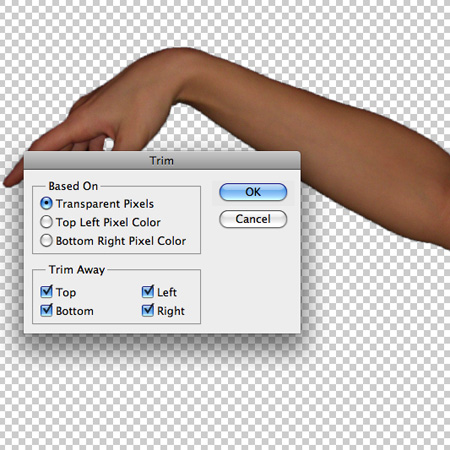
Save it as 'arm', and drop the file into your project below the 'woman' layer, and rotate and resize it so it matches the size of her other arm.
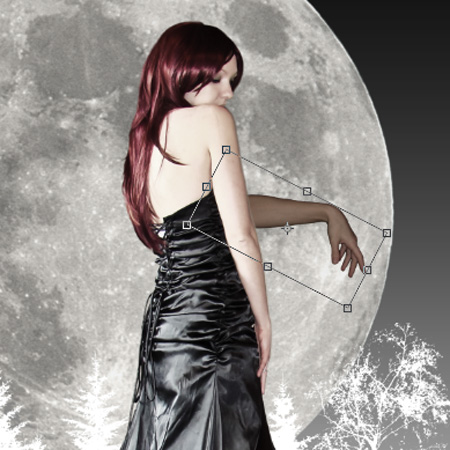
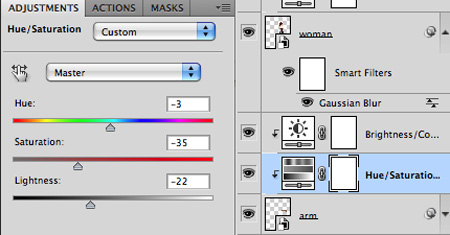
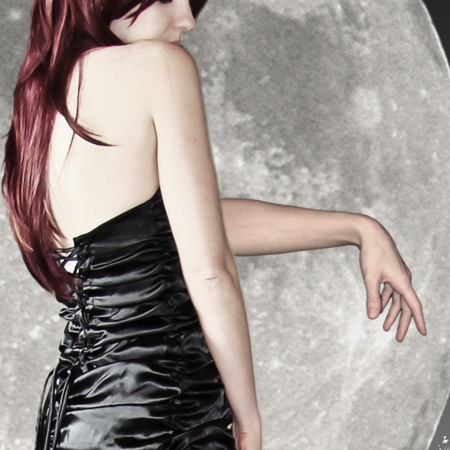
Add Hue/Saturation and Brightness/Contrast adjustment layers, both with clipping masks above the arm layer. Tweak all the sliders in both until you get the arm looking the same colour and contrast as the other arm.
Step 5: Photoshop The Owl
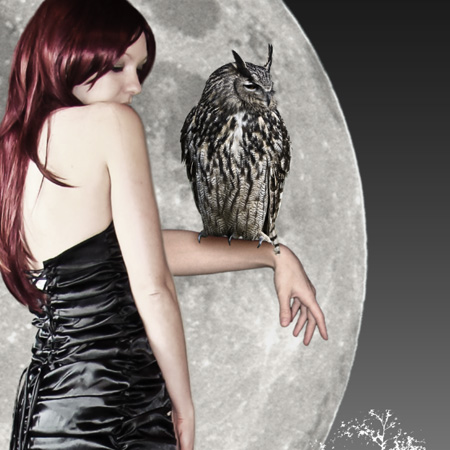
Next we'll add the owl, which you can download here: http://tigg-stock.deviantart.com/art/Bird-of-Prey-21-114235987
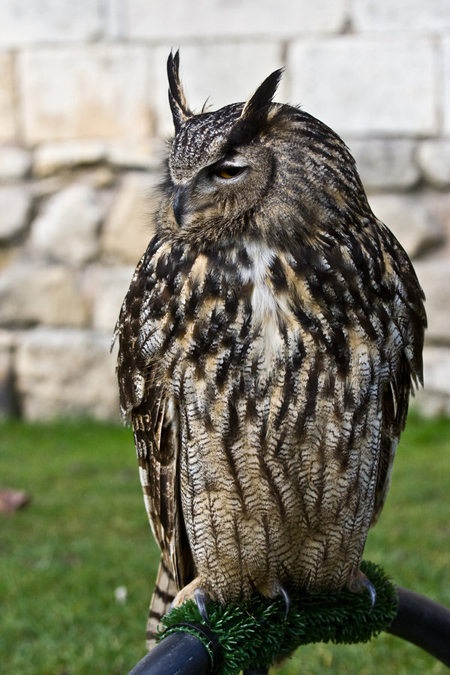
As you did with the arm, cut it out save it, drop it in your file, then flip it horizontally and resize and position it above the arm.
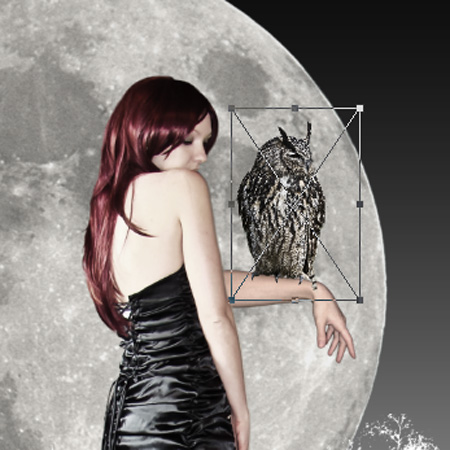
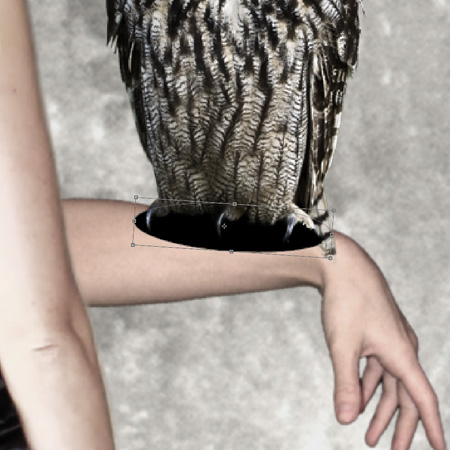
Use the Ellipse Tool to draw a black oval beneath where the owl sits.
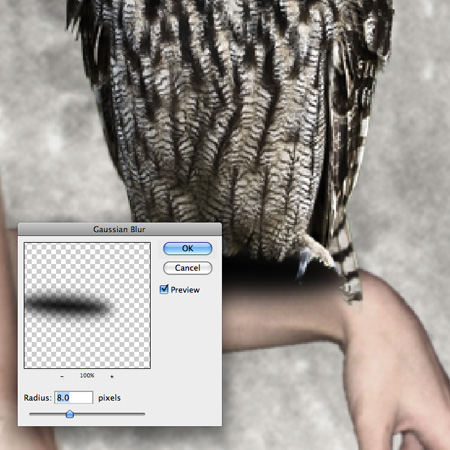
Gaussian Blur it at 8.0 pixels.
Duplicate the layer and give them both clipping masks.
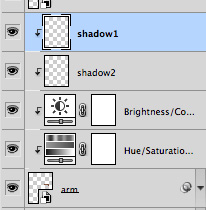
Set the bottom one to Overlay at 80% Opacity, and the top one to Hard Light at 30% Opacity.
Step 6: Photoshop The Fox
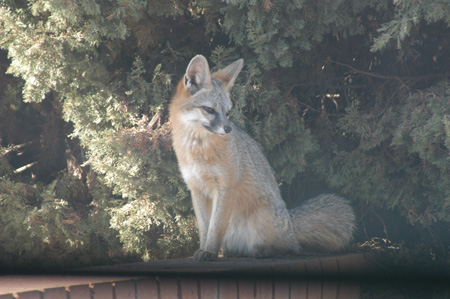
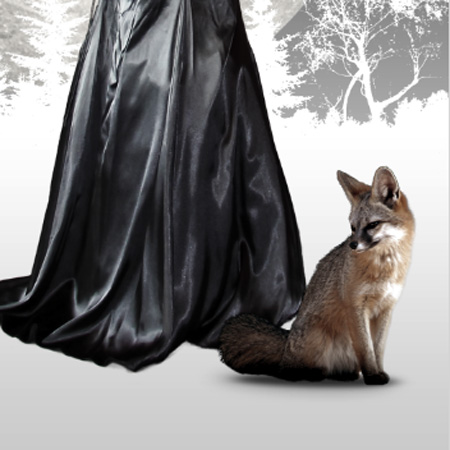
You can download the fox stock photo here: http://rbsrdesigns.deviantart.com/art/Fox-Stock-3-151768404
Cut the fox out, Trim the image, save it, drop it into you project above the woman, flip it horizontally, and resize it.
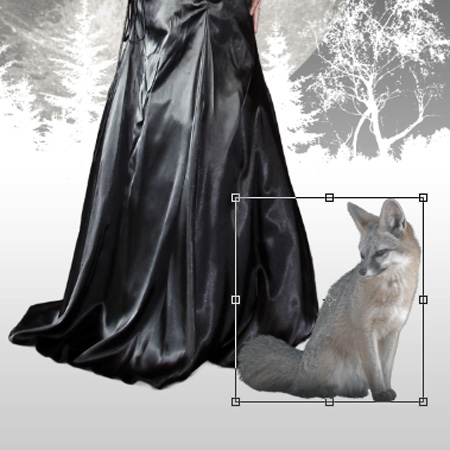
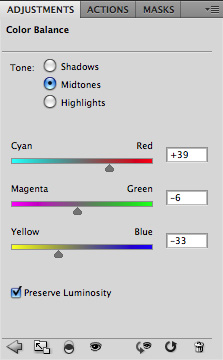
Add a Curves adjustment layer and a Color Balance Adjustment layer, both with clipping masks.
Use the Curves layer to strengthen the contrast, and the Color Balance layer to adjust the colour.
Create shadows beneath the fox as you did for the owl.
Step 7: Photoshop The Antlers
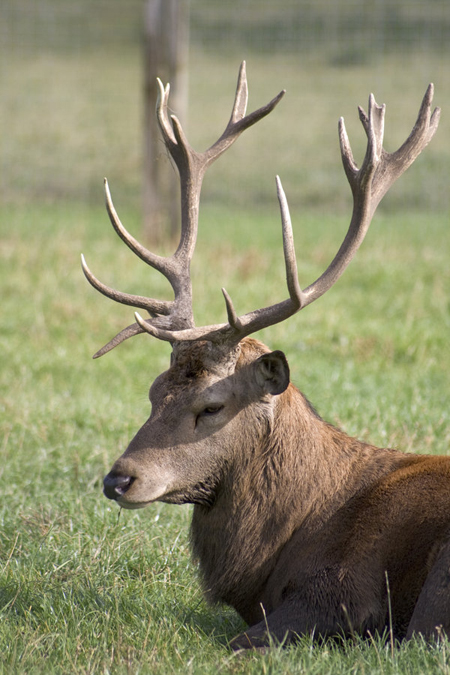
You can cut out the antlers from a stock photo that can be downloaded here: http://sassy-stock.deviantart.com/art/Stag-Antlers-Stock-128076033
Use the same cut-trim-save-drop process as before, flip them horizontally and position them on top of the woman's head.
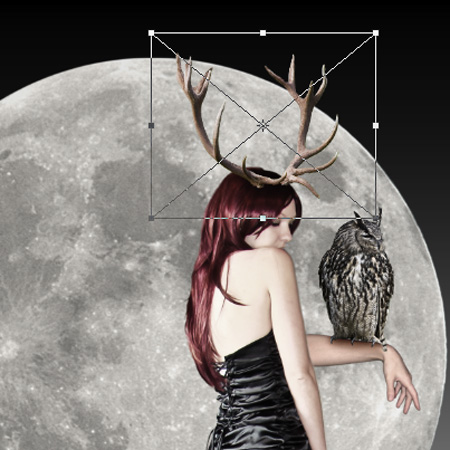
Give it a layer mask by click on the Layer Mask button at the bottom of the layers panel.

In the layer mask you can use a black brush to paint out the small area of the right antler that overlaps the top of the head.
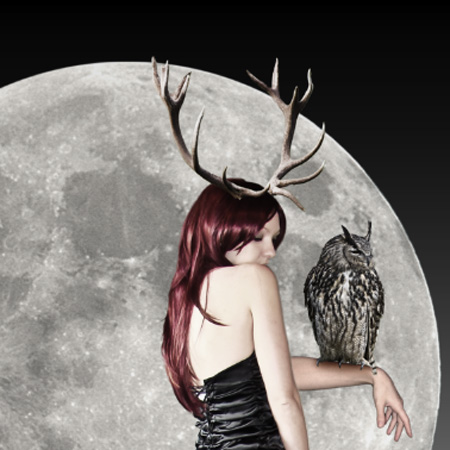
Use a curves layer with a clipping mask to adjust the contrast of the antlers.
Step 8: Photoshop The Paint Splashes
Next we'll add the black paint splashes. You can download a set of brushes here: http://arcandio.deviantart.com/art/ARCINK-Brushes-38712246
Once you've downloaded the set, click on the Brush Tool, then click on the arrow in the dropdown box and choose Load Brushes to load the set you've just downloaded.
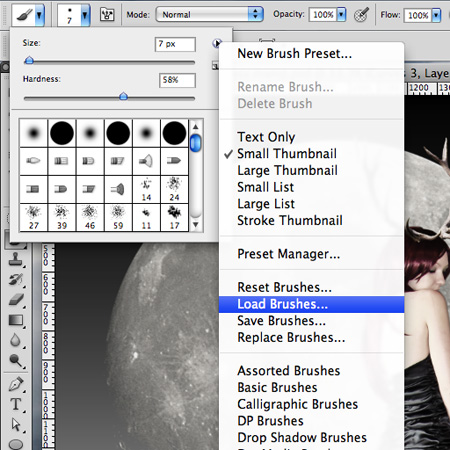
In a new layer above the 'tree' layer, use a black colour to paint on one paint splash.
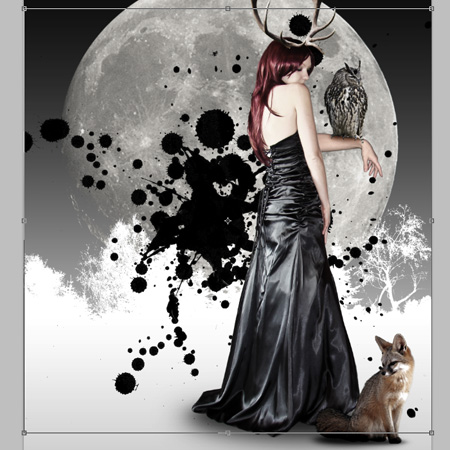
Use the transform tool to scale down the paint splash vertically. Add a couple more splashes, each in a new layer.
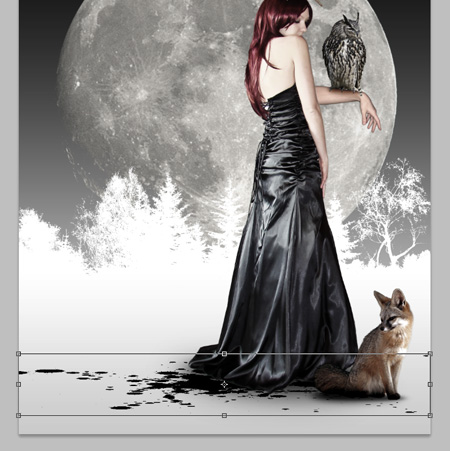
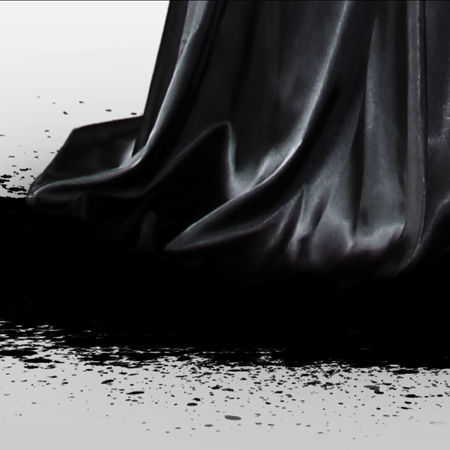
When you're done, go back to the 'woman' layer and give it a layer mask, then mask out the bottom edge of the dress with a small soft black brush so it fades into the paint beneath it.
Step 9: Photoshop The Mushrooms
Download the mushroom stock from here: http://ladyfoxill.deviantart.com/art/Mushrooms-186579392 and here: http://dracoart-stock.deviantart.com/art/Mushrooms-25-40885206
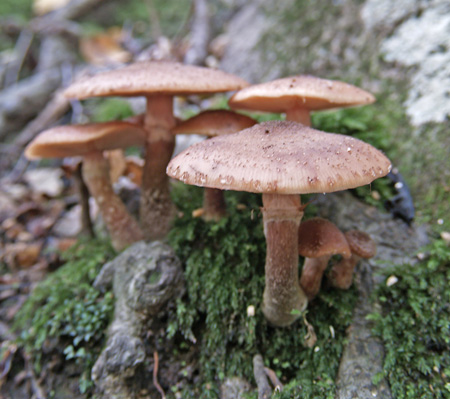
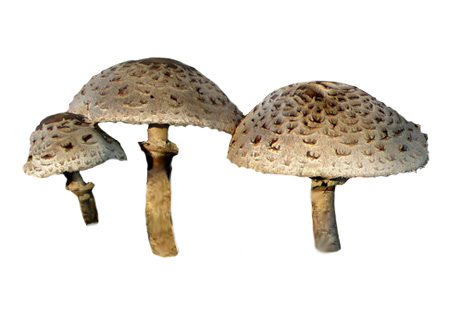
Place them into your file as you've been doing previously.
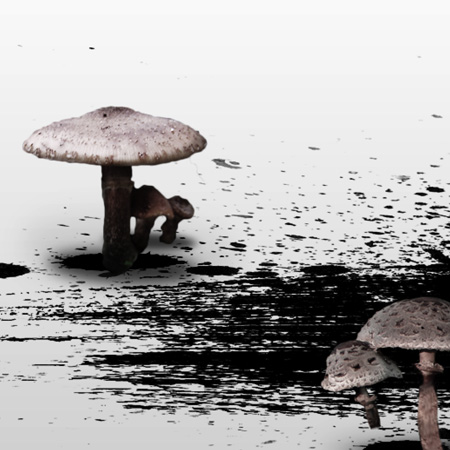
As well as adding shadows below the mushrooms, also add a new layer above them with a clipping mask, and use a black brush set to Darken at 20% Opacity, then use it to paint on some shading at the base of the mushrooms.
Step 10: The Final Touches
We've now finished adding all the elements to our manipulation. You can organise all the layers into groups so the layers panel looks tidier.
Add a Black and White adjustment layer above all the other layers, and set it to Overlay at 30% Opacity.
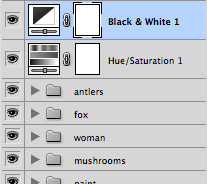
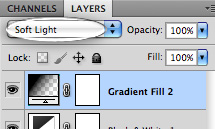
Lastly we'll add a dark vignette around the edges of the image.
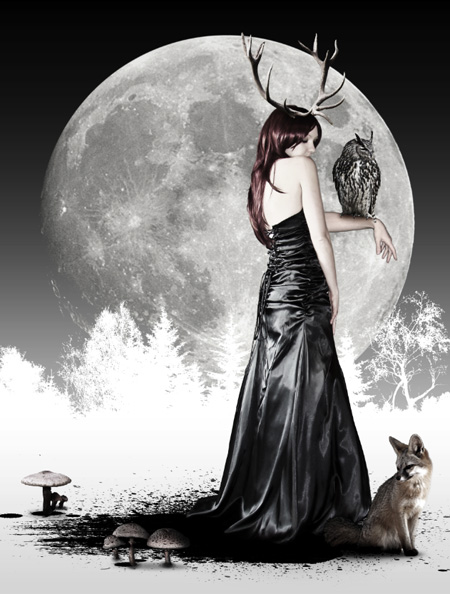
To do this, add a Gradient adjustment layer using a black to transparent Radial gradient with the Scale set to 150%. Change its blending mode to Soft light.
The Final Outcome
.jpg)
Hope you enjoy this fantasy photoshop tutorial.
About the author
Copyright © . All Rights Reserved
