Speed Text
Step 1: Creating the Workspace:
Start with a 300 x 300 px document. Fill the background color with Black (#000000)
Step 2: Create the text
Next grab the text tool and create a piece of text like this:

I'm using a Bold Italic Verdana Font at the size of 60 px as always :)
Step 3: Duplicate the text layer
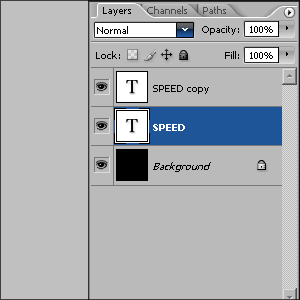
Duplicate the text layer you just created by selecting the layer in the layers panel and right clicking on it. Select Duplicate layer.
Your layers panel should now be like this:
Step 4: Add a wind effect
Now select the copied layer and then go to Filter > Stylize and then choose Wind, apply these settings:
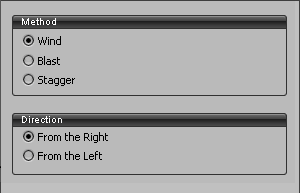
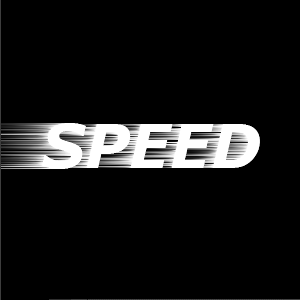
Apply these settings two more times. You should now have something like this:
Step 5: Add some colour onto the speed lines
Now we need to create color on a speed lines:
On the speed lines layer go to Image and then apply the image. Once done go to Image > Adjustments then choose Hue/Saturation. Tick the colorize button on this window and apply these settings:
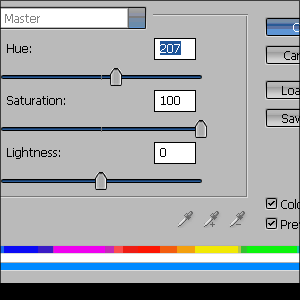
Once done you should end up with something like this:

Step 6: Add a blur effect
Making sure your still on the speed lines layer go to Filter > Blur and the Gaussian Blur and apply these settings:
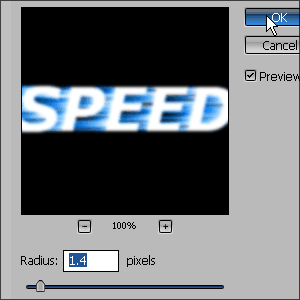
If you haven't already bring the normal text layer above the speed lines layer by selecting the text layer and dragging it above the speed lines layer. Your layers panel should look like this:
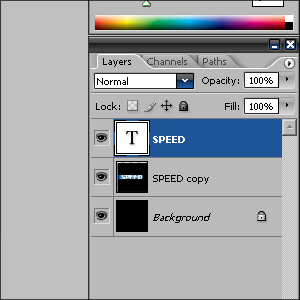
Step 7: Make it blend
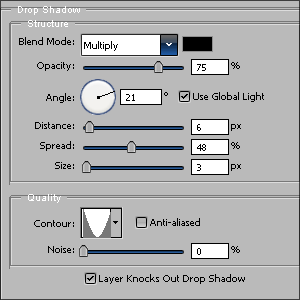
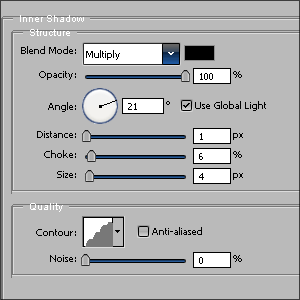
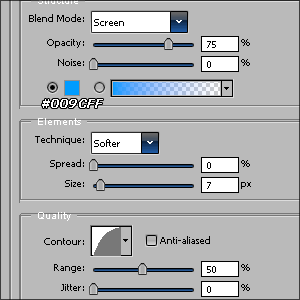
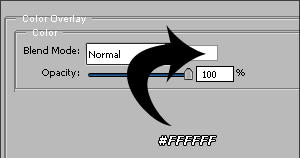
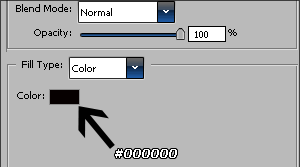
Now to make the text blend in with it's surroundings. Right click on the text layer and go to Blending Options. Apply these style:
Drop Shadow
Inner Shadow
Outer Glow
Color Overlay
Stroke
The Final Result

Copyright © . All Rights Reserved