


This tutorial with guide you through how to add rain to a photograph, if you wanted to do that for some reason:
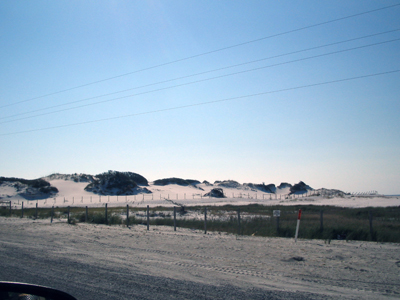
1. Open your original image in Photoshop
2. Create a new layer above the background image
3. Fill this with white (#FFFFFF)
4. Then go to Filter >> Noise >> Add Noise
5. Use these settings:
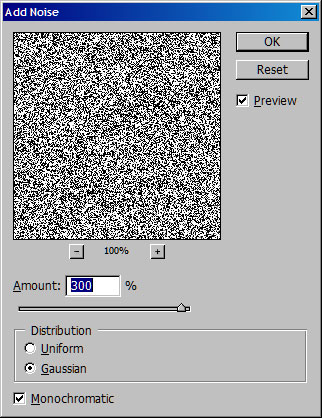
6. Then Press OK
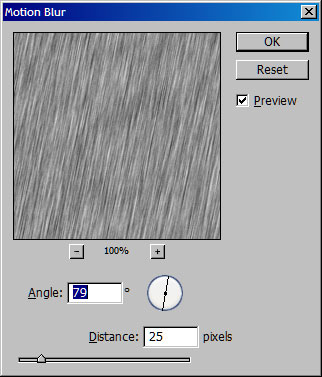
7. Now go to Filter >> Blur >> Motion Blur
8. Use these settings:
9. For the layer set the blending mode to Vivid Light and the opacity to 80%
10. Now we have the rain, but the sky is bright, we need to darken it.
11. Create a new layer above the rain layer
12. Select the Lasso Tool
13. Draw the area, where you want your clouds.
14. Set the colours back to default by pressing D
15. Now go to Filter >> Render >> Clouds
16. Then Filter >> Blur >> Gaussian Blur and set the distance to 10px
17. Set the blending mode to Overlay
18. Duplicate this layer so it covers the whole sky area, if you get any straight lines, do another gaussian blur.
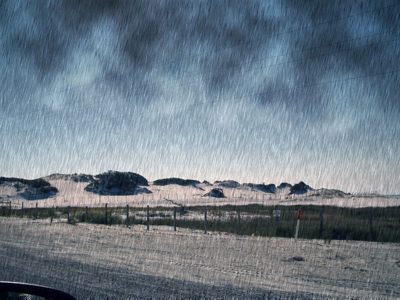
19. You should now have the rain and clouds, but the sky is still bright
20. Create a new layer just below the clouds layer, and use a black to transparent gradient
21. Then set the blending mode to Hue and the opacity to 80%