3d Valentine's Day Typography Exclusive Tutorial
In this tutorial I will walk through the steps I took in creating this illustration. This technique can be used in a variety of ways and also for different themes besides Valentine's Day.

Programs: Cinema 4D R10, Photoshop CS3
Techniques: creating 3D type, exporting into Photoshop, enhancing the image, layering, post effects.
Subscribe to our newsletter and get useful tutorials and huge bundles with design freebies once in two weeks:
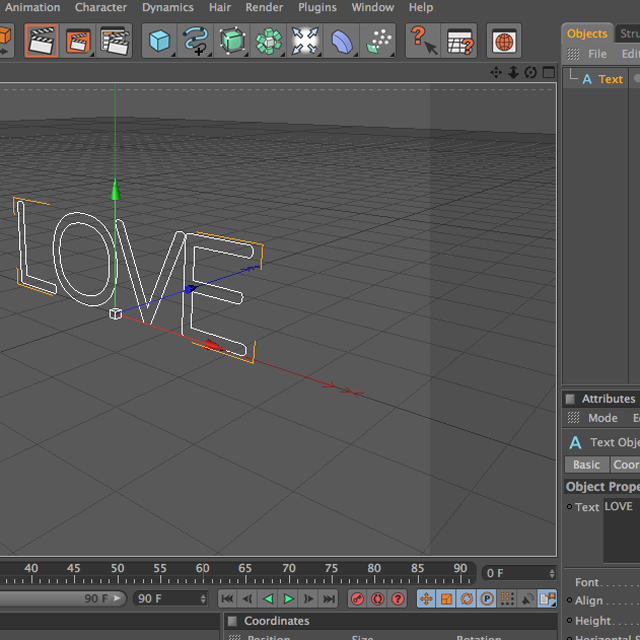
Create a type object and write your message in the Text Field of Attributes.
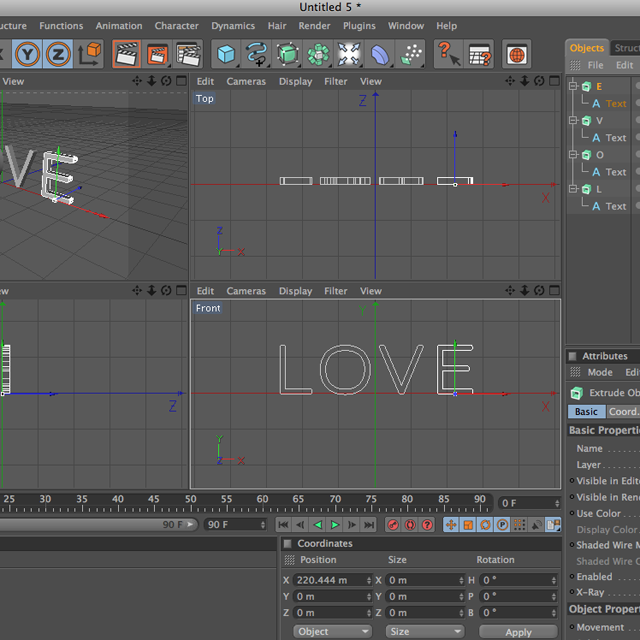
Use the technique above to create each letter of your message and place it within an Extrude Nurb.
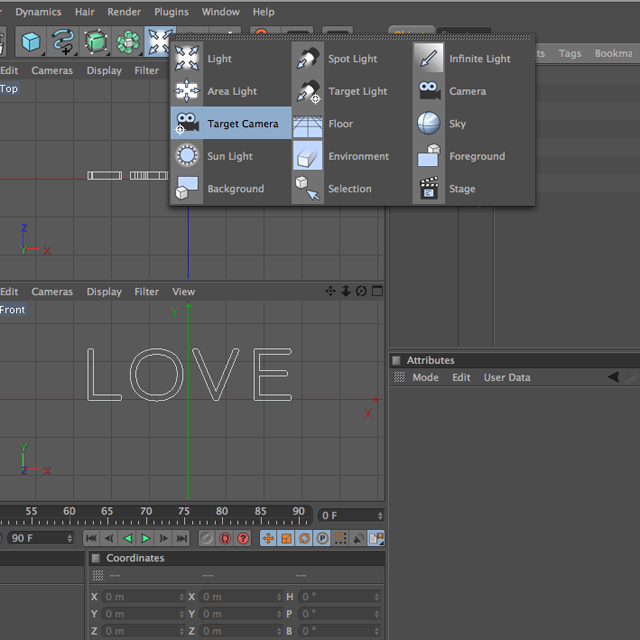
Creating a Target Camera always helps organize the scene and is helpful between viewing the scene in Editor and Camera.
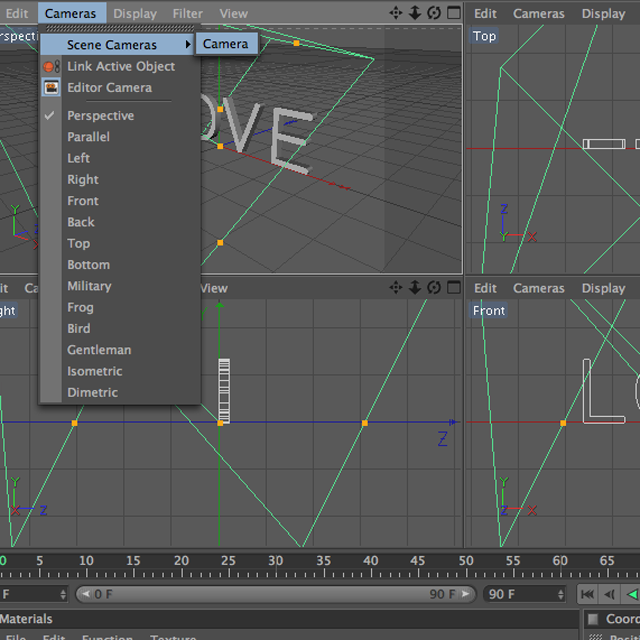
Selecting the Camera View is found in Cameras > Scene Cameras > Camera.
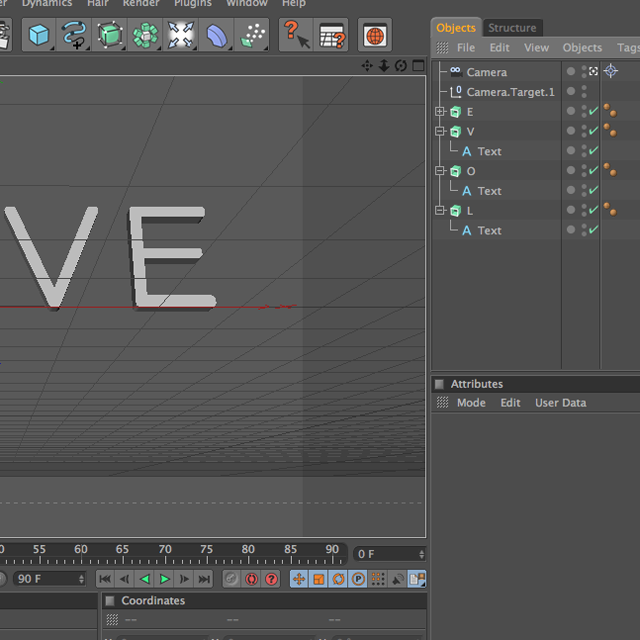
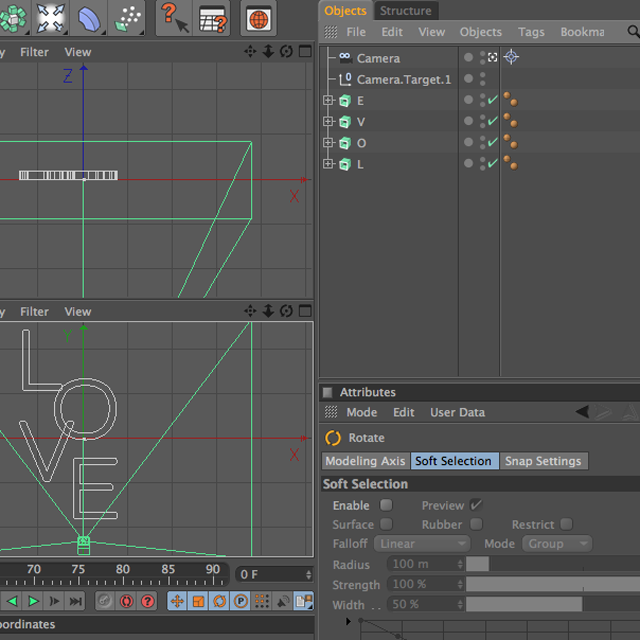
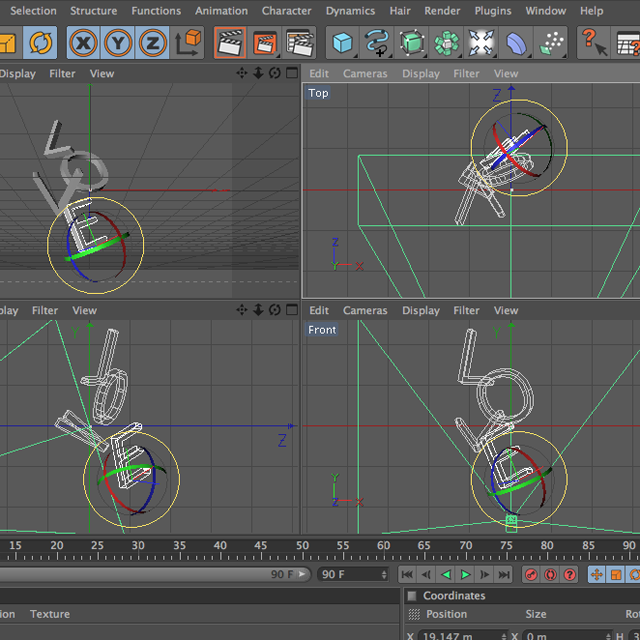
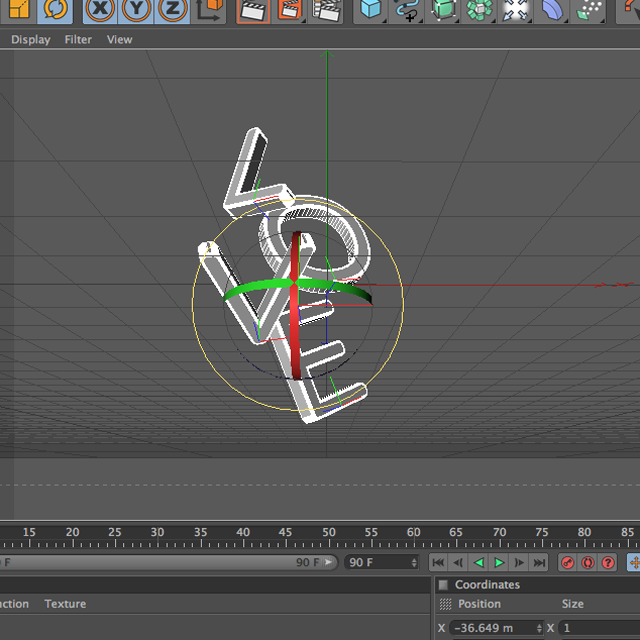
Set up the Camera as you see fit.
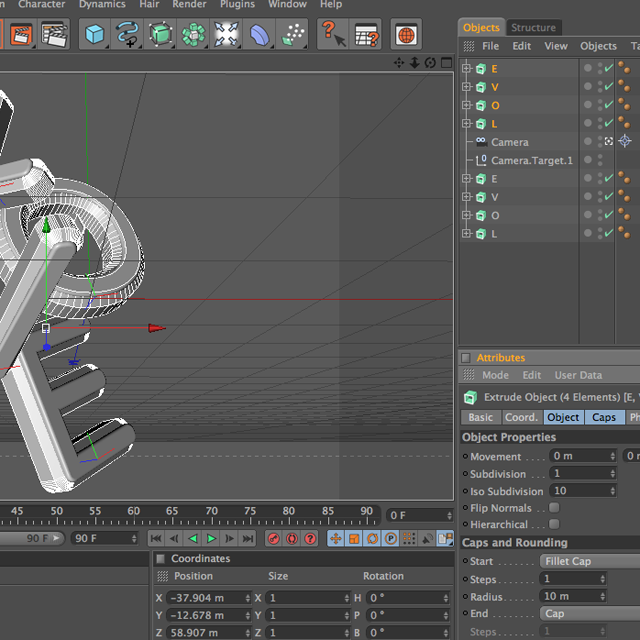
Select "L O V E" and duplicate it. In my example, I've moved each letter back a bit and applied a 1 Step, 10 Radius Fillet cap to create a more rounded effect and give the type a bold feel.
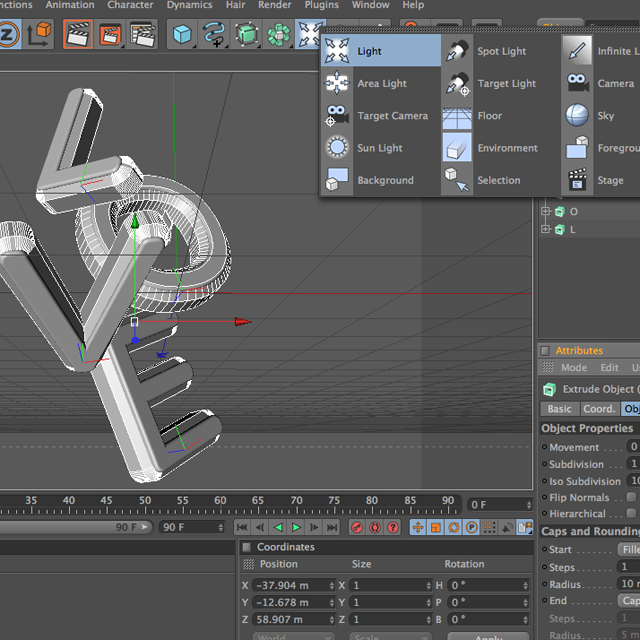
Next, I created a light object.
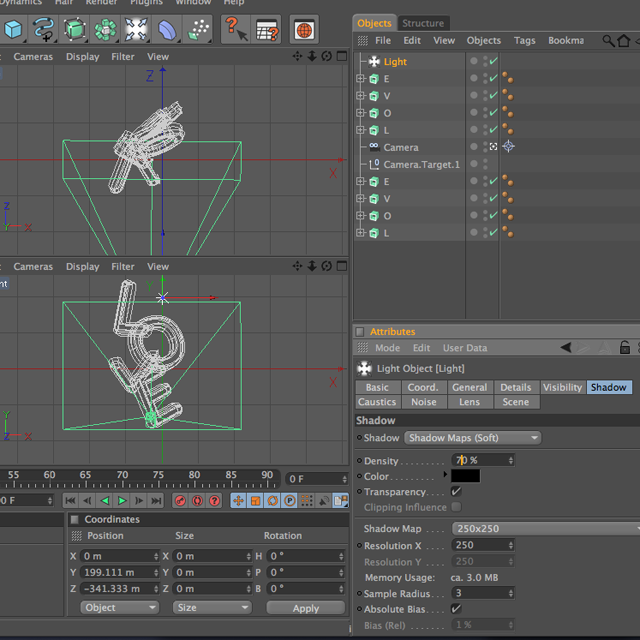
I set up the light farther from the type and about level with the upmost letter.
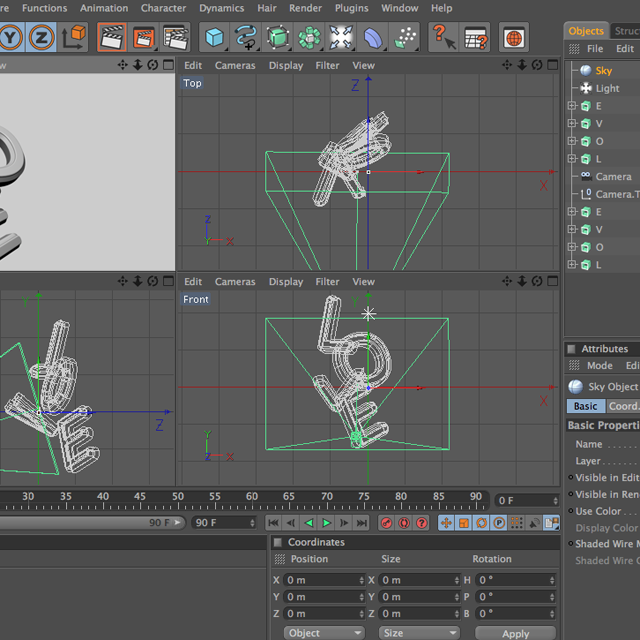
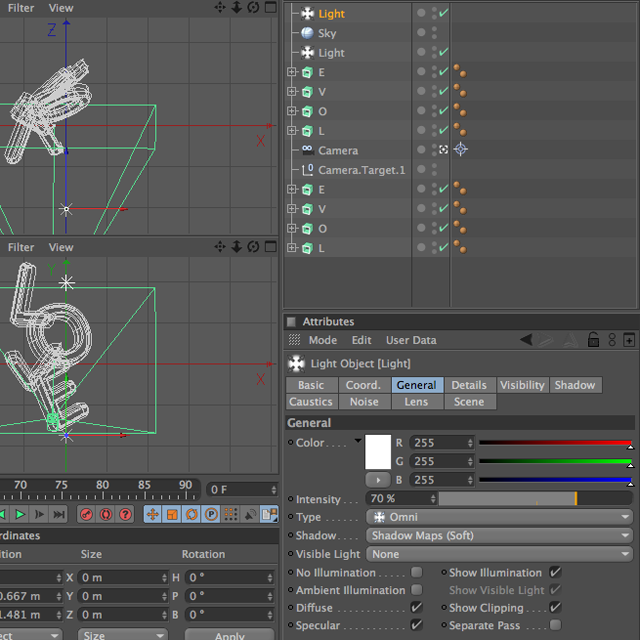
Creating a sky helps with illumination of the type.
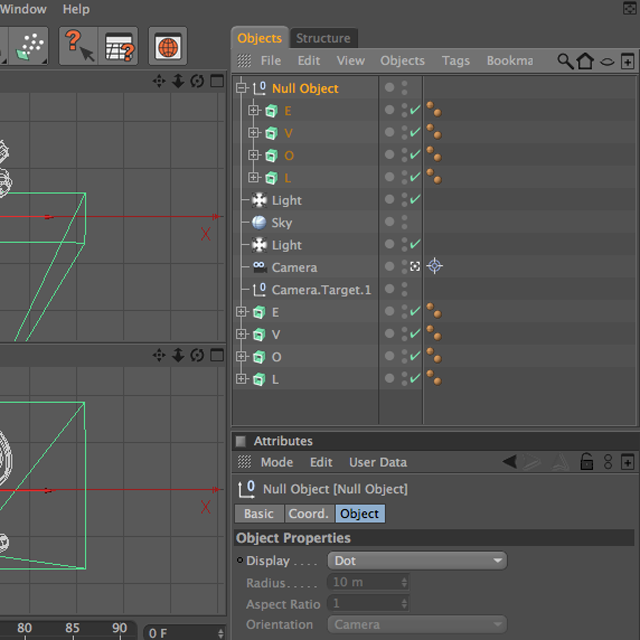
I've created a Null Object and paced all the duplicated type inside.
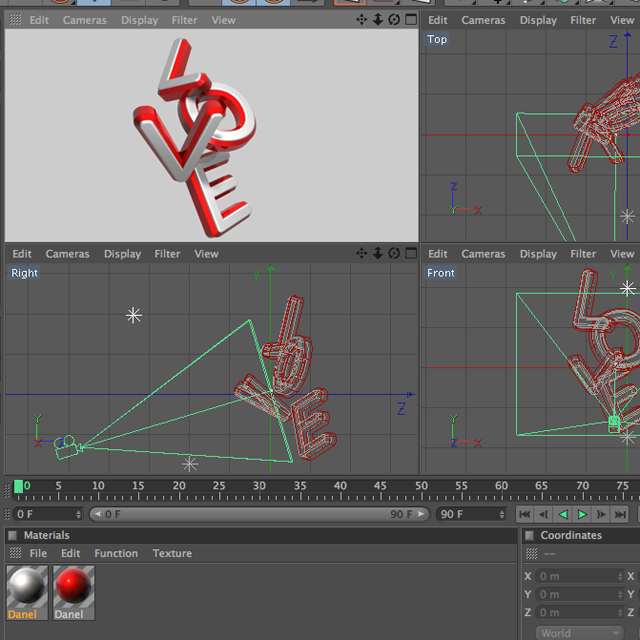
The Null Object easily lets you place a material on itself rather than each individual letter.
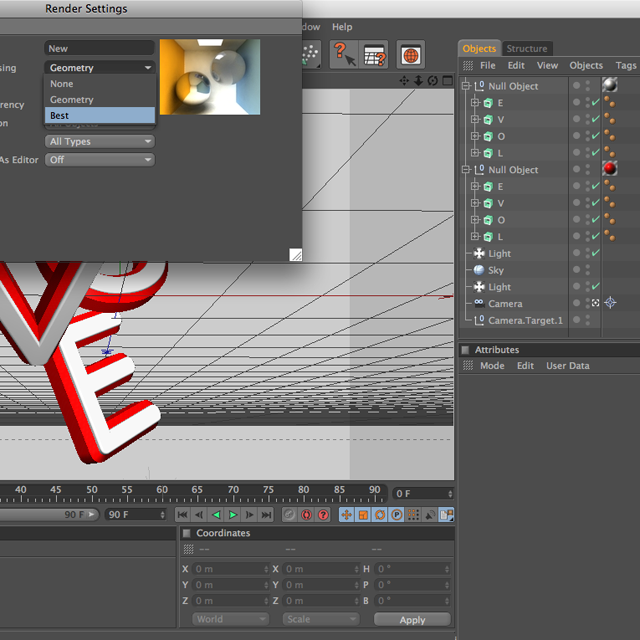
Render Settings: Antaliasing: Best
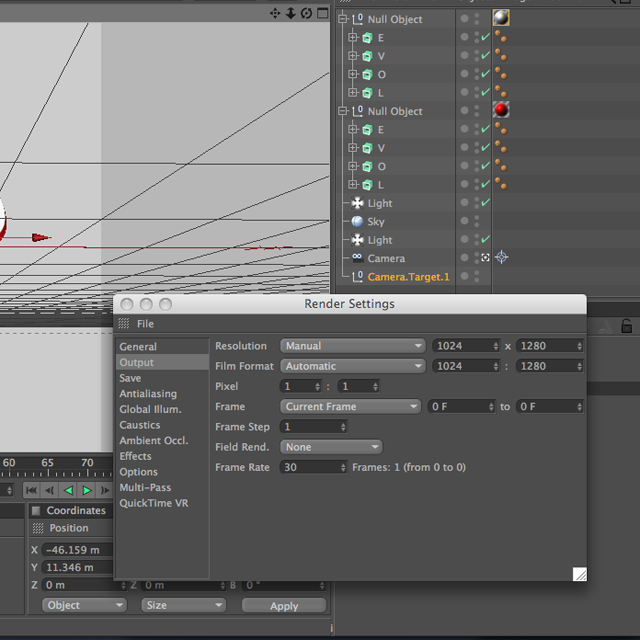
Render Settings: Output: 1024x1280

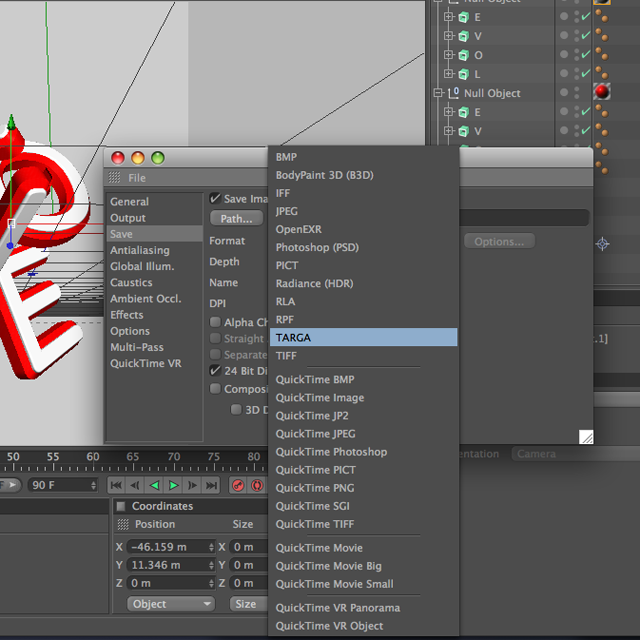
Render Settings: Save As TARGA, Alpha Channel
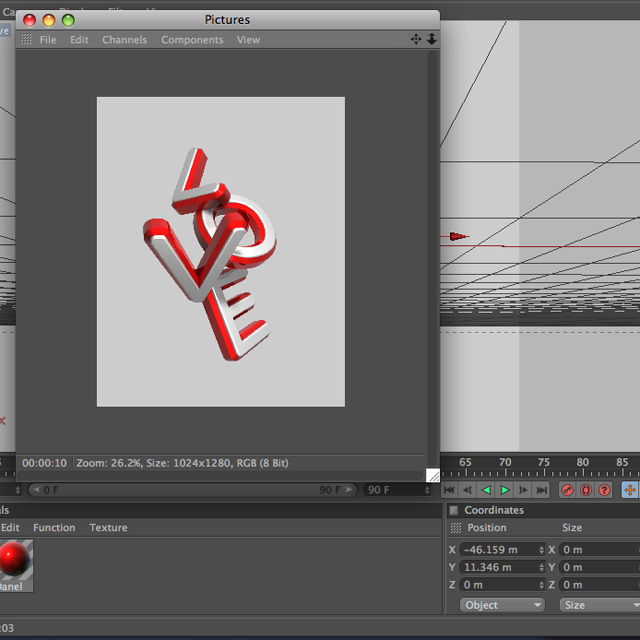
Raw Rendered Image
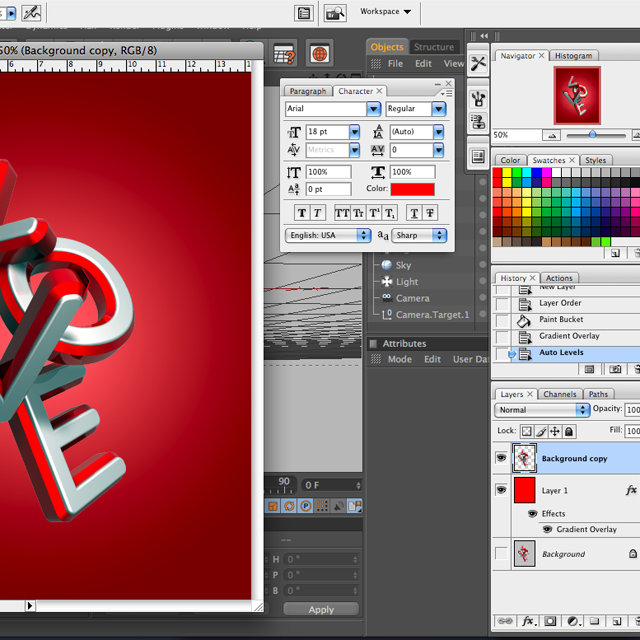
In Photoshop, I've erased the space around the image by selecting the type in the Channels and erasing it inversely to the white space. Next I created a red fill layer with a radial white to black Gradient.
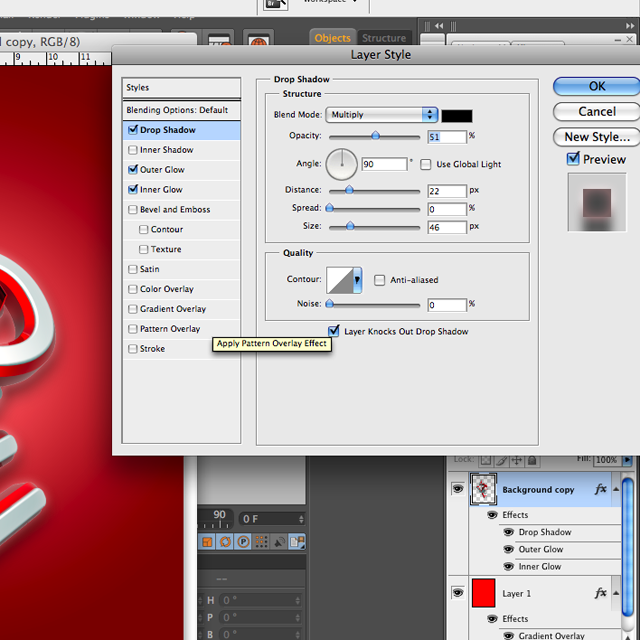
Layer Style: Drop Shadow
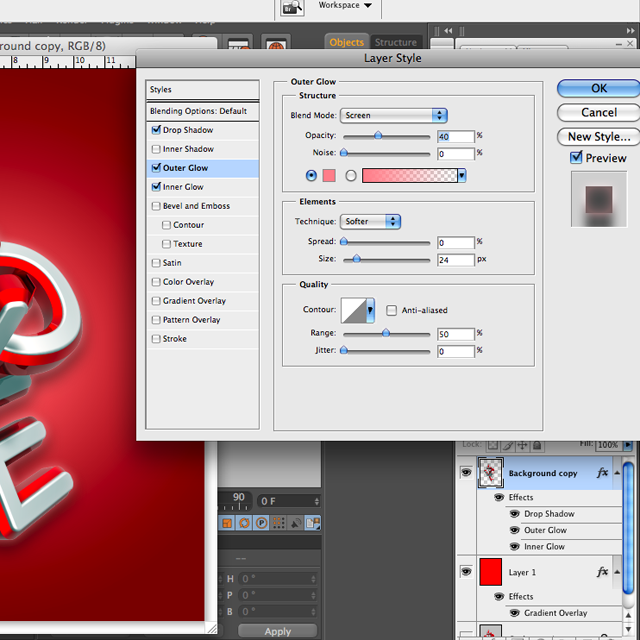
Layer Style: Outer Glow
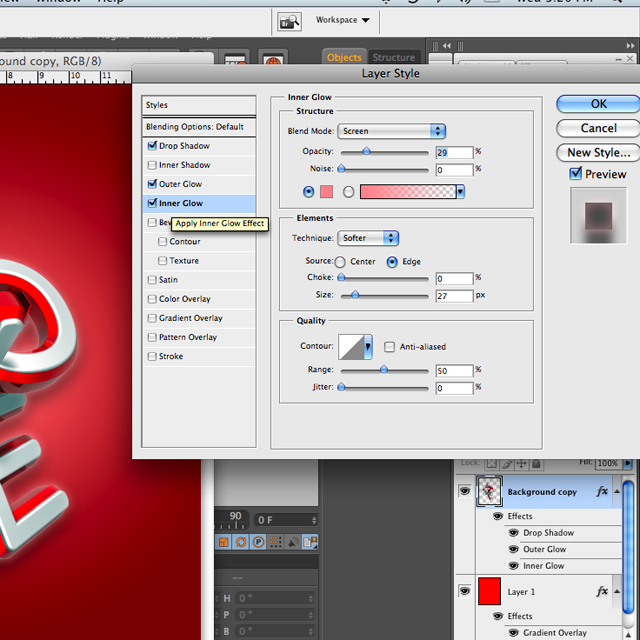
Layer Style: Inner Glow
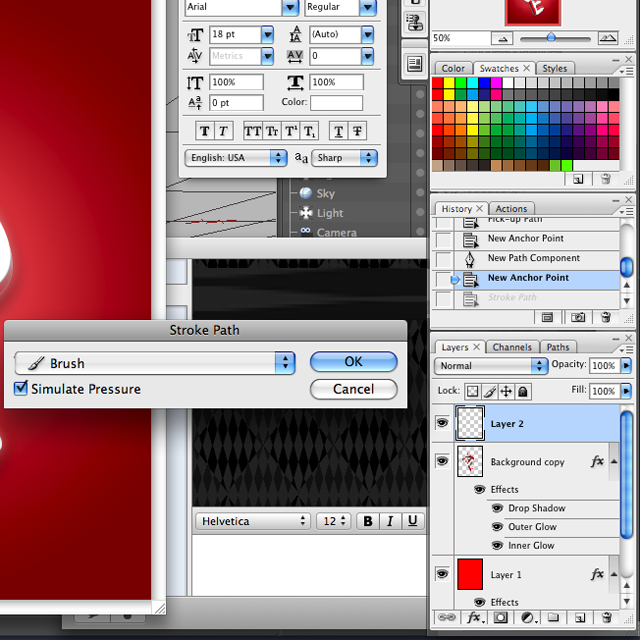
On a new Layer (Layer 2 in the example) using the pen tool, I've drawn out lines that resemble the lettering. I stroked it with a 20px featherd brush which creates the unique glow effect.
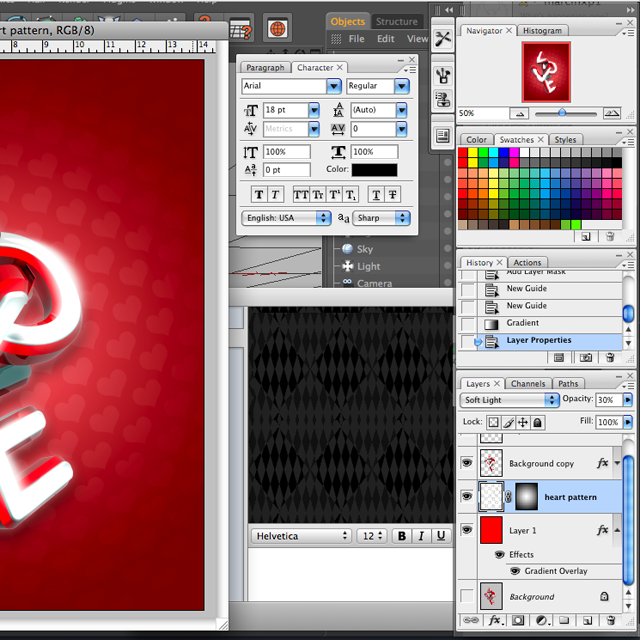
I've added a pattern of hearts to a new layer under the main type (Background Copy). I then added a layer mask to the pattern an also created a radial gradient. This lets the pattern fade off as it nears the edges of the image.
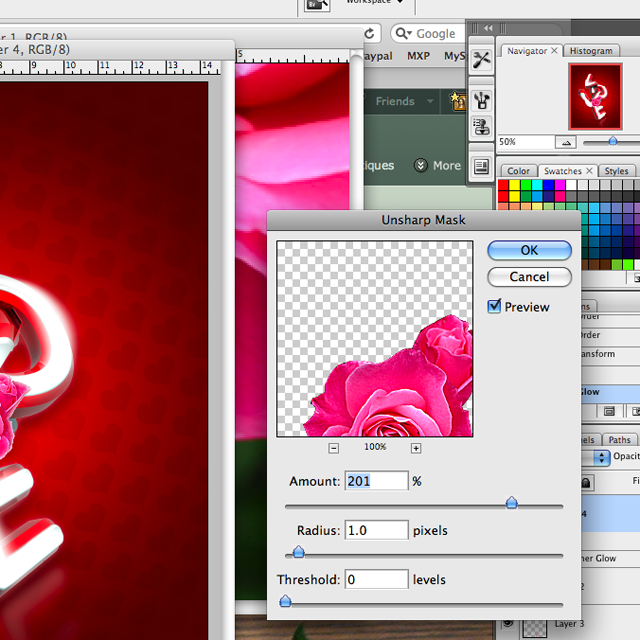
There are tons of elements you can use to create the effects in this tutorial. Since we are focusing on Valentine's Day, I've cropped out an image of a rose and applied it onto a new layer above everything else. I then duplicated it and applied it to different parts of the image.
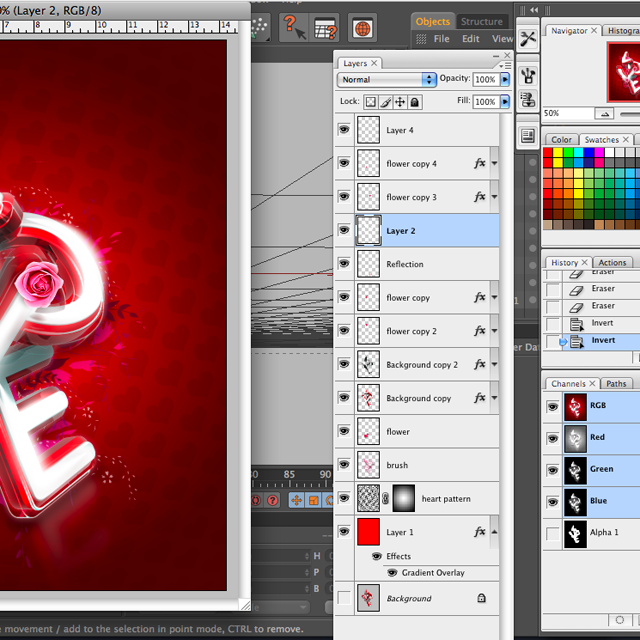
Here I created a new layer and applied some floral brushing of different colors.
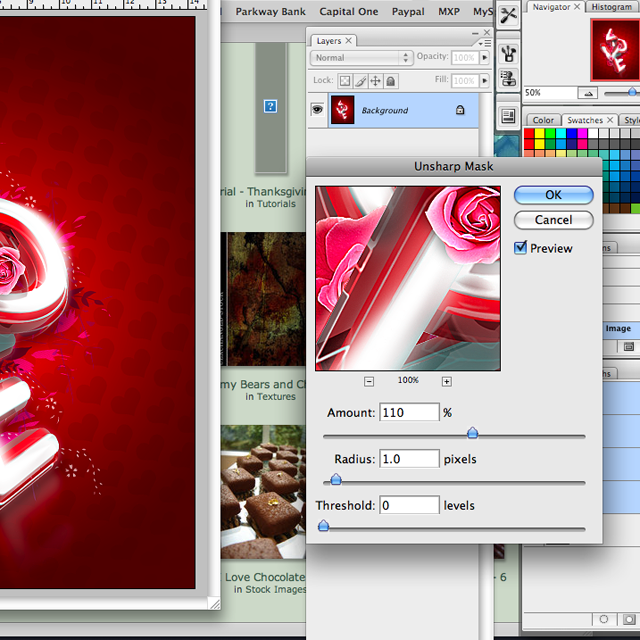
After finishing with the desired effects, I flattened the image and applied an overall Unsharp Mask.
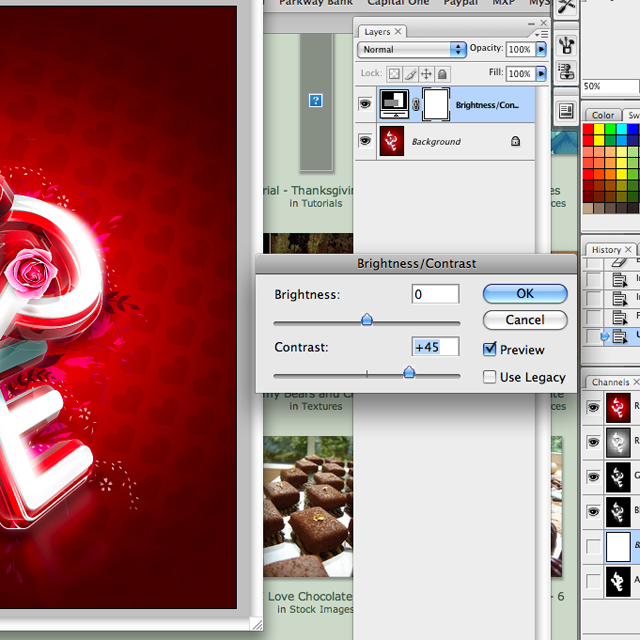
I applied a final Brightness/Contrast adjustment.

After some final editing an adjusting I've come up with this quick 3D Type Image.
Conclusion:
The objective of this tutorial is to experiment with how different layers work with 3D Type and how it can be enhanced once in Phothshop. Experiment with different fonts, colors and objects to come up with unique effects.
More related posts:
About the author
Copyright © . All Rights Reserved
